- DIY
- A
Fog Gaming Server or Problems Out of Nowhere for 0.30/hr
The writing of this article was prompted by two reasons. Firstly, due to initially established reasons, a trivial task turned into an interesting and exciting adventure. Secondly, the point in this story has not yet been made, and among the comments, there are useful tips.
The beginning of this adventure dates back to 2020. During the times of sanitary restrictions, my family and I spent time at my parents' country house, improving the living conditions there. Clean air, free time, interest in electronic devices, and a desire for new experiences led me into the world of home automation and mining.
In November of last year, I was thinking about earning money on the usually idle 7900X + 4070TiS and remembered about renting PCs for gaming. I was familiar with the foggy gaming service from MTS and had even unsuccessfully tried to list my previous PC. This time, I followed the instructions clearly, and I was met with complete success. I installed Cyberpunk, The Witcher, and Dota, set the minimum rate, and made my first withdrawals. The demand for my PC is not high, with ~2 to ~10 expectedly having no connections at all. Sometimes a game lasts for several hours, and sometimes it ends in the first five minutes without payment, with earnings approximately one-tenth of what was advertised. I tested it myself. The image delay is noticeable, especially in front of the monitor of the rented PC, but after some time, adaptation occurs, and it feels like it should be that way. There are saves in the MTS cloud and a personal Steam profile, and when playing from the personal page, the platform's commission decreases. Overall, the platform seems interesting and promising to me.
To increase earnings, it is suggested to install engaging and popular games, which is quite logical, but I thought of increasing the number of computers with the popular game - Dota2. I already had three Palit 2060S graphics cards and a power supply (a legacy of mining), I could borrow an SSD from other PCs, and the rest required consideration: I was looking at used builds, PCs, and studying reviews on Huawans and machinists. I have experience in passing through GPUs in Hyper-V on Supermicro X10DRI with Xeons and IPMI, so it was decided to replicate something similar.
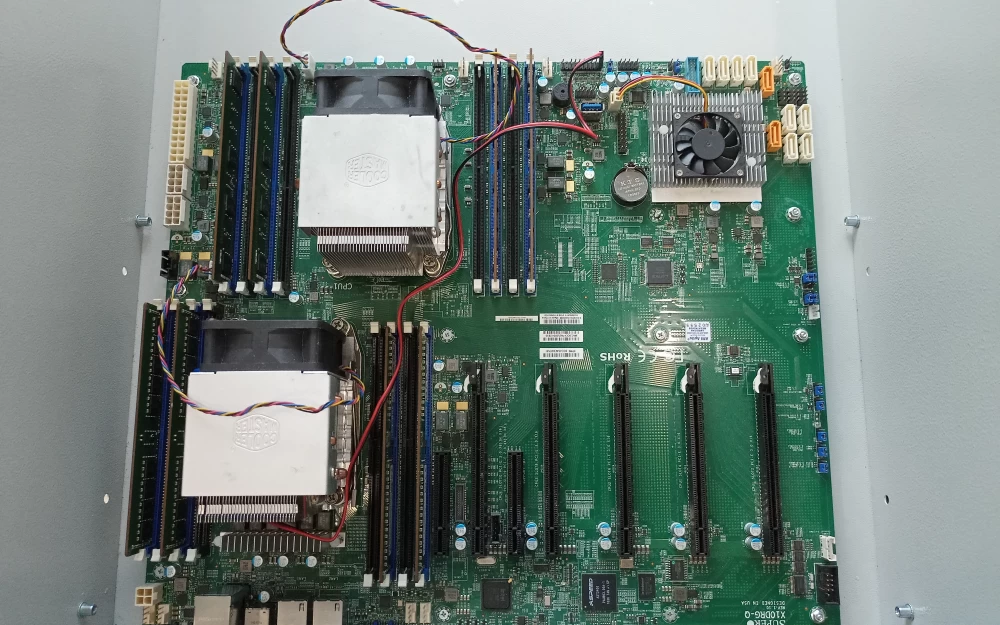
I purchased an X10DRG-Q board, 2xCPU E5-2667 with coolers, and 64GB of memory on Avito.
The seller was slow to ship, and in the meantime, I was looking for a case, knowing that a regular one wouldn't fit. I found options on Ali with 12 PCI-E slots at the back, but both the prices and delivery times did not please me, and compatibility remained in question. After fitting the cards to the motherboard, I realized that my doubts were not unfounded. Installing the card in the first x16 slot is not possible due to the installed memory, which I initially overlooked, so the 1-3-5 scheme was out of the question.
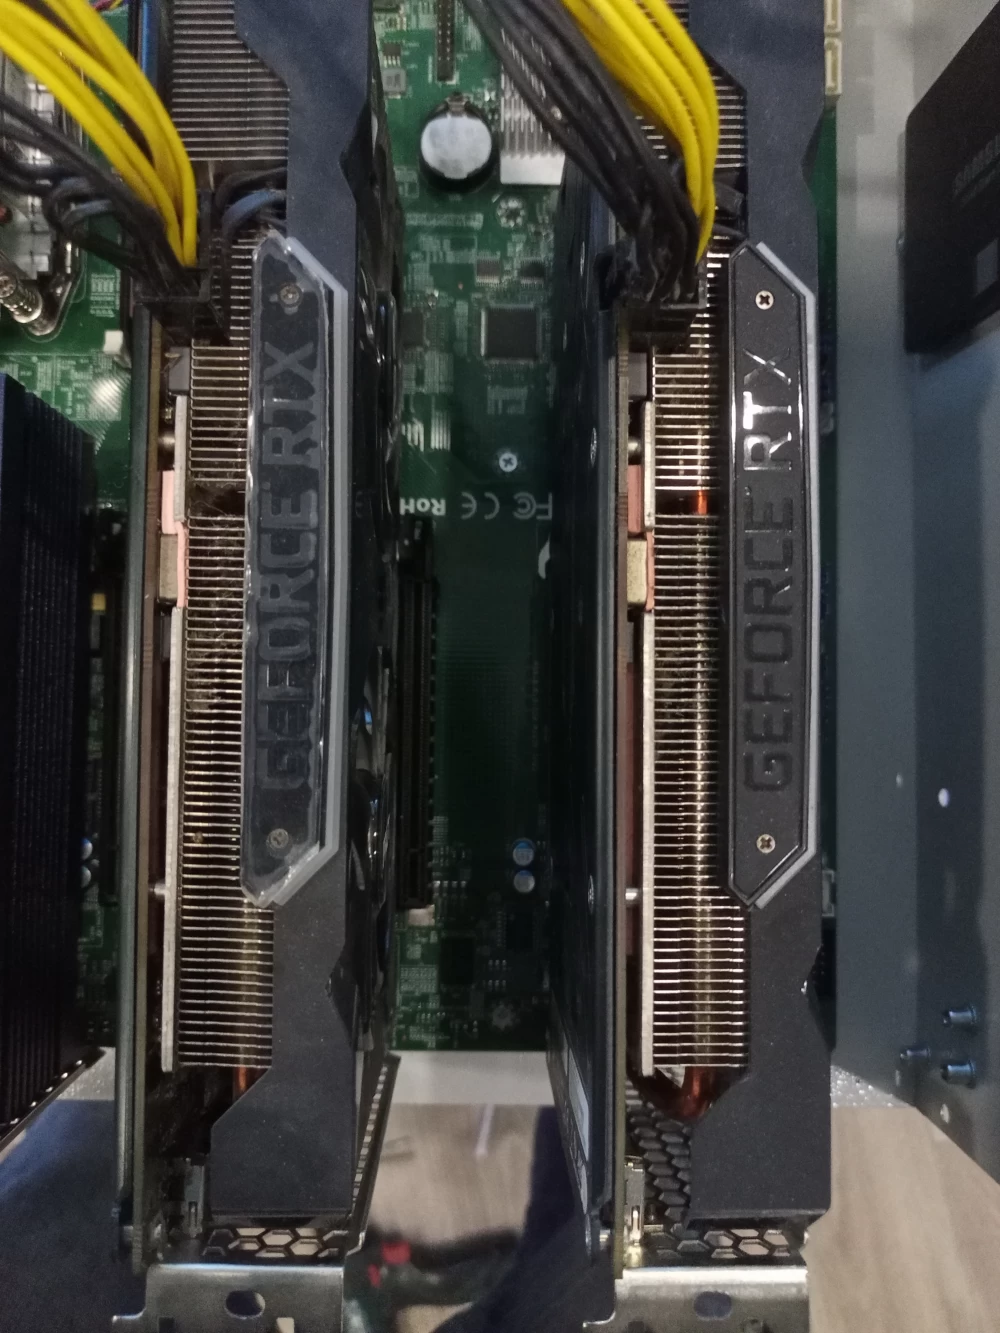
It is also not possible to install my cards in two adjacent slots. I ordered a case for mining from Jabbamarket, I didn't want to completely give up on a closed box, as the presence of small children increases the risk of damage. The power supply outputs were also modified. I initially tested with one connected 8pin, later I made an adapter for another from a 6pin PCI-E and 4pin from molex.
Pausing the "iron" question, I moved on to the software one. In the quickly installed Win Server 2019, I passed through the GPU, the guest ten picked it up, but the game for two cores refused to work properly on ten. The likely reason was the game through IPMI, not a connected monitor, but after reading more about the host OS limitations on guests, I installed Proxmox. I had encountered the latter once when my mini-PC refused to boot from the HomeAssistant disk, and the bootable flash drive stopped working. The installation then went in a mode of saving my brain from something unexplored and surely complex based on commands from a video tutorial. I expected script editing, package building, and the like. To my surprise, the GPU passthrough is done in a couple of clicks from the web interface, just like adding a mouse or a flash drive. For guest OSs, I allocated 10 cores, 12 GB of RAM, and 300 GB of disk space on a 1.6 TB Samsung. After moderating the first virtual PC, I made a mistake; instead of installing a new OS, I cloned it, resulting in having to repeat the moderation and reinstall the system. While the server is running at 2/3 capacity, I spent the mornings upgrading the box, and in the evening, it will be back in service.
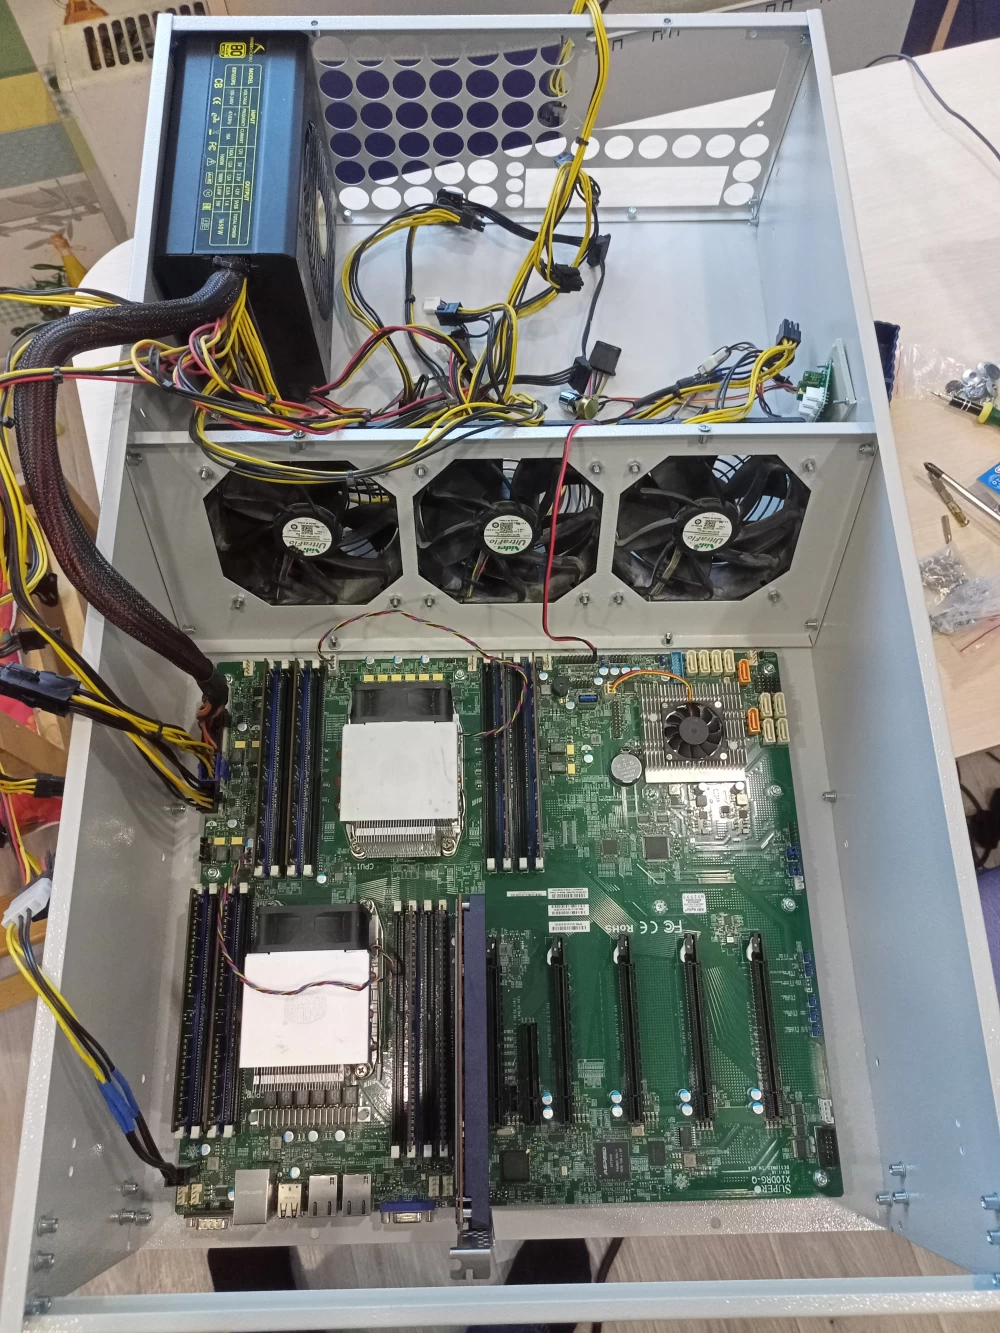
I added new mounts for the board, raised the existing ones for installing the disk and cards. The graphics cards or CPU cooler obstruct the installation of the power supply in the back wall. To make the power connector accessible, I secured the unit at the front, and installed the fans in the middle. The fans from the ASICs create a good airflow, even if the speed is reduced with the regulator knob. This is not the final solution; I maximized the use of available parts and holes. The back wall appears custom-made; it is definitely necessary to have space for connectors and airflow from the CPU coolers, securing the disk wouldn't hurt, but I am still searching for a solution with the cards. Initially, I considered installing one card behind the disk, and the remaining two through x16 risers on the side wall. Now I am leaning towards the option of securing all cards to the back wall and connecting them with a flexible angled extender. I am exploring the possibility of gaming through the available x1 risers.
I would appreciate any relevant advice in the comments. I will finish the article upon project completion, as it is being done out of interest, not for renting three computers at $0.10/hour.





Write comment