
- Network
- A
Quick Setup Guide for VPS and Vless Configuration
In recent years, many articles have accumulated on this topic, so why another one? Personally, my problem was finding all the information on basic server setup and a quick way to configure VLESS in one article. Usually, I came across articles that had 3X-UI panel setup without the basic VPS configuration or articles that were too detailed, and "too many words" make it lazy for many to read and reproduce themselves in our time.
Therefore, in this guide, I decided to gather in one place both the basic server setup (which practically anyone can do without complicating the settings too much) and the Xray configuration without the 3X-UI panel in just a couple of scripts.
And before we begin, I would like to say that the Vless setup instructions were borrowed from this repository and the part on basic server setup + 3X-UI panel setup, if you want to read more details, is from this guide on GitHub.
The entire process includes 3 main steps: renting a VPS, configuring the VPS, and configuring Xray/Vless.
Step 1. Renting a VPS
The first thing to do is to rent a virtual dedicated server or VPS (This part of the article will be the least detailed in order not to provoke censors into blocking a specific hoster).
If you are deploying a VPN only for yourself or for a small group of people (in my case it was up to 5 people) and do not plan to load the network heavily, then, as my experience has shown, servers for $1-2 per month with the most basic parameters are quite sufficient, here, probably, you only need to look at the traffic limit per month (and preferably at least 1GB of RAM).
It is better to choose Debian 12 or Ubuntu 24 as the operating system, further settings will be shown on Debian 12.
For the VPS, you can choose any foreign country, preferably with the least censorship on the internet and closest to your location (this can affect the connection latency). Also, pay attention to whether there is an option to pay for the server in a way convenient for you (sometimes when purchasing, they require you to provide passport details, but they do not always check them).
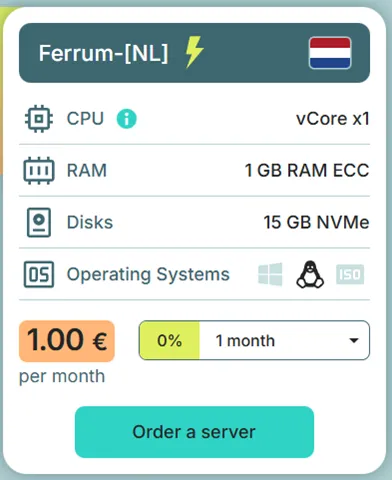
After paying for the VPS, the login details for the server will be sent to your email. Save them somewhere.
I think the hardest part is already over, there’s no turning back now, the money has been spent, so the task now is to make sure it’s not wasted, so let’s continue)
If something goes wrong with the server setup, you can always reset or reinstall the system through the provider's administrative panel and start over.
Step 2. Basic VPS Setup
First, you need to connect to the rented server. To do this, open the command prompt or PowerShell. Then, in the opened window, type the following command and press Enter (enter the IP address saved in the previous step): ssh root@server_ip_address.
Upon first connecting, SSH will ask about the fingerprint, answer yes.
After that, you will be prompted to enter the password; you can copy it from the saved data in the previous step and paste it (most likely pasting in the console is done by right-clicking) or type it manually, the password will not be visible in the console, which is normal, so do not try to paste it multiple times)
Now let's proceed with the setup and ensure the basic security of the server.
1. Changing the root password:
Type the command passwd in the console and enter a new password (the longer the better), now when reconnecting to the server, you will need to enter this password, not the initial one.
2. Updating packages and rebooting the server:
Type the command apt update && apt upgrade -y && reboot in the console, after which you need to wait about 5-10 minutes (if a pink/blue window appears, just press Enter), after which the server will reboot and you will need to reconnect.
3. Creating a new user:
Connect and enter the command adduser user_name in the console, where instead of user_name you should write any invented username (example command adduser lorem), then enter a new password for the user and also save this information somewhere (other prompts during creation can be skipped by pressing Enter).
Next, enter the following command usermod -aG sudo user_name where user_name is your new username. If needed, you can switch from a regular user to root using the command su -, and from superuser to regular user with su user_name.
4. New port for SSH connection:
Now you need to change the default port for SSH connections. To do this, enter the command nano /etc/ssh/sshd_config in the console, after which a text editor will open (all commands are executed as root user).
Use the arrow keys on the keyboard to navigate through the lines. The mouse does not work here. In this window, you need to change two lines; find the line #Port 22 where you need to remove the # and change the number 22 to any unoccupied number from the range 10001-65535 (you can check occupied ports with the command ss -lntup).
Also, look for the line PermitRootLogin yes and change yes to no. Save the file by pressing Ctrl + O, then Enter, close the file by pressing Ctrl + X. Then execute the command systemctl restart sshd.
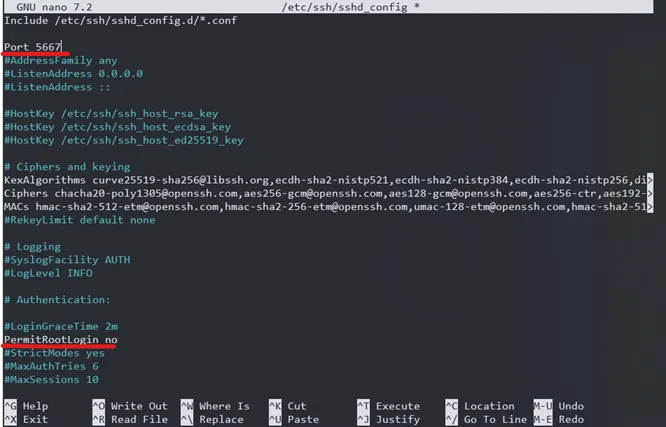
Now the connection to the server will occur with the command: ssh user_name@ ip_address_of_server -p new_port
As a result of this step, we have prohibited the root user from accessing the server, also forbidding access from the standard port 22, and now the connection is made by the user created in the previous step via the new port.
Also, as stated in many articles, it is safer to access the server using keys; I won't dwell on this here. You can read more in the instructions.
5. Installing Fail2ban:
Fail2ban is a program for server protection that automatically blocks the IP addresses of intruders after repeated failed login attempts.
Run the commands (as the root user) apt install rsyslog, then apt install fail2ban, and after that nano /etc/fail2ban/jail.local to create a basic configuration. In the opened text editor, insert the following text (in the line port =, insert your new SSH login port):
[DEFAULT]
bantime = 10m
findtime = 10m
maxretry = 5

[sshd]
enabled = true
port = 5667
filter = sshd
logpath = /var/log/auth.log
maxretry = 5
bantime = 1h
findtime = 10m
Save the file by pressing Ctrl + O, then Enter, close the file by pressing Ctrl + X. Run the command systemctl restart fail2ban, then systemctl status fail2ban to check its functionality, and systemctl enable fail2ban.
6. Configuring Firewall:
Run the command apt install ufw -y. Allow the necessary VPN ports by executing the following commands one by one:
ufw allow OpenSSH
ufw allow 80
ufw allow 443
ufw allow 8442
ufw allow 8443
ufw allow 10443
You also need to allow the port for SSH access specified in step 4, otherwise you won't be able to access the server: ufw allow 5667 (specify your port). Enable and check the Firewall: ufw enable (it will ask for confirmation, agree), then ufw status verbose, the output should look something like:
Status: active
Default: deny (incoming), allow (outgoing)
…
Try accessing the server from a new console window without closing the previous one, to ensure that you do not lose access to the server if something goes wrong, execute the command sudo ufw disable in the old console session.
This concludes the basic server setup; now we need to configure Xray and obtain VLESS configs.
Step 3. Configuring XRAY/VLESS
So first, you need to get your domain. We will use a free domain from FreeDNS (you can use any other option), of course, it is preferable to use paid options, but, as my experience shows, the free option works quite well.
Go to the website and register:
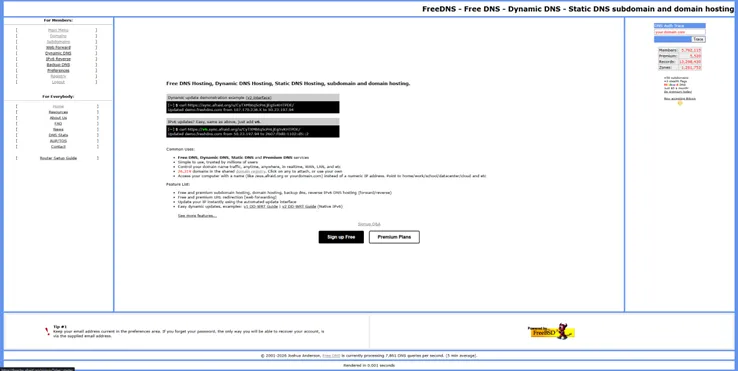
After that, in the upper left menu For Members, go to the Registry section. In this section, choose any domain you like and go to its page.
In the Subdomain field, you need to come up with and enter your domain, in the Destination field enter the IP address of your VPS, after which you should complete the captcha and click the Save button.
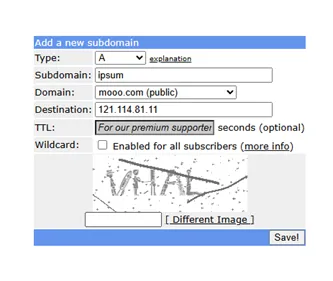
Next, you will be taken to the Subdomains page from where you need to copy the resulting link and save it (for example ipsum.mooo.com).
You need to wait about 5 - 10 minutes for the domain to bind to the server's IP address before continuing. You can check if the subdomain is bound using the command ping your_domain. If you do not see an error like Name or service not known, then you can continue.
The scripts used further may change to more up-to-date ones; you can check them in this repository, if the commands below do not work.
Let's return to the console of our server. If you have logged out from the server, log in as the root user using the command su –. Copy or enter the bash script into the console for the automatic installation and configuration of a VPN server based on Xray (VLESS Reality / XHTTP) with nginx and HTTPS (Let’s Encrypt) for the specified domain (it should also be noted that you should not run unfamiliar scripts from the internet without checking them, so it is necessary to review scripts before execution, but since we are amateurs here, we will continue as is; however, you can check the script by visiting the script's URL or in the repository). For convenience, you can copy the command and edit it in a text editor:
bash -c "$(curl -L https://raw.githubusercontent.com/xVRVx/autoXRAY/main/autoXRAY1.sh)" -- you domainwhere you_domain is the domain copied from the previous step.
After executing the command, the console should display output like this; copy and save it:
Next, you need to copy either the subscription URL or each config into the application suggested at the end of the output. In most applications, the logic is similar; you need to copy the link or config and in the application click the "Paste from clipboard" button or something similar.
Test Connection
Copy any config link from your subscription page
Add it to the application (Happ, v2rayNG, etc.)
Enable VPN
Check IP: whoer.net
The IP should change to your server's IP
Check any blocked website
This could be the end, but there is a possibility that this VPN implementation might not work, especially over mobile networks, but we have a solution for this situation (for now).
Step 4 (optional). Creating a bridge from RU VPS --> Foreign VPS
Since in the previous VPN variant we connect directly to a foreign server, this may not please the censors, which consequently leads to the inability to use this method. The solution to this situation is to create an additional server in a territory where the censor is more tolerant (for now) of connections to servers, for example, in Moscow.
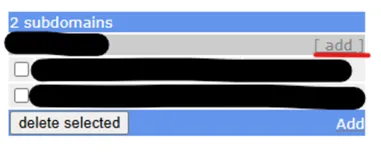
So, to implement this method, you need to rent another server and fully complete steps 1 and 2 to create and configure a new VPS. Next, you need a new subdomain, which can be added by clicking on [add] in the Subdomains tab on the FreeDNS website (don't forget to check if your new domain is linked to the server using the command ping domain).
Also, you will need the vless XHTTP reality EXTRA config generated at the end of the third step.
After all the preparation, you need to enter the following command in the console on the new server:
bash -c "$(curl -L https://raw.githubusercontent.com/xVRVx/autoXRAY/main/autoXRAYselfRUbrEUxhttp.sh)" XHTTP"where domain is the newly created domain and XHTTP is the vless XHTTP reality EXTRA config (insert the config inside the quotes).
As a result, a bridge will be established between the two servers, and you will receive a new config for connection, as at the end of step 3, which will allow us to connect to the RU server, which in turn will already connect to the foreign server.
Well, that's it, congratulations on setting up your VPN, and I hope everything works for you on the first try. If something doesn't work, the internet and neural networks are at your disposal!
P.S. If something stops working over time, try restarting the VPN installation script.


Write comment