- DIY
- A
Five DIY projects based on Raspberry Pi: from a children's car to a navigator for the blind
Hello, tekkix residents! This is Viktor Sergeev from MTS Digital. Today I bring you a new selection of homemade systems based on the "raspberry". Under the cut - five different projects that entertain, help and teach. Let's go!
Not Tesla, but close
What is the project
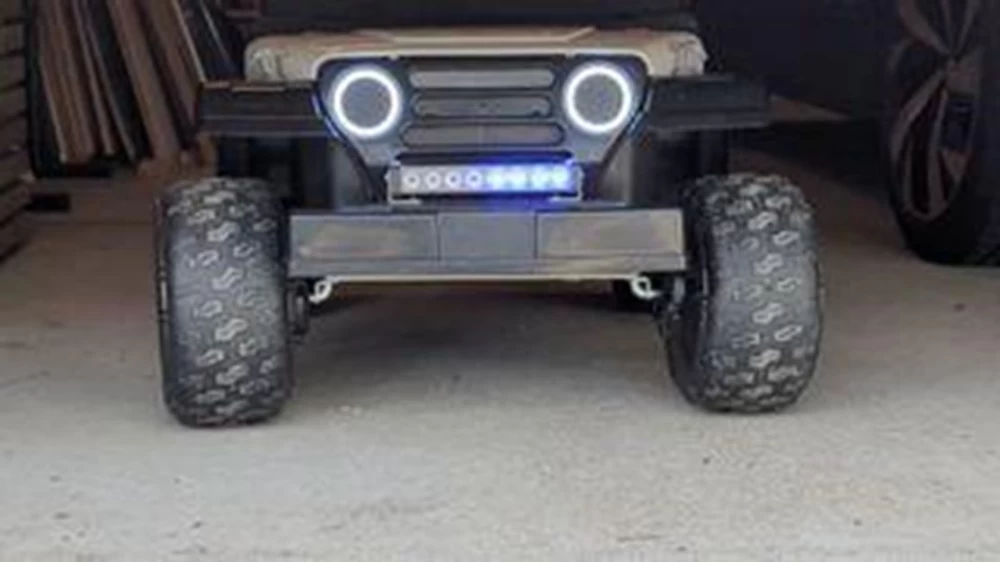
I'll start the selection with a smart radio-controlled car. This is a modernization of a broken children's toy - an electric car with a faulty battery. The author, John Skagmo, turned it into a high-tech vehicle equipped with Raspberry Pi, touchscreen, audio, motor control system, and other features.
John is passionate about electronics and decided to use his skills to repair and upgrade a non-working children's electric car for his daughter. So no electric car was harmed during the procedure. On the contrary, the original system got a second life.
Details
Skagmo started by purchasing a standard children's electric car with a non-working rechargeable battery. After replacing the latter, he focused on upgrading the device. As the main control module, the developer used a Raspberry Pi 3 with a custom daughterboard.
Initially, it was equipped with a GPS/GNSS chip for creating geofences, but Skagmo disabled this feature, considering it ineffective in a confined space: the car was planned to be used only in the yard. Instead, he added a system for tracking the car's location via Wi-Fi, connected to the Home Assistant server.
The author equipped the car with an audio system with an amplifier, a small subwoofer under the seat, and a speaker on the control panel. And also — a gas pedal familiar to motorists. The harder you press it, the faster the car goes. Before the upgrade, it drove at the same speed, no matter how hard you pressed.
Skagmo also added a control panel with buttons and a display. The side parts were made of plywood, the front part — of 2.5 mm thick aluminum sheets. A wide-angle selfie camera is mounted in the case: it can be used for video recording and for video communication with the driver. The panel operates on the basis of the MCP23018 microcontroller.
The display is 4 inches. It is a touchscreen with a resolution of 480 × 800 pixels. It displays the name of the track playing, the remaining battery charge, and the pressure on the accelerator pedal. The entire system is controlled using a custom graphical interface written in PyQT specifically for the Raspberry Pi.
In general, it turned out to be an electric car for a child. Not a Tesla, of course, but already close. You can watch the video on YouTube.
Raspberry Pi Watch
What is the project
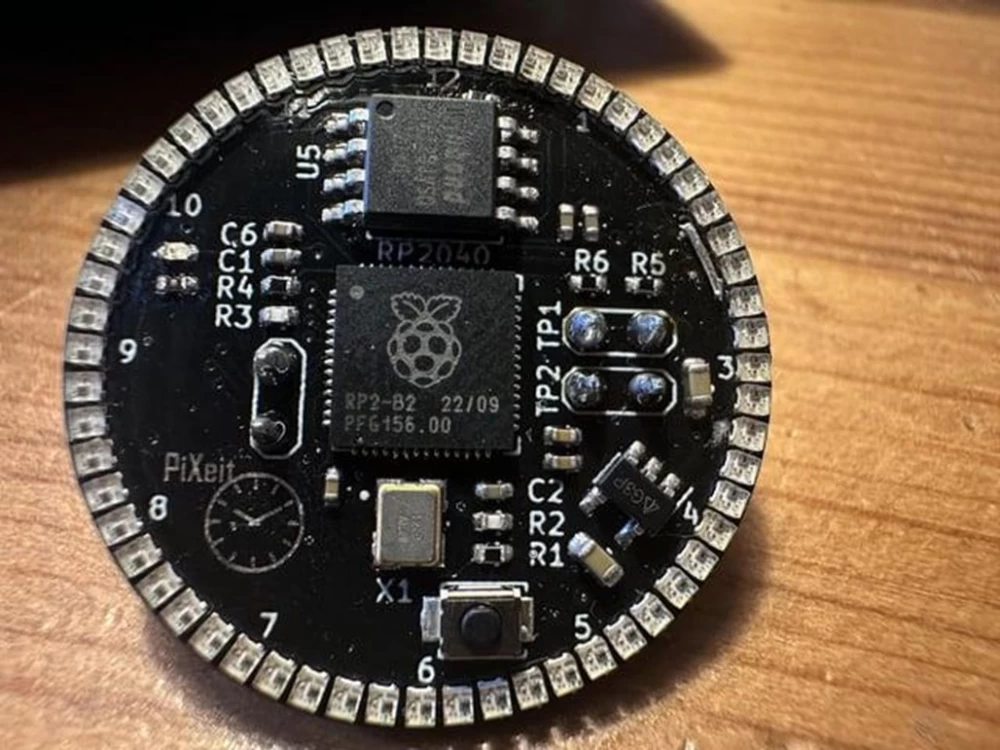
And these are watches created based on the Raspberry Pi Pico. The board is made in the form of a circle, LEDs of different colors show seconds, minutes, and hours.
The project developer is Kim Paulsson.
Details
The clock is based on a custom board with an RP2040 chip developed by the project author. There are 60 LEDs around the circumference. Each is responsible for displaying the time using different colors to indicate hours, minutes, and seconds in real-time. There is also flash memory - this is the Winbond 25Q1281VSQ chip with a capacity of 8 MB.
Paulsson placed all this in a stylish metal case with a bracelet. For charging the device, there is a port on the back panel, neatly integrated into the design. The watch is quite elegant, despite being a DIY project.
There is an important nuance: the project is based on the RP2040 controller, but theoretically, similar watches can be created on newer microcontrollers. For example, on the RP2350, which is used in the Raspberry Pi Pico 2.
Details about the project can be found on Reddit. The video is on YouTube.
Camera for monitoring stray cats
What is the project
Next on the list is the open CatBot camera project. The main task is to monitor the food bowl and the animals that approach it.
The author is Michael Sugitan, a DIY project enthusiast. He often uses Raspberry Pi to create various systems - for example, a Leica-based camera or a "Death Star" based on an IKEA lamp. This time he decided to help stray animals.
About a year ago, Michael lived near West Rock National Park in Connecticut, where there were many street cats. He regularly fed them in his backyard but didn't have time to watch them. Then the idea of installing video surveillance came up: with it, the author could see how many cats actually come to the backyard. And at the same time, he found out that the bowl is in demand not only among them:
The device also has an additional function to scare away birds: they also flock to the food, but it is harmful to them. To solve this problem, Sugitan modified the camera module and added a bird detection function. When a bird appears, the Raspberry Pi activates a servo with an inserted wooden stick. It starts tapping on the window, and the impressionable birds fly away. I wonder what if a crow comes? It won't be scared by tapping.
Details
CatBot includes two Raspberry Pi: Pi Zero and Raspberry Pi 5. More about this on YouTube.
Pi Zero works as a Flask server and processes input from the camera using a simple Python script. Essentially, the device continuously films the area around the bowl. And Raspberry Pi 5 is responsible for using the neural network, processing images from Zero, and detecting cats. As soon as a cat appears, CatBot takes a picture of it and sends a notification to the author via Twilio.
The project is completely open and available for study. All source code can be found on GitHub.
A system for teaching the concept of negative numbers
What is the project
Zero Pairs is a visual system designed to facilitate the understanding of the concept of negative numbers by children. The author, Russell Eveleth, suggests using the development as a teaching aid for schools or for self-study of operations with negative numbers by children.
Details
The idea of the Zero Pairs system is to visualize the behavior of negative numbers. The main panel with "numbers" consists of two rows of spheres. They rotate to demonstrate values. The top row includes eight spheres: black on one side and white on the other. They symbolize positive values. The bottom row includes balls of black and orange colors, symbolizing negative numbers.
The system runs on a Raspberry Pi Zero, to which an Adafruit Servo Hat board is connected to control the servos that rotate the spheres. The balls are designed and 3D printed specifically for this project. But it's not just mechanics; the input system is organized quite interestingly. The user adds tasks through a Flask-based web interface. When entering, the system visually shows how positive and negative values interact with each other, helping to better understand the process of working with them.
Russell Eveleth made the project open and accessible to everyone on GitHub, as the system is primarily intended for educational purposes. There is a video on YouTube.
Navigator for the blind
What is the project
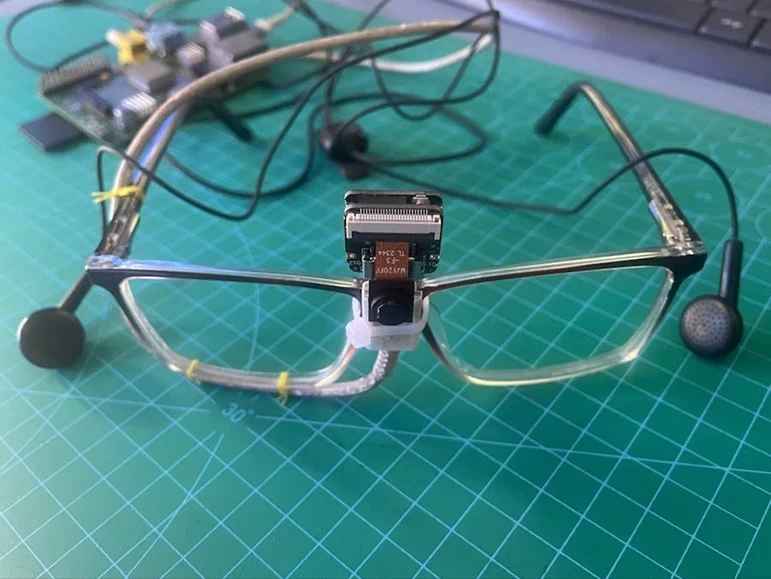
And here is a headset based on glasses with a camera, designed for people with visual impairments. The goal of the project is to reduce dependence on outside help when moving. Author — Mohammed Khairul Alam.
Raspberry Pi and AI are used to interpret the environment, describe objects around, and transmit information to the user through headphones in the form of voice instructions. The creator of the project calls it the "third eye".
Details
The project is based on the Xiao ESP32S3 Sense module (pictured above) for video recording and environmental analysis. The camera captures the environment, then another module, this time Raspberry Pi, processes this data and creates a text description of what is happening. Then the text is converted into voice instructions, and the system reads them to the user through headphones.
The main computing module is the Raspberry Pi. The author uses the original Raspberry Pi Model B, but any "raspberry" can be used, including the Raspberry Pi 5. The Xiao ESP32S3 Sense has a built-in camera sensor, digital microphone, and 8 MB of flash memory, a microSD card slot for data storage. The system is powered by the Raspberry Pi, which can run from a battery pack located in the user's pocket.
For object recognition and model training, Alam used Edge Impulse Studio. All project source codes and detailed instructions for setting up the system and training the model are posted here.
That's all for today. If you have your own projects based on "raspberry", tell us about them in the comments. And of course, add interesting projects you have heard about there as well.









Write comment