
- Network
- A
ZeroTier Magic: Creating a Personal VPN Network for Home and Cloud in 20 Minutes
Hello, tekkix!
Do you remember the times when a "white" IP address was the norm and not a paid service? When accessing your server just required a simple ssh user@ip_address? I remember too. But that era is slowly fading away.
Today, we find ourselves in a new reality. Your home "Raspberry Pi" is choking behind your provider's NAT, and the cloud VPS in Europe seems like a distant and isolated island. How do you get access to the first or second?
My journey began with the classics: I wanted to set up a simple and fast WireGuard server on my home Raspberry Pi. But all my attempts hit a brick wall of provider's NAT. And that's when I realized: the game had changed. The problem is not with the protocol, but with the topology. You can't knock on a door that simply doesn't exist for the outside world.
This became my personal challenge. I embarked on a journey through the world of overlay networks, stepped on the rake with DynDNS, but eventually found my treasure — a simple and almost magical solution named ZeroTier. A solution that not only opened the "door" to my home "Raspberry Pi," but also made it just as easy to turn any VPS into a personal VPN gateway.
This article is not another guide on VLESS or Shadowsocks for bypassing complex blocks. It's not a "silver bullet" against DPI. This is an honest guide to building your personal, flat, and secure L2 network over the chaos of the modern internet. We will build a VPN hub that is not afraid of NAT, no matter where it will live — on a modest "Raspberry Pi" at home or on a rented VPS in another country. We will break down the entire process step by step, from registration to setting up the full tunnel, and honestly talk about the compromises of this solution.
Rake #1: Dreams of WireGuard and the harsh reality of NAT
I, like many, first thought about the classic — WireGuard. Setting up a server on Pi seemed elementary: generate keys, configure settings, bring up the interface. Beautiful!
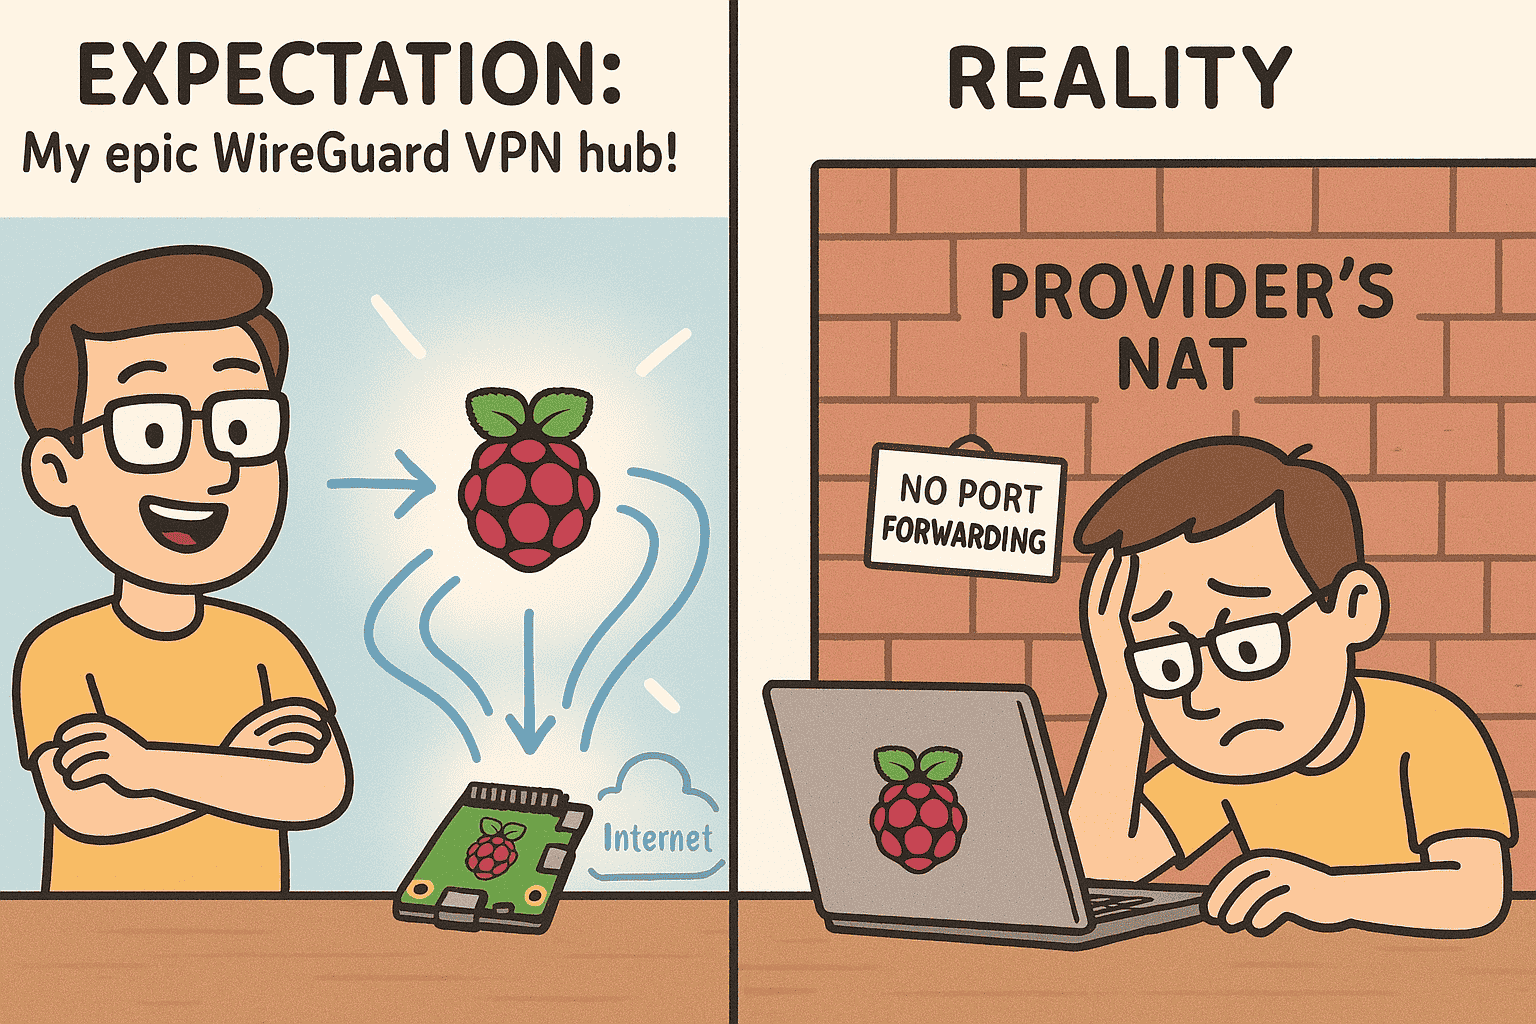
But then I remembered... My provider. No white IPs, no port forwarding. Ports are closed tight, and there's no way to reach my Raspberry Pi from the outside. All attempts to set up a WireGuard server that would listen for incoming connections hit an invisible NAT wall. Those were some serious dances with the tambourine, but the result was zero.
"Well," I thought, "I need a different approach. One that doesn't fear NAT."
Secret weapon: ZeroTier, or how to create a VPN network that finds its way
My salvation came from the world of "Zero-Configuration" VPN. Its name is ZeroTier. The concept is simple, like three rubles: it's not just a VPN, it's a tool for creating a virtual local network, where all devices communicate with each other as if they were in the same room. And what's most important? It doesn't care about port forwarding!
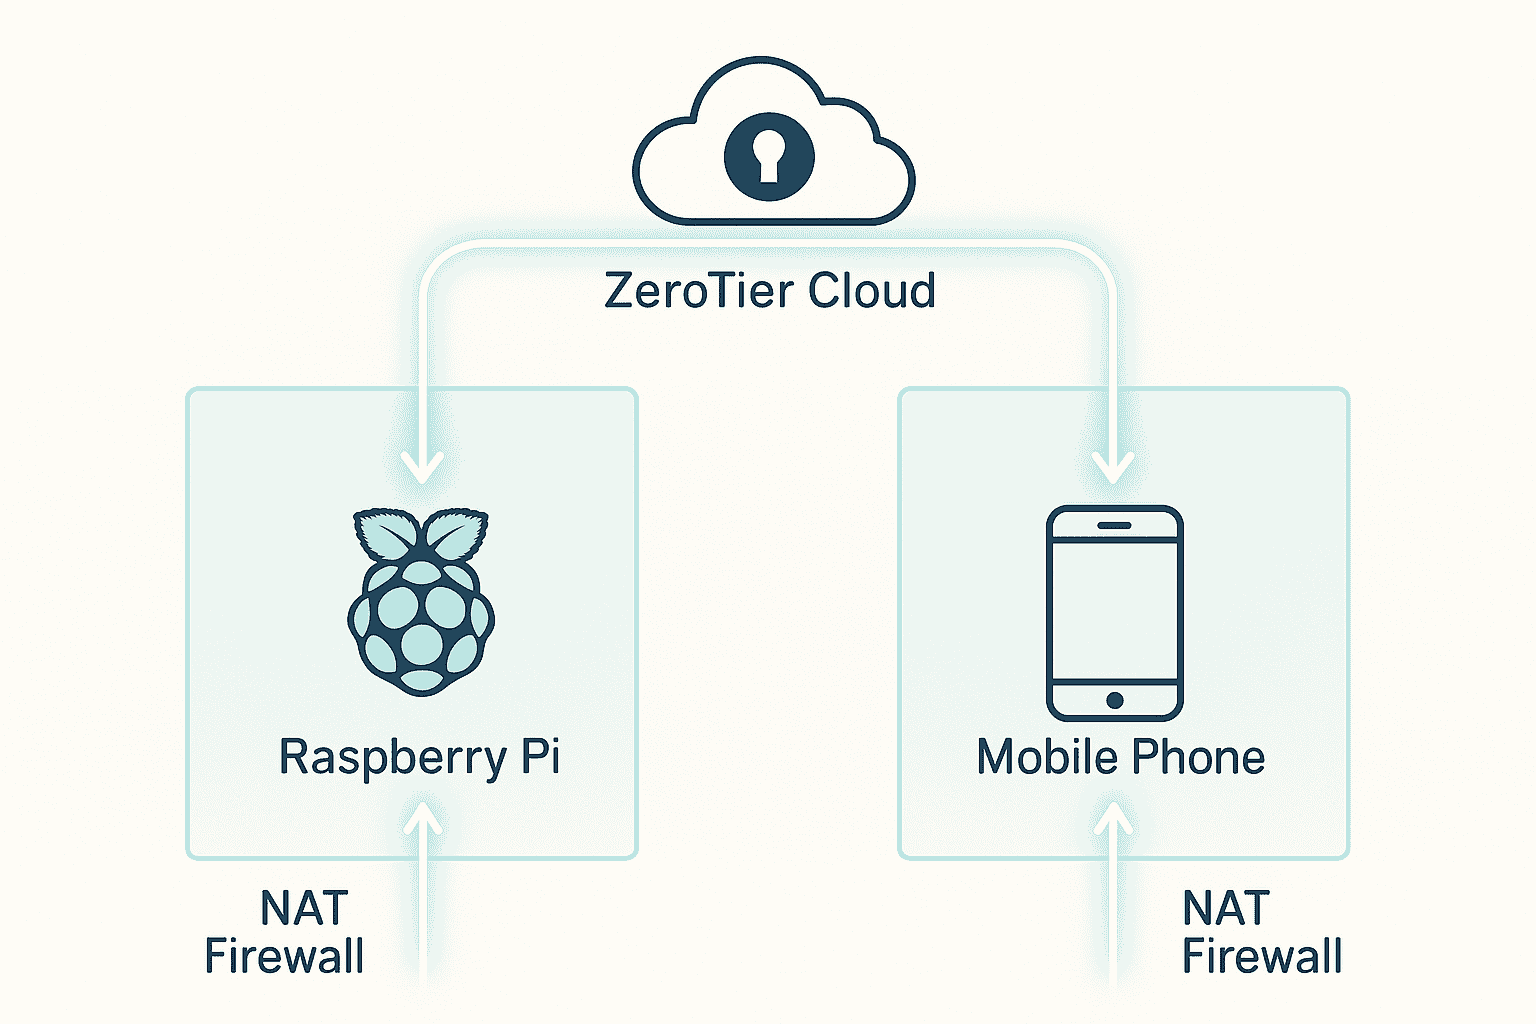
Lifehack: ZeroTier handles CG-NAT perfectly since all connections are outgoing. Your Raspberry Pi will "knock" on ZeroTier servers by itself, and your phone will do the same. From there, they'll communicate with each other using these "binding" connections.
Let's go! Setting up ZeroTier on Raspberry Pi and phone
The whole process took me about 15-20 minutes, not counting the coffee break.
Step 1: Create your virtual headquarters in ZeroTier Central
Go to my.zerotier.com and register. After registration, immediately create a new network by clicking the Create A Network button. You will receive a 16-digit Network ID. This is the ID for your personal VPN empire. Copy it!
Important: In the network settings on ZeroTier Central, make sure that "Private" is selected under the "Access Control" section. This means you will manually approve every new device that tries to join your network. Security is everything.
Step 2: My Raspberry Pi joins the VPN empire
Now take your Raspberry Pi. I assume you already have SSH access to it and a working internet connection via Ethernet or Wi-Fi.
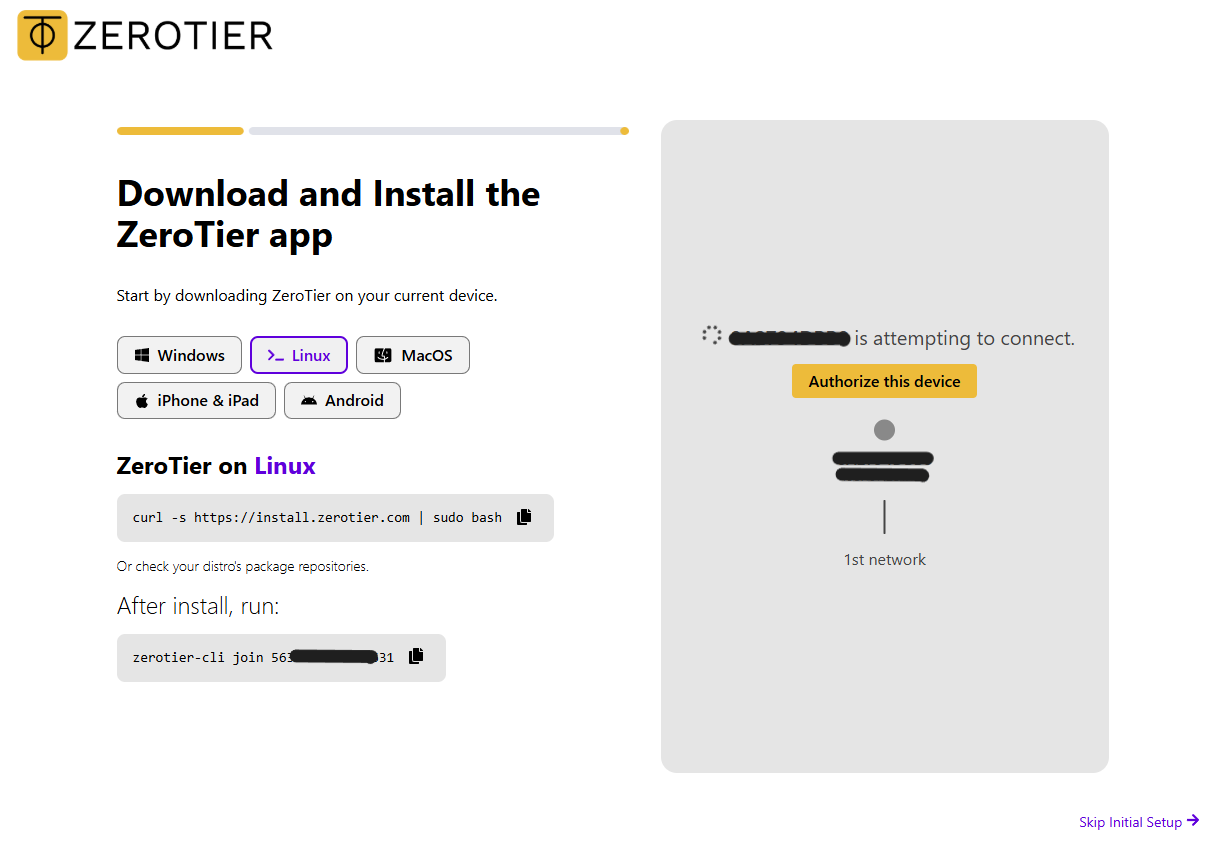
Install ZeroTier:
curl -s 'https://install.zerotier.com' | sudo bashAttention, colleagues! The rule of honest compromise!
Yes, I know. The curl | sudo bash command is considered an anti-pattern in system administration. This means you are downloading a script from the internet and immediately running it with superuser privileges without checking its contents. In theory, this is a serious security hole if the script source becomes compromised.Why am I still using it here?
This is the official ZeroTier installation script, widely used and repeatedly checked by the community.
It greatly simplifies the process, saving us from manually configuring repositories, importing GPG keys, and other "dances with tambourines," which fits perfectly with the "no headache" concept.
If you are paranoid (in a good way!) and want to do everything "properly," you can examine the contents of the script before executing it (curl -s 'https://install.zerotier.com' > zerotier_install.sh, then nano zerotier_install.sh, and only then sudo bash zerotier_install.sh). Or install it manually from the repository, as described in the ZeroTier documentation. But for our pet project and trusted source — this will suffice.
The Raspberry Pi requests to join the network: Use the previously copied Network ID.
sudo zerotier-cli join [YOUR_NETWORK_ID]After the command, you will see 200 join OK. This means the Raspberry Pi has sent a request.
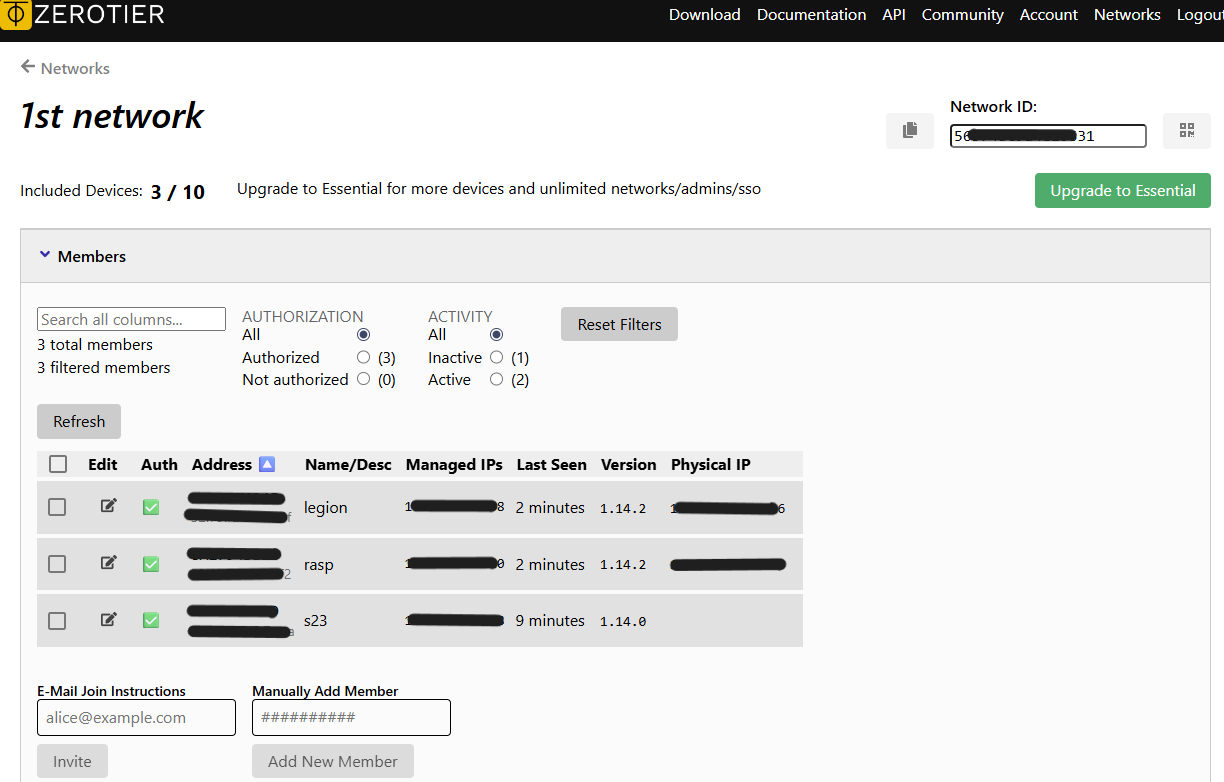
Now go back to ZeroTier Central (on the website). In the "Members" section, you will see a new device with a strange address. This is our Raspberry Pi! Check the box in the "Auth?" column next to it. After a few seconds, you will see that the Raspberry Pi has received its internal IP address (e.g., 10.242.82.120). Remember it — this is its address in our virtual ZeroTier network.
Step 3: Mobile client to the rescue
Now, take your phone (or laptop) — the device you want to use to access the internet through your home IP.
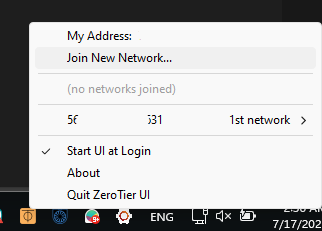
Download ZeroTier: Go to zerotier.com/download/ and install the app for your OS (Android, iOS, Windows, macOS).
The client requests to join the network: Launch the app and insert the same Network ID.
We are back in ZeroTier Central. In the "Members" section, another new device will appear. This is your phone/laptop! Again, check the "Auth?" box next to it. It will also get its ZeroTier IP (for example, 10.242.194.58).
Here is where the magic starts, which will make your mobile internet use your home IP.
Step 4: Tell the ZeroTier network that the Raspberry Pi is our internet gateway
Go to ZeroTier Central, to your network settings.
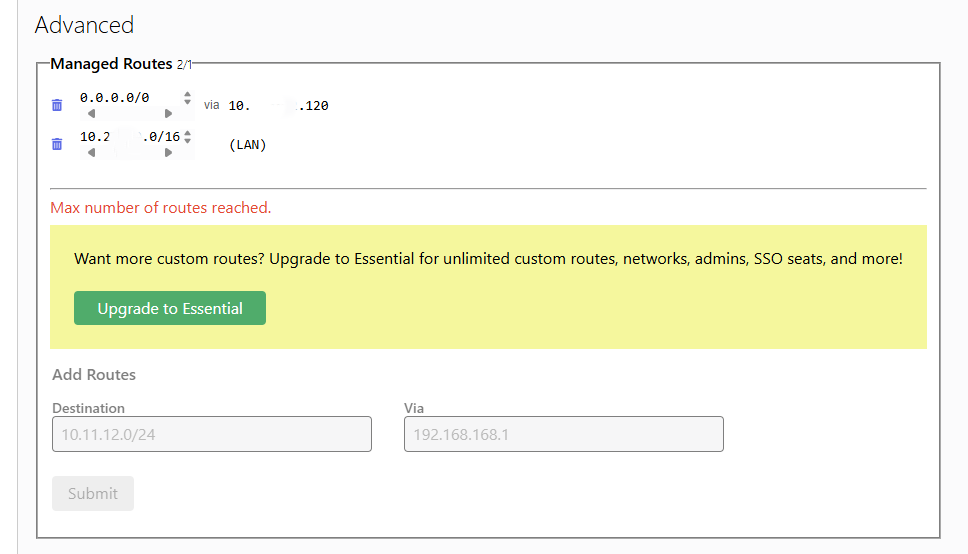
In the "Managed Routes" section, add ONE route:
Destination: 0.0.0.0/0 (this is "the entire internet")
Via: [RASPBERY_PI_IP_IN_ZEROTIER] (that’s 10.242.82.120)
Click "Submit".
Lifehack: ZeroTier on the free account allows only one "custom" route. Our 0.0.0.0/0 is the one taking up this slot. Don’t be scared by the "Max number of routes reached" message — it's just a notification that you've used it, not an error. The system route 10.242.0.0/16 always remains and doesn't count towards the limit.
The rule of honest compromise: What to keep in mind
Speed: All your mobile traffic will now go through your home internet. This means your speed will be limited by the upload speed of your home internet connection. If your upload speed is low, this will be noticeable. Lifehack: To measure the real impact on speed, try speedtest-cli (if installed) before and after connecting to ZeroTier:
speedtest-cli --server 22765 # Server ID in Moscow, or any other nearby(Or use web services like 2ip.ru/speed on your mobile device.)
Detection: Although ZeroTier encrypts your traffic, like any VPN, it can be detected by deep packet inspection (DPI) systems used by ISPs. ZeroTier does not have built-in traffic obfuscation mechanisms like some paid VPN services that disguise themselves as regular web traffic.
ZeroTier and "Server Dependency": Here’s the nuance. ZeroTier does indeed rely on its central servers (controllers) for network management (control plane): device authorization, key exchange, establishing connections and routes. This means when you "authorize" a new Raspberry Pi, it happens through ZeroTier’s servers. BUT! The actual data traffic (data plane) between your phone and Raspberry Pi, once the connection is established, tries to go directly (peer-to-peer), bypassing ZeroTier's central servers. Only if a direct P2P connection cannot be established (e.g., due to very strict NAT) will the traffic be relayed through ZeroTier relays, but this is an exception. So, yes, there is a dependency, but it's not that all your traffic constantly "passes through" third-party servers.
Step 5: Set up the Raspberry Pi to forward traffic
The Raspberry Pi has been told to become the gateway, but it needs instructions.
Enabling IP forwarding:
sudo nano /etc/sysctl.confFind the line #net.ipv4.ip_forward=1, remove the #, save (Ctrl+X, Y, Enter) and apply the changes:
sudo sysctl -pCheck: cat /proc/sys/net/ipv4/ip_forward should return 1.
Setting up NAT (firewall rules):
Here we tell the Raspberry Pi: "Redirect the traffic coming from ZeroTier to our home internet and masquerade it under your own IP".Life hack: To know the name of your active internet interface (whether it's wlan0 or end0), run the following command:
ip route show default | awk '{print $5}'The result of this command (for example, wlan0 or end0) will be the name of your outgoing interface. Use it instead of [YOUR_INTERFACE_IN_INTERNET] in the commands below.
Your ZeroTier interface name (ztt6j2rt4v) may also differ. Check it with the ip a command (it's the one with IP 10.242.82.120).# Clear old rules just in case sudo iptables -t nat -F sudo iptables -F # Add new rules # Replace [YOUR_INTERFACE_IN_INTERNET] with wlan0 or end0 (from `ip route show default`) # Replace ztt6j2rt4v with your ZeroTier interface name sudo iptables -t nat -A POSTROUTING -o [YOUR_INTERFACE_IN_INTERNET] -j MASQUERADE sudo iptables -A FORWARD -i ztt6j2rt4v -o [YOUR_INTERFACE_IN_INTERNET] -j ACCEPT sudo iptables -A FORWARD -i [YOUR_INTERFACE_IN_INTERNET] -o ztt6j2rt4v -m state --state RELATED,ESTABLISHED -j ACCEPTMaking the rules persistent: So you don't have to enter them after every reboot:
sudo apt-get install iptables-persistent -y
sudo netfilter-persistent save
This is the last, but crucial step!
On your phone (or laptop), open the ZeroTier app.
Go to the settings of your ZeroTier network.
Find the option that says "Route via ZeroTier", "Allow Default Route" (for Windows) or "Allow Default Route".
TURN IT ON!
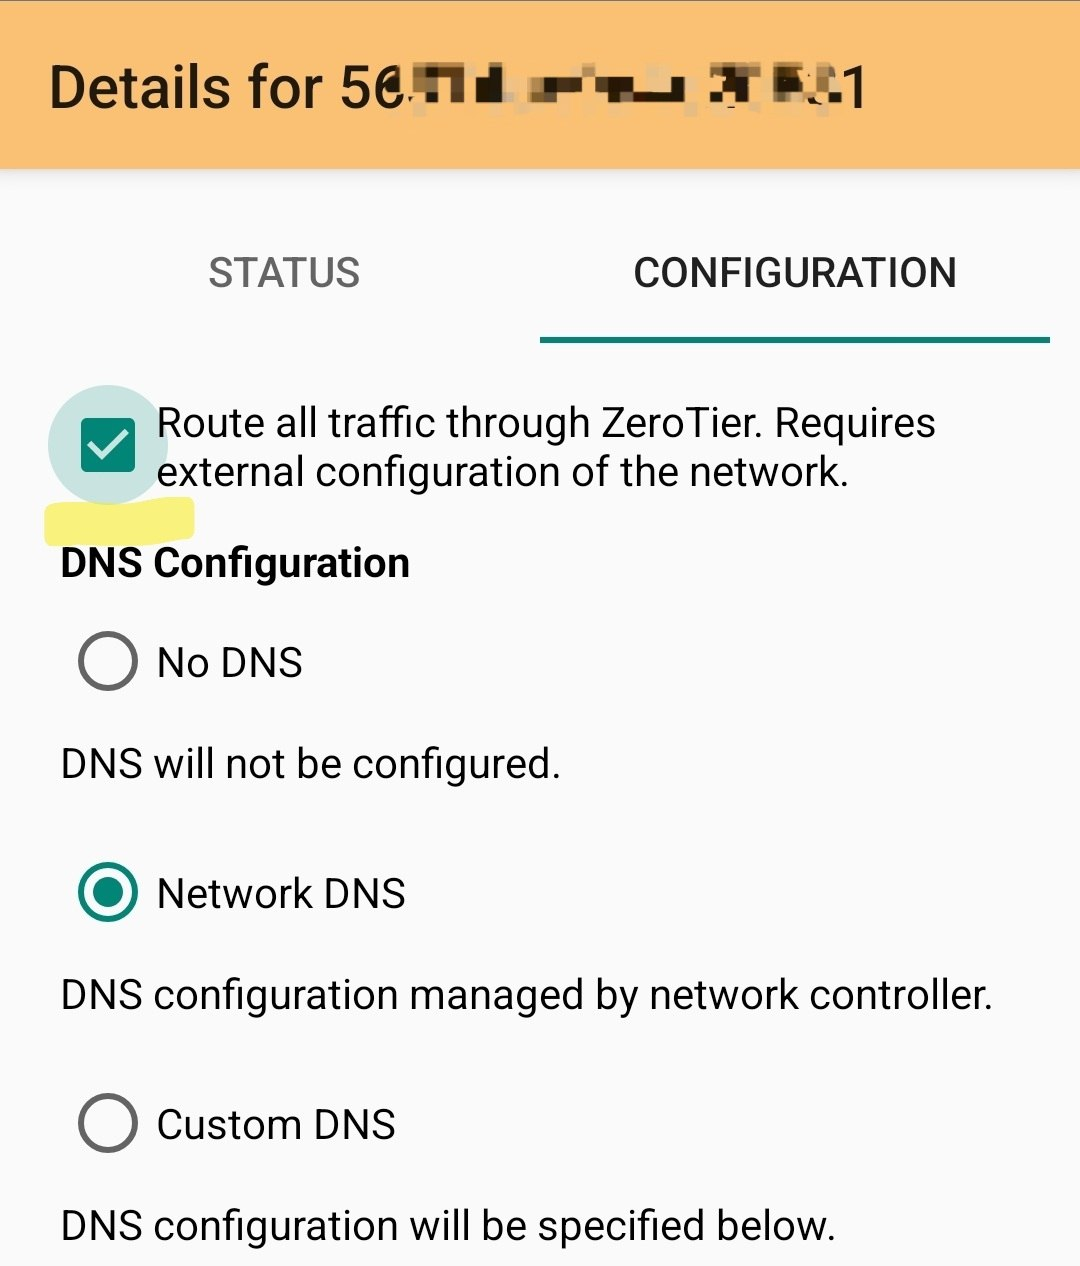
Step 6: Final touch on the client: Enable the "full tunnel"!
Now that you're connected to mobile internet and ZeroTier, your public IP address should be the same as your home provider's! You can check it on 2ip.ru. It worked for me! Now all services that "think" I'm at home actually see me at home, no matter where I am.
Rule of fair compromise: The capabilities and limitations of our VPN hub
Congratulations! Our system is working, and the "Raspberry Pi" is accessible from anywhere in the world. But, like any tool, ZeroTier has its peculiarities. Let's honestly break down what we've achieved and what compromises we're making.
1. Speed: Your home "upload" is your "bottleneck"
All your mobile traffic now passes through your home internet channel. This means that the speed of your VPN will be directly limited by the upload speed of your home plan. If you have optical fiber with symmetric 100 Mbps, you probably won't notice a difference. But if your plan has 5-10 Mbps upload, loading heavy pages and videos will be noticeably slower.
2. Dependence on ZeroTier servers: Centralized management, decentralized data
This is a key nuance to understand. ZeroTier is not a fully decentralized system.
Control Plane: To "acquaint" devices, exchange keys, and assist in bypassing NAT, ZeroTier always uses its central servers. If they are unavailable, you won’t be able to add a new device or establish a new connection.
Data Plane: However, once the connection is established, ZeroTier strives to route the traffic (your requests, messaging) directly between your devices (P2P), bypassing its servers. Your personal data does not constantly travel through the ZeroTier infrastructure, which is a huge plus for privacy.
3. Goal and Capabilities: Access, Not "Invisibility"
Initially, we addressed the problem of access to a device behind NAT. However, by establishing a full tunnel through a remote server (whether it’s a home Pi or a VPS in another country), you also obtain its IP address. This opens up certain possibilities:
Access to geo-blocked services: You can "appear" in the network as if you are physically in the location of your server. If your VPS is located in Germany, all websites will treat you as a user from Germany.
Connection stability: If your main provider has issues with specific services, games, or protocols, traffic through the tunnel may work more reliably and without interruptions.
That being said, remember: ZeroTier is not a tool for "invisibility". Its traffic is encrypted, but the protocol itself has recognizable "signatures." Advanced traffic analysis systems (DPI) can detect it and potentially slow it down. It is not designed for active masking, as specialized protocols like VLESS or Shadowsocks do.
4. What about VPS? Another scenario, the same magic!
This guide is not only about Raspberry Pi. The same logic works perfectly for creating a secure private network between your VPS at different hosts.
Imagine you have:
A cheap VPS with a large disk for backups.
A powerful VPS for computations.
Your work laptop.
You can install ZeroTier on all these machines, connect them in one private network, and get:
Secure communication: Services (e.g., databases and web servers on different VPSs) can communicate with each other using internal, encrypted ZeroTier IP addresses. You no longer need to expose database ports to the "open" internet!
Convenient access: You can connect via SSH to your servers using their static and easy-to-remember ZeroTier IPs.
"Clean" internet channel: By setting up any of the VPSs as a gateway, you can access the internet from the data center’s IP address. This not only solves the problem of accessing geo-blocked resources but also often provides a more direct and stable connection to international services.
Thus, ZeroTier is a versatile Swiss army knife for creating simple and reliable private networks, solving both the home NAT problem and the task of securely linking cloud infrastructure.
What "pitfalls" with network availability for your pet projects have you encountered? And how did you solve them? Share your experiences in the comments!
P.S. What's next? ZeroTier vs Tailscale Of course, ZeroTier is not the only player in this league. Its main and very powerful competitor is Tailscale, built on WireGuard. In the next article, we will have a face-off: comparing ease of setup, performance, security model, and figuring out in which scenarios one is more convenient than the other. Stay tuned!


Write comment