- Security
- A
Fortress under surveillance: installing Maltrail to catch "spies"
Hello, tekkix!
In the first part of our journey, we turned a bare VPS into a small fortress. We created a user with sudo, set up SSH key-based login, put up a firewall (UFW) as a guard, and hired a bouncer (Fail2ban). Now, brute-force attacks and automatic scanners break against our walls, causing no trouble. We've won, right?
Not quite. Our fortress is impregnable, but it is blind. We fend off those trying to break through the gates, but we can't see what's happening on the perimeter. What if a vulnerability is found in our web server? What if one of our running programs starts sending strange traffic, becoming part of a botnet?
Here, we need "alarm systems." A system that will be our eyes and ears and raise an alert at the slightest suspicious movement. Today, we will install just that — Maltrail.
If we continue our analogy, Fail2ban is the guard at the door, while Maltrail is the surveillance camera system around the perimeter. It is a lightweight intrusion detection system (IDS) that works on a very simple principle:
It quietly listens to all network traffic going to and from your server.
It compares the IP addresses, domains, and URLs from this traffic with a huge, constantly updated database gathered from hundreds of public "blacklists" and static signatures. This includes lists from AlienVault, dshield, Emerging Threats, ransomware trackers, and data on thousands of malware families, from AgentTesla to Zeus.
If a match is found — Maltrail immediately logs it and shows it in a beautiful web interface.
This is not a replacement for Fail2ban, but an ideal complement. They operate at different levels.

Step 1: Installation and Basic Setup
Installing Maltrail is surprisingly simple, no complicated steps required.
# Clone the repository from GitHub
git clone https://github.com/stamparm/maltrail.git
cd maltrail

# Install dependencies via pip
# If pip3 is not installed: sudo apt install python3-pip
sudo pip3 install -r requirements.txt
That's it! For a quick test, you can run the server and sensor directly from the console.
Tip: To avoid occupying the terminal, use screen or tmux. This will allow you to run the process in the background and disconnect from the server without killing it.
# Create a new screen session
screen -S maltrail

# Run the sensor (it collects data)
python3 sensor.py
# Press Ctrl+C to stop it and run the server

# Run the server (it serves the web interface)
python3 server.py
# To "minimize" the screen session without killing the process, press Ctrl+A, then D.
# You can return to the session with the command `screen -r maltrail`
After running, the server will be available on port 8338, but only locally. Don't rush to expose it to the world! First, we will properly secure it.
Step 2: Hiding the Admin Panel Behind Nginx (Mandatory Step!)
Exposing the admin panel of such a tool to the internet in its "bare" form is a very bad idea. We are building a fortress, not a thoroughfare. So, we will configure Nginx as a reverse proxy that will:
Provide access to Maltrail via a nice domain name (for example, sec.yourdomain.com).
Encrypt traffic using a free SSL certificate from Let's Encrypt.
Protect access with a username and password.
2.1. Generate a Password
First, let's install the htpasswd utility to create a password file.
sudo apt update
sudo apt install apache2-utils
Now let's create the file and add a user (for example, admin). The command will prompt you to enter and confirm a password.
# The -c flag creates a new file. Use it only for the first user!
sudo htpasswd -c /etc/nginx/.htpasswd admin
Life hack: To add other users, remove the -c flag to avoid overwriting the file: sudo htpasswd /etc/nginx/.htpasswd another_user.
2.2. Configuring Nginx
Create a new config for our site in /etc/nginx/sites-available/maltrail:
sudo nano /etc/nginx/sites-available/maltrailPaste the following config, replacing sec.cyberscope360.com with your domain:
server {
    server_name sec.cyberscope360.com;

    location / {
        # Redirect all requests to the local Maltrail port
        proxy_pass http://127.0.0.1:8338;

        # Important headers to let Maltrail see the real client IP
        proxy_set_header Host $host;
        proxy_set_header X-Real-IP $remote_addr;
        proxy_set_header X-Forwarded-For $proxy_add_x_forwarded_for;
        proxy_set_header X-Forwarded-Proto $scheme;

        # Enable our password protection!
        auth_basic "Restricted Access";
        auth_basic_user_file /etc/nginx/.htpasswd;
    }
}
Activate the config by creating a symbolic link to it:
sudo ln -s /etc/nginx/sites-available/maltrail /etc/nginx/sites-enabled/Now, let's call Certbot to automatically obtain an SSL certificate and set up HTTPS:
# If Certbot is not installed: sudo apt install certbot python3-certbot-nginx
sudo certbot --nginx -d sec.cyberscope360.com
Certbot will modify your config and add everything necessary for SSL. After that, check the syntax and reload Nginx:
sudo nginx -t
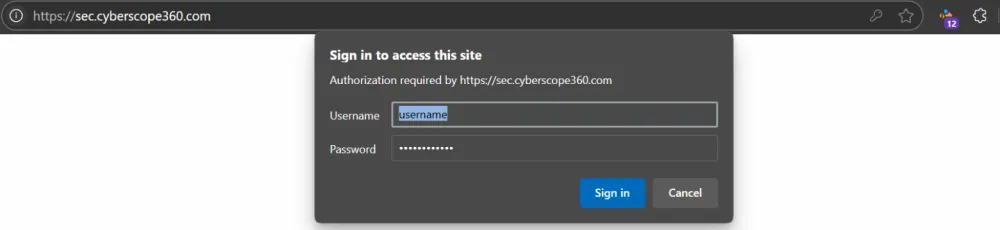
sudo systemctl reload nginxNow, if you visit https://sec.cyberscope360.com, your browser will show a login and password prompt. Our admin panel is locked!
Step 3: Set up properly with systemd
Running services in screen is fine for testing, but for persistent operation, we need Maltrail to start automatically after a server reboot. For this, we'll create systemd units.
Life hack: The Maltrail repository already includes ready-made files maltrail-sensor.service and maltrail-server.service. You can copy them to /etc/systemd/system/ and adapt them to your needs. But for clarity, we'll create them from scratch.
maltrail-sensor.service
sudo nano /etc/systemd/system/maltrail-sensor.service[Unit]
Description=Maltrail Sensor
After=network.target
[Service]
ExecStart=/usr/bin/python3 /path/to/maltrail/sensor.py
Restart=always
User=root # The sensor needs root privileges to listen to traffic
WorkingDirectory=/path/to/maltrail/
[Install]
WantedBy=multi-user.target
maltrail-server.service
sudo nano /etc/systemd/system/maltrail-server.service[Unit]
Description=Maltrail Server
After=network.target
[Service]
ExecStart=/usr/bin/python3 /path/to/maltrail/server.py
Restart=always
# The server can be run by a normal user
User=www-data
Group=www-data
WorkingDirectory=/path/to/maltrail/
[Install]
WantedBy=multi-user.target
Important: Don't forget to replace /path/to/maltrail/ with your actual path (e.g., /home/admin/maltrail or /opt/maltrail).
Now, let's command systemd:
# Re-read the configurations
sudo systemctl daemon-reload
# Enable autostart
sudo systemctl enable maltrail-sensor
sudo systemctl enable maltrail-server
# Start the services
sudo systemctl start maltrail-sensor
sudo systemctl start maltrail-server

# Check that everything is working
sudo systemctl status maltrail-sensor maltrail-server
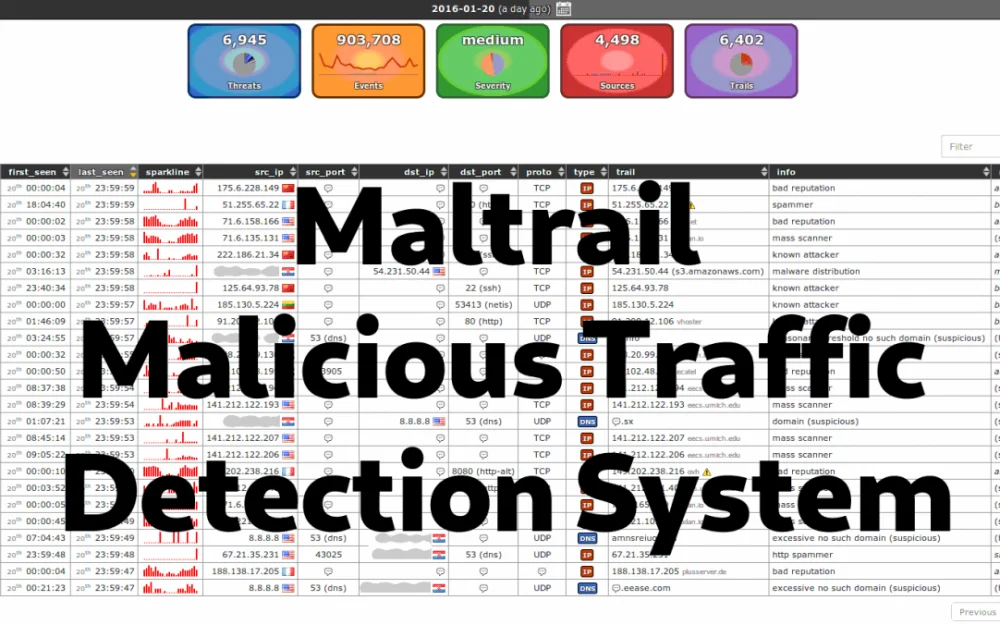
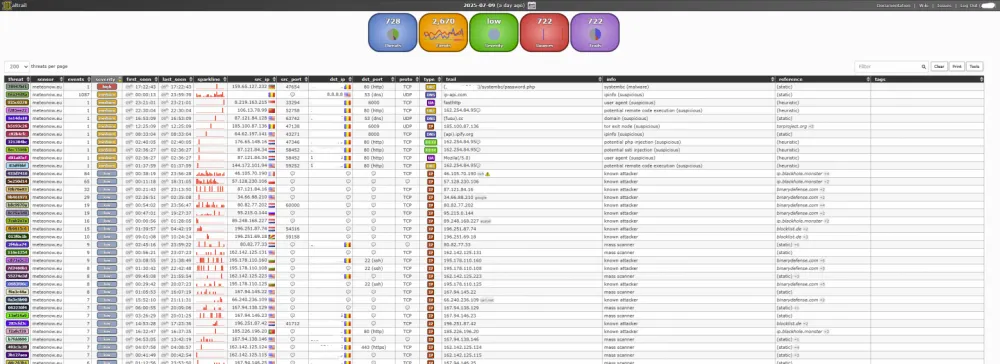
Step 4: Analyzing the Dashboard
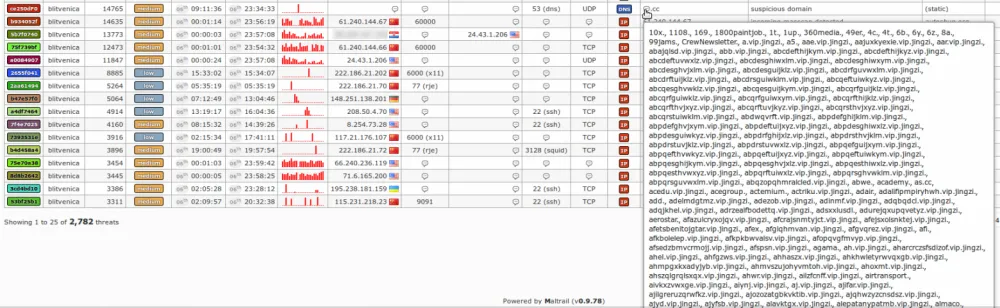
Now for the most interesting part. Go to our secured domain, enter the login/password, and you will see the Maltrail dashboard. Don't be scared if events show up immediately — this is normal. The internet is a noisy place.
What exactly will you see there?
Maltrail is not just a list of IPs. It shows the essence of the threat. Here are a few examples of what you can catch:
Vulnerability scanners: Attempts to find holes in your web server using tools like sqlmap or nmap.
Connections to C&C servers: Your server (or one of its Docker containers) has been compromised and is trying to connect to its "command center".
Traffic through Tor: Someone is trying to access your services anonymously.
Suspicious downloads: Attempts to download files like .exe, .dll, .ps1 from or to your server.
DGA domains: DNS queries for strange, automatically generated domains — a clear sign of malware activity.
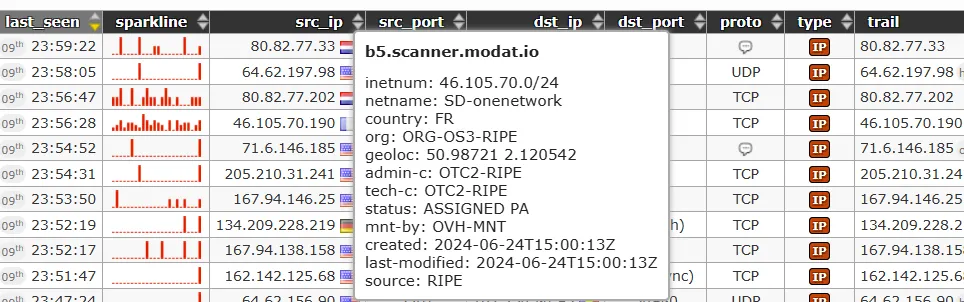
Clicking on an event will provide detailed information about the IP, including Whois data and reputation.
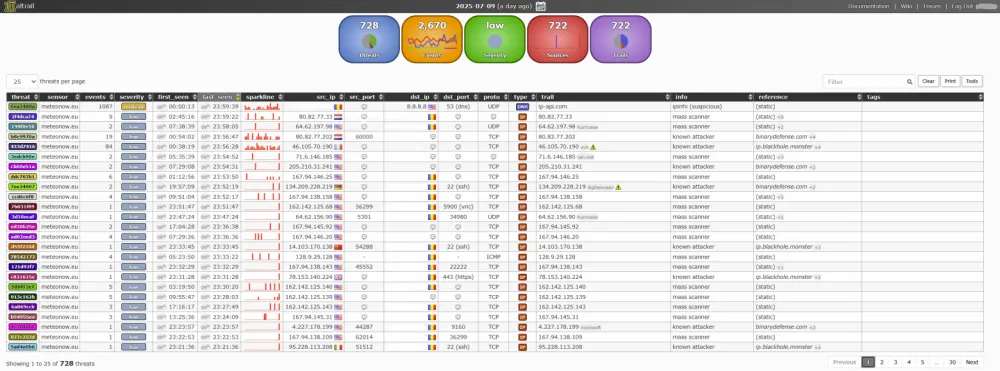
What to look at:
Events: Real-time event feed.
Source IP: The IP address from which suspicious traffic originated.

Threat: How serious the threat is (on a scale from 0 to 100).
Info: The most important part. Here you will find what the IP address is suspected of: (malware), (scanner), (tor), (botnet), etc.
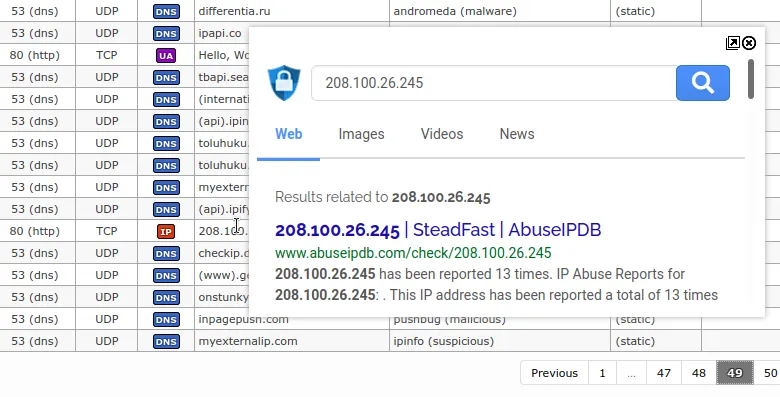
Clicking on an event will give you detailed information about the IP.
Honest Compromise Rule: What to Keep in Mind
Maltrail is an incredibly useful tool, but it’s important to understand its place.
It’s an IDS, not an IPS. Maltrail detects, but does not block traffic by default. It’s your alarm system, not an automatic turret.
False positives are possible. Sometimes, IP addresses from large services like Google or Cloudflare get listed. Don’t panic and ban them right away. Look at the context.
Ideal for pet projects and small servers. It’s very lightweight, hardly consumes resources, and is easy to set up. For protecting corporate giants, you may need "heavier" solutions.
Conclusion: The Fortress Has Gained Vision
Congratulations! Our journey continues. We’ve not only built the walls, but we’ve also set up guards on them. Now, our fortress is not just protected from direct attacks, but it is under constant surveillance. We’ll know if someone tries to sneak in "quietly".
And now an open question to the community: What other lightweight IDS/IPS do you use for your projects? Maybe there's something more interesting and functional than Maltrail for small servers? Let's share our experiences in the comments


Write comment