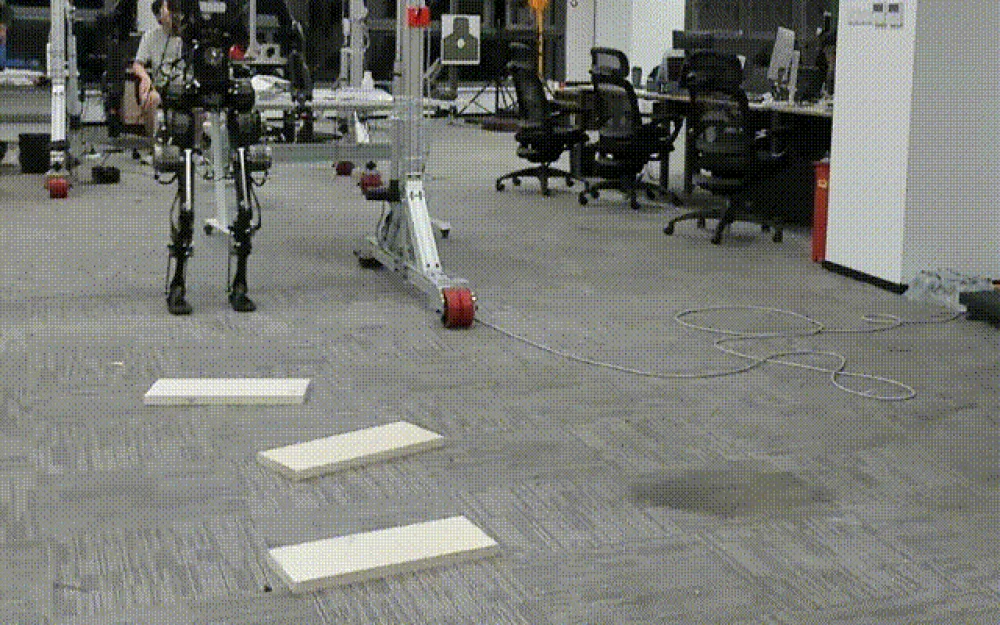
- DIY
- A
Assembling a Humanoid Robot with OpenLoong: Notes of a Java Developer
Hello, my name is Ashot Agabekov. I'm a Java backend developer. My main professional areas are backend development, architecture, integrations, microservices, databases, observability, and production systems.
In this article, I want to talk about my pet project for free time - an attempt to assemble a humanoid robot based on the OpenLoong project.
OpenLoong is a robotic project by Chinese engineers.
The project includes open-source 3D models of hardware, circuitry, and software. Essentially, everything needed to create a modern robot like Unitree.
I'm assembling the robot based on this project. I'm not a robotics engineer by profession, nor am I a laboratory employee or a representative of a company that develops industrial robots. I'm a Java developer who became interested in testing myself beyond the familiar backend world: taking a complex engineering system and gradually going through the path from 3D models and printing parts to mechanics, actuators, electronics, control, and AI layer.
For me, this project is a hobby, engineering practice, and a way to improve system thinking. In typical backend development, we assemble systems from services, queues, databases, contracts, retries, monitoring, and infrastructure. In robotics, it's similar, but some "services" are made of plastic, motors, fasteners, wires, and bearings. Plus, it's always useful for any programmer to improve fine motor skills after mental work.
And the most unpleasant thing: if you can look at the stack trace in code, then in hardware, the stack trace usually looks like "part didn't fit", "loosening", "hole didn't match", "need to reprint".
Why a Java developer got into robots
I've been working in development for many years, and I've always been interested in how software systems can enter the physical world. Not just an API that returns JSON, but a system that can see, hear, move, and interact with objects.
In this sense, a humanoid robot is a very interesting engineering challenge. It brings together several disciplines at once:
mechanics;
3D modeling;
3D printing;
electronics;
motors and gear reducers;
motion control;
computer vision;
speech recognition;
AI and agent scenarios;
complex system architecture.
As a backend developer, I find it particularly interesting to view a robot not as a "tin doll" but as a complex distributed system.
There is a mechanical layer.
There is an electrical layer.
There is a control layer.
There is a perception layer.
There is an AI layer.
There is user interaction.
There are safety and predictability requirements.
So this is no longer just about "printing the chassis". It's an architectural task where you can't think only locally.
The most interesting thing is that the OpenLoong authors have published not only 3D models but also hardware and software materials. For anyone interested in robotics, this is a very strong starting point.
What it looks like in the project
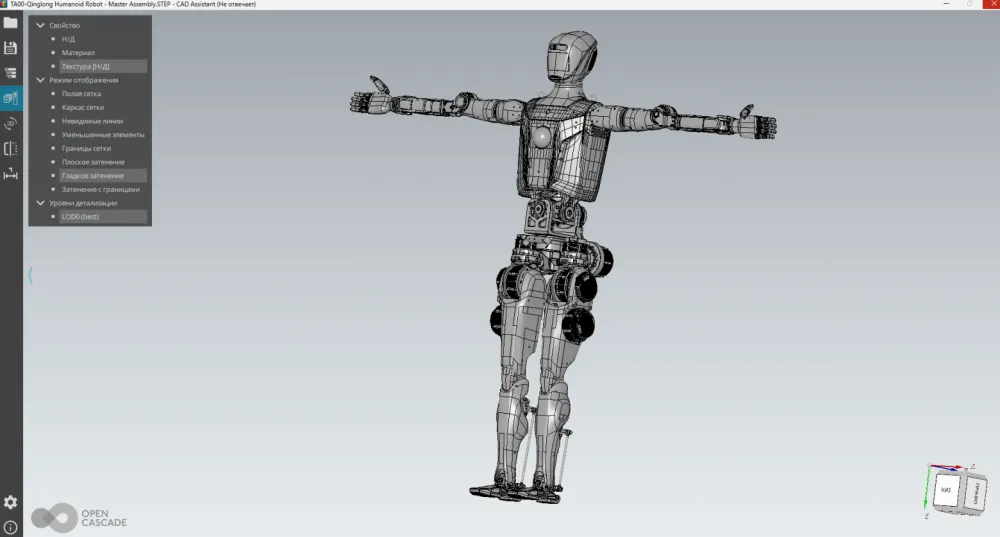
I'll leave the link to the 3D assembly below
My first steps
Naturally, I bought a 3D printer to start with.
I got an Elegoo Centauri Carbon (this is not an ad), the guys did a great job making it good quality and affordable, kudos to them and best of luck to them. When it arrived with a broken glass panel due to shipping, they politely sent a new one, for which I thank them!
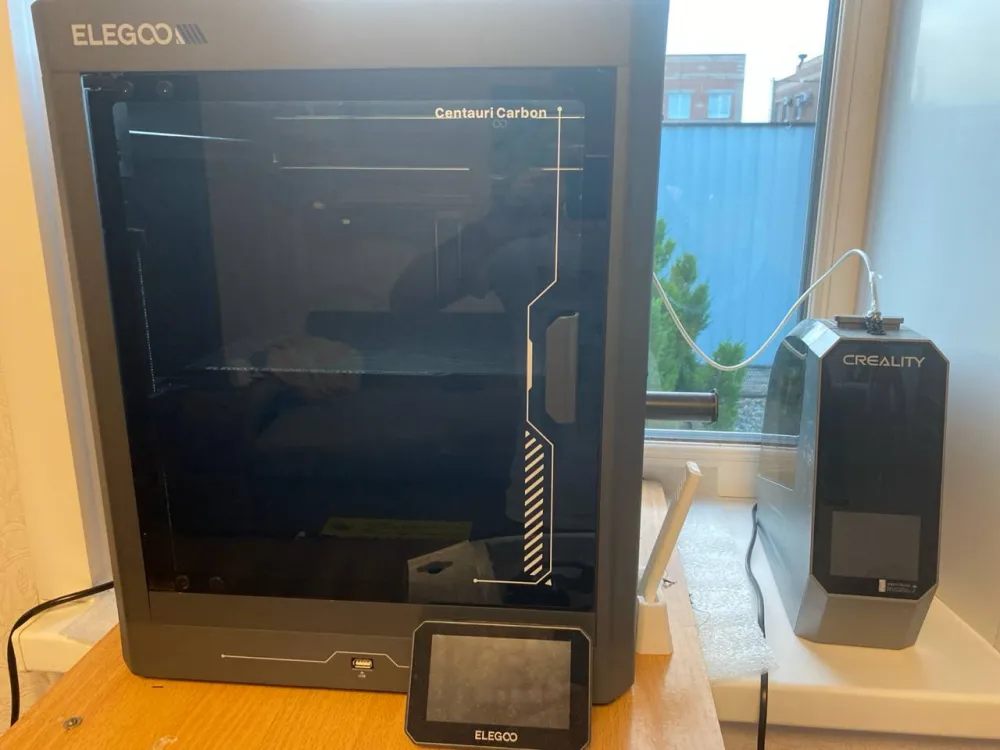
And started printing spaceships... I made my first print. I had never used a 3D printer before in my life. But I think I managed to get the hang of it.
As I mentioned earlier, I based my work on OpenLoong, an open-source project for a full-size humanoid robot.
I liked the core idea: instead of trying to come up with the geometry of the entire robot from scratch, take an existing open-source base and go through the practical process of assembling it with your own hands.
But it's important to understand: an open-source project does not mean "download the files, press a button, get a robot".
In practice, there are still a lot of questions:
how to prepare parts for printing;
how to orient them on the table;
where to place supports;
which parts are better to print first;
what to do if the geometry is not suitable for a specific assembly;
how to fit mating surfaces;
how to reinforce weak areas;
how to place electronics later;
how to move from plastic to actuators and control.
Sometimes it was necessary to cut parts in 3D so that they fit on the printer table and then glue them.
Overall, OpenLoong is not a “ready-made constructor” for me, but a starting point for an engineering pet project.
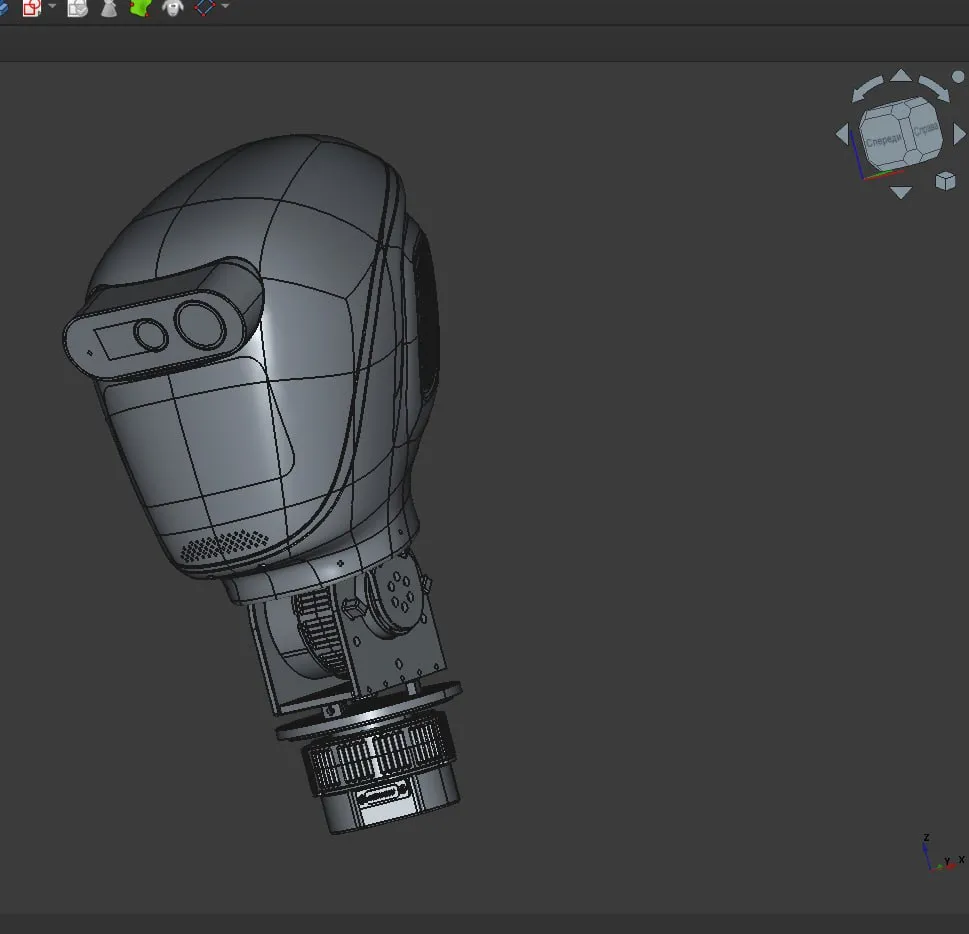
The initial plan looked too optimistic
When I just started, the plan seemed quite understandable:
Print the head.
Assemble the shoulder block and part of the body.
Move on to the neck and actuators.
Start working on the arms.
Add electronics.
Figure out motor control.
Connect speech recognition and AI.
And of course, the process "grounded" me. Everything is more complicated than planned:) There are literally several separate worlds.
The head is already a separate stage.
The shoulders are a separate stage.
The neck is a separate stage.
Actuators are a separate major engineering topic.
The arms are a standalone project.
AI is already an upper layer that makes sense to add only when the lower layers are stable enough.
Head: the first major stage
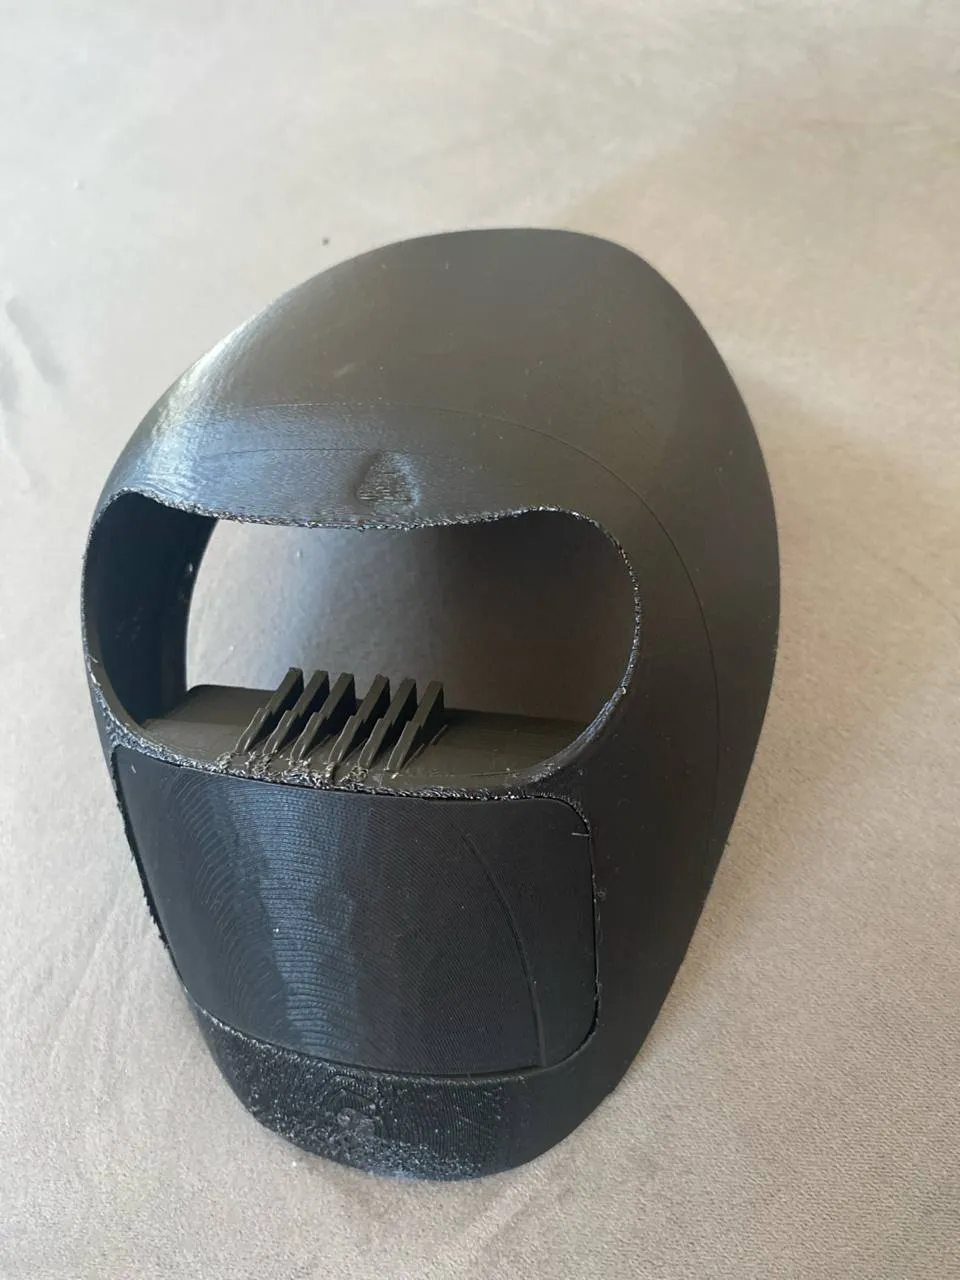
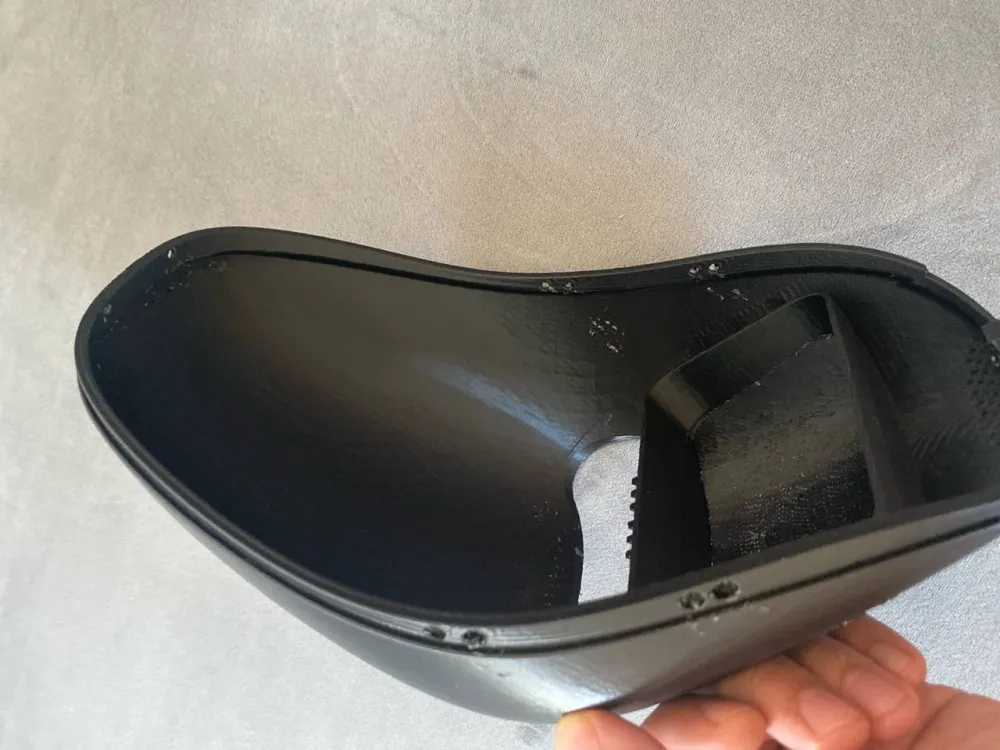
The head became the first major stage.
In renders and CAD, everything looks beautiful. But when you start printing a physical part, questions appear that are not visible in the picture:
how to correctly position the part on the table;
where supports are needed;
how much plastic will be used;
how long the part will take to print;
whether it will warp;
how to remove supports later;
how accurately the holes will match;
whether the head body will assemble normally.
I decided not to bring the first version of the robot to a perfect appearance. Without polishing, without painting, without trying to make it “like on display” right away.
A character comes to mind
It was a deliberate choice, and chasing perfection would be pointless, since I assumed anything printed could end up in the trash at any second.
It's easy to get stuck on cosmetics in a pet project: sanding, painting, reprinting, improving the appearance. But if you do that too early, you can waste months without even testing the mechanics.
So my principle was simple:
Geometry and functionality first, beauty later.
I printed the head with PLA, and for all the rest of the robot I only used PETG CF and regular PETG. I didn't touch PLA anymore, it's very fragile.
When the "eyeballs" appeared, the project started to feel different
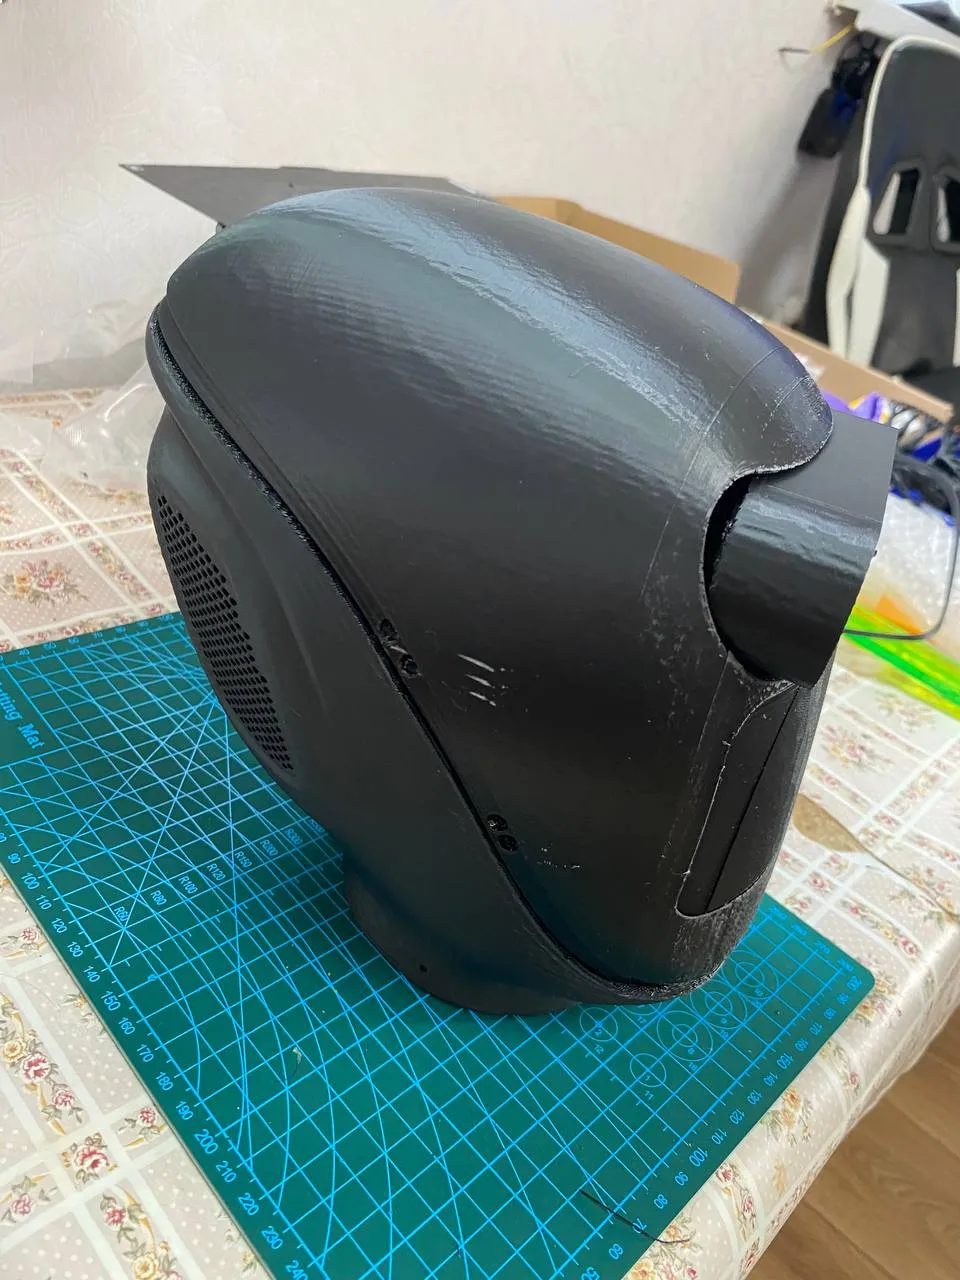
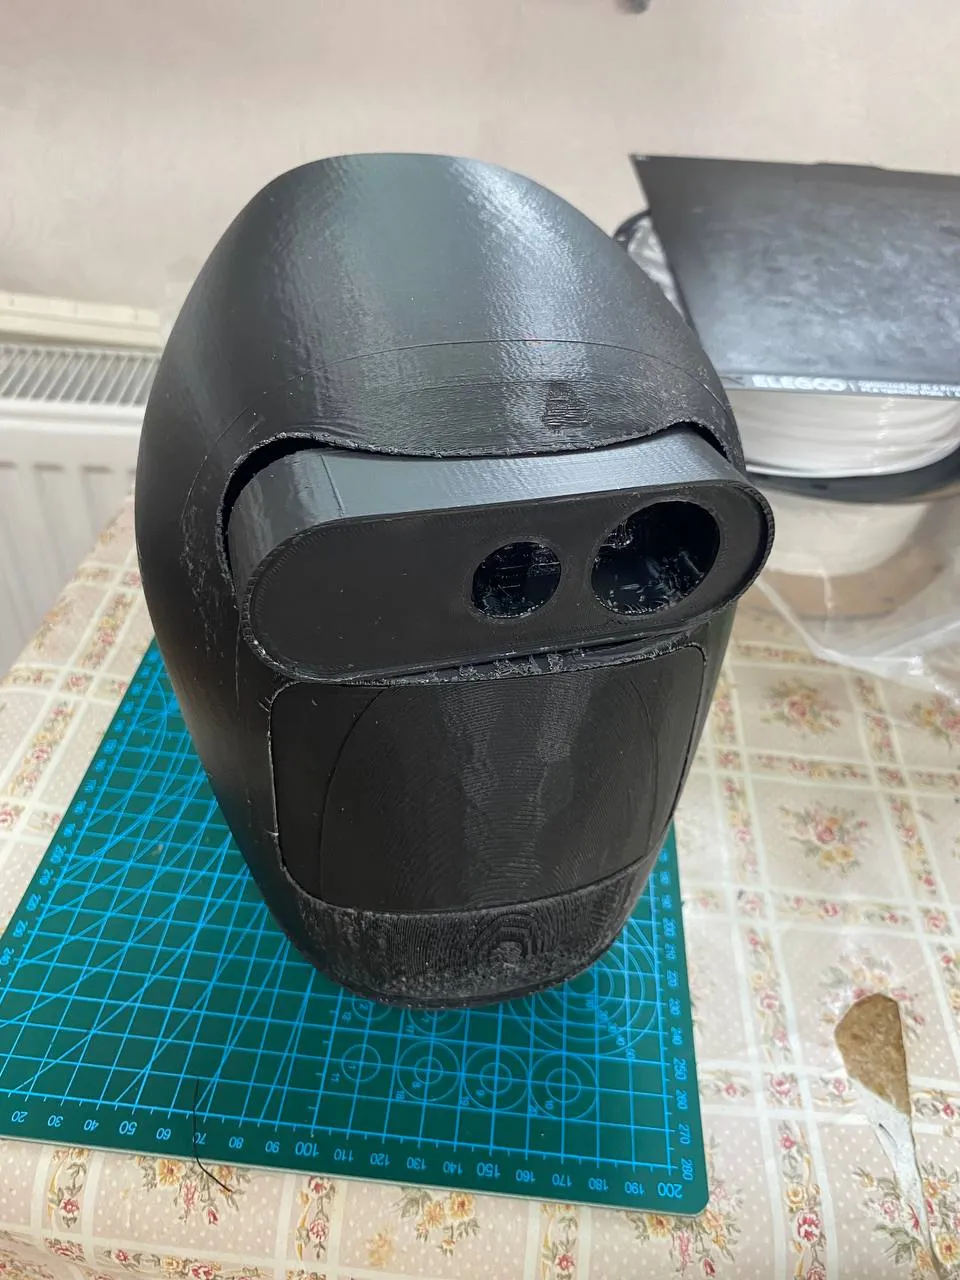
At some point I printed the face part of the head with holes for cameras or sensors.
And visually, the project stops being an abstract assembly. It starts to look like a future system.
Although technically there's still almost nothing inside: no proper vision, no servos, no electronics, no control system. But the external appearance is already taking shape.
Yes, at this stage everything looks more like a rough engineering prototype than an exhibition-ready robot. But this is exactly what the early stage of DIY assembly looks like: checking geometry is more important than painting and pretty renders.
I had to learn Fusion 360 not for beauty, but for the project's survival
I'm a programmer. My usual environment is IDEs, Git, logs, profilers, Docker, CI/CD, databases, and services.
But in robotics you quickly realize: you can't move forward properly without CAD.
You need:
adjust parts;
change fasteners;
design adapters;
make mounting seats;
check clearances;
reinforce weak areas;
understand how the part will be printed;
think about how to access the fasteners later.
That's how I started mastering Fusion 360.
At first it seemed simple: "I just need to tweak the part a little bit".
Then it turned out that this "little tweak" requires understanding sketches, constraints, planes, bodies, components, operation history, export to STL/STEP, and the link between the model and actual printing.
For me as a developer, this was similar to shifting from "I'll fix one line of code" to "I need to understand the module architecture, dependencies, contracts and runtime behavior".
The main takeaway: CAD is not about drawing pretty shapes. It's a way of thinking about assembly.
In programming, a module can sometimes be considered almost in isolation. In mechanics, a part almost never exists on its own. It is connected to adjacent parts, fasteners, load, print orientation, tool access and future maintenance.
Body and shoulders: when the project started looking more like a robot
After the head, I moved on to the body and shoulder block.
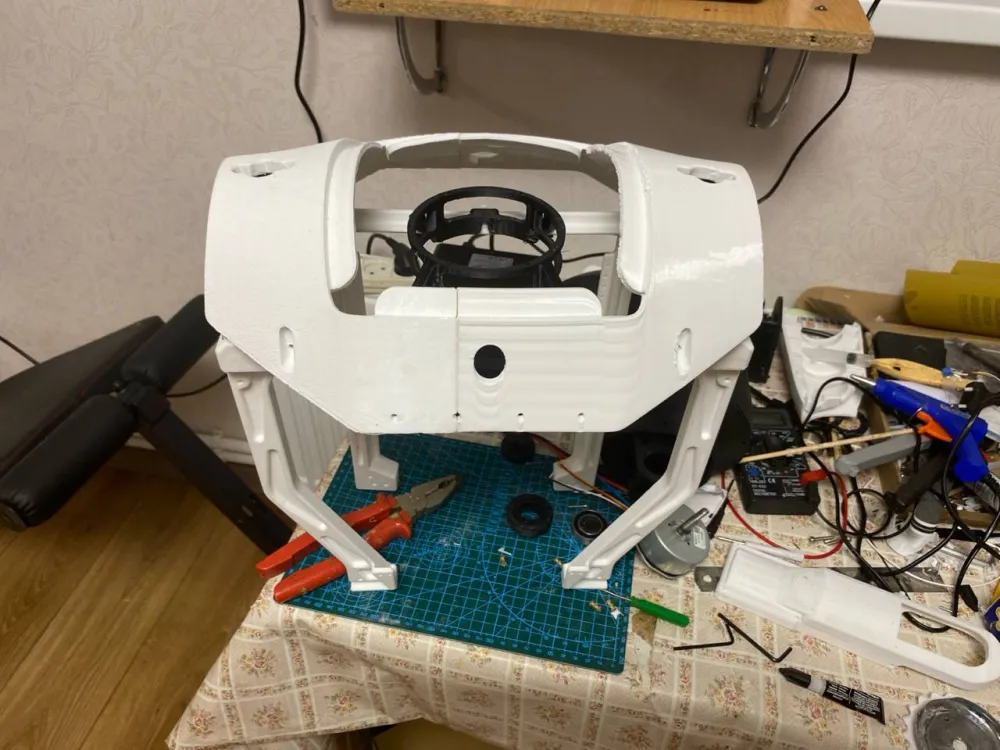
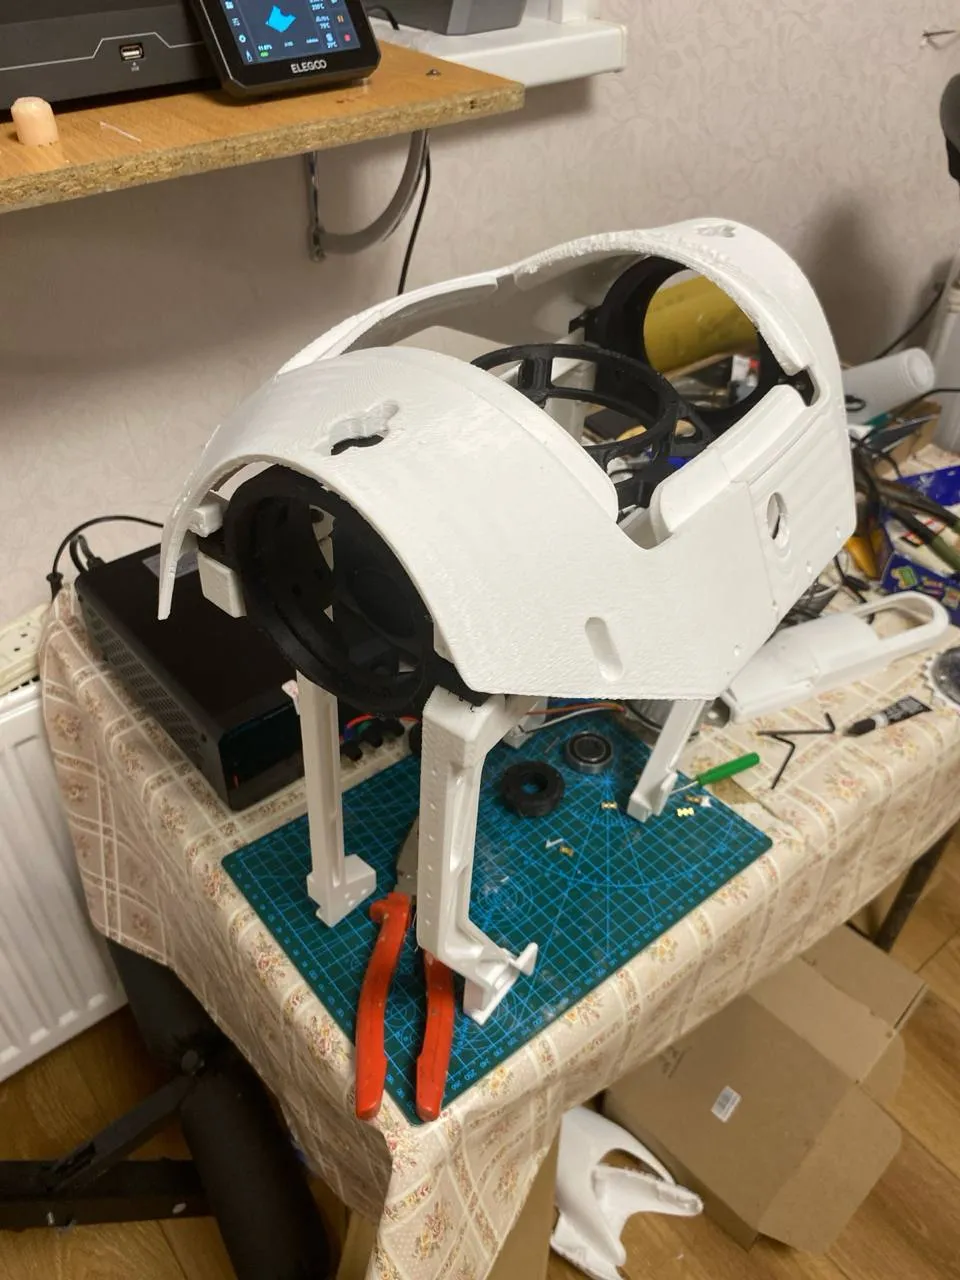
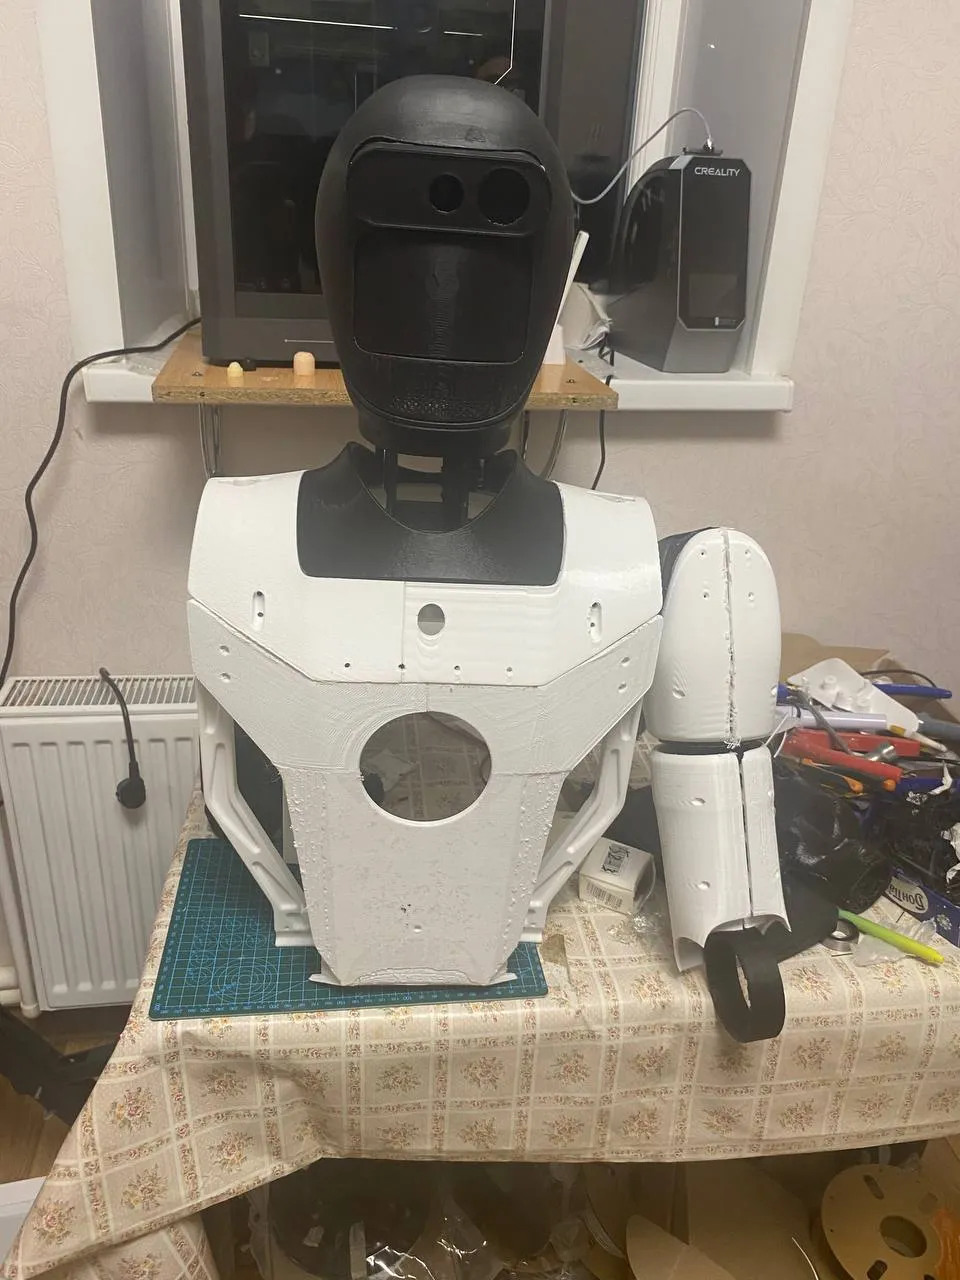
This is a whole different scale. Large white parts, frame, mounting seats for shoulders, neck mount, fasteners, overall geometry of the upper body.
The photos show that the stage is still rough. Print layers are visible in some places, temporary assembly in others, and some parts are just placed for testing. But this is exactly what a real DIY project looks like, it seems.
First you're happy that the part printed at all :-)
Then you're happy that it roughly fits in place.
Then you realize the fastener needs to be redesigned, because in practice it gets in the way of another part.
And this is where programming experience helps again. I approach this as iterative development. Not "design perfectly once", but move through versions, checks, mistakes and improvements with flexibility.
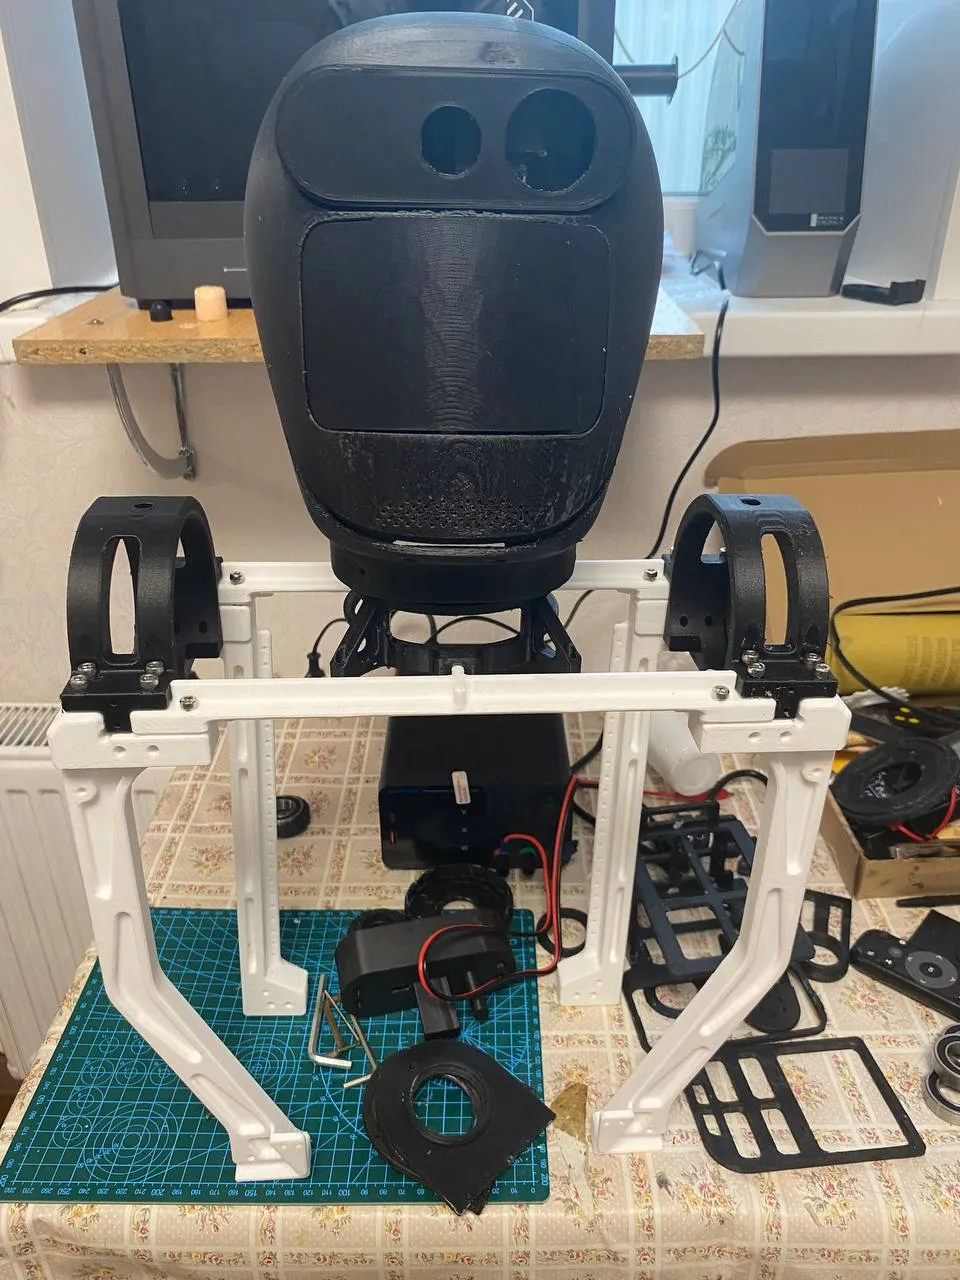
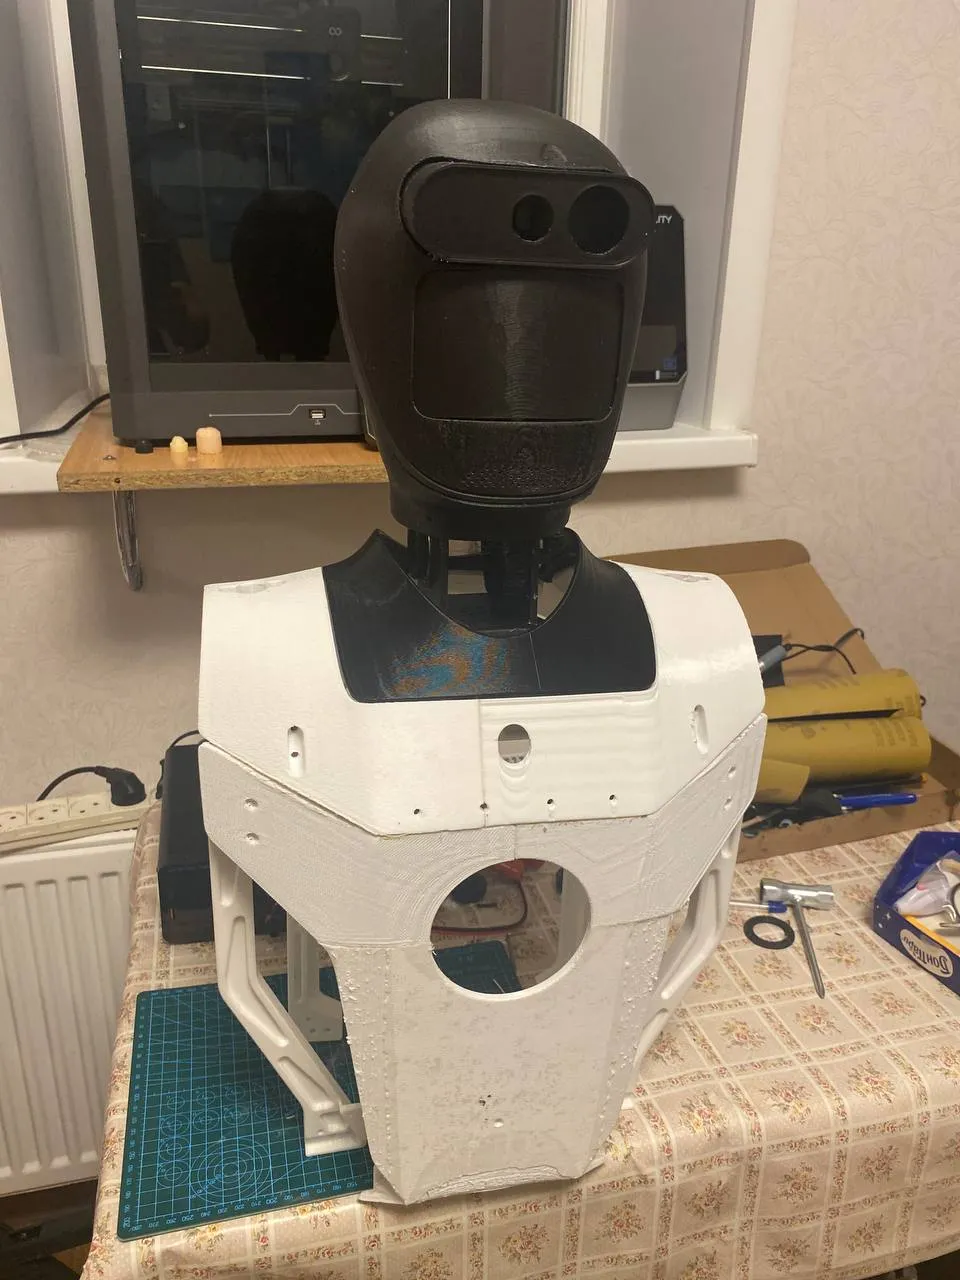
When I temporarily placed the head on the robot body, for the first time it started to look like a single integrated system.
It still has no proper neck, no functional kinematics, no arms, but the development direction was already clear.
Neck: a small component that quickly becomes critical
The neck seems like a minor part compared to the body or arms. But for a humanoid robot, it is a crucial element.
The head should not just sit on top. It needs to:
be securely held;
be able to move;
not catch on the body;
have no excess play;
leave space for wiring;
withstand load;
be serviceable.
At an early stage I simply mounted the head on the body for demonstration purposes. This was a temporary prototype to check proportions and figure out the next steps.
We often do proof of concept work in software. The same approach works for hardware, only the end result can be touched with your hands.
Everything looks much better once assembled:)
Arms: a separate sub-project within the project, and a total fiasco
The next major focus area was the arms.
A humanoid robot arm is an extremely complex component. Even if you don’t build a full five-fingered hand right now, you still have to account for:
the shoulder;
the elbow;
the forearm;
mounting points;
force transmission;
motors;
gearboxes;
cables;
weight limits;
part durability.
But actually this was a pleasant moment. Lying on the floor was no longer just a pile of plastic, but an almost fully assembled arm. Still, I knew in my head that there were a huge number of factors to account for, and only time would tell if this would work out.
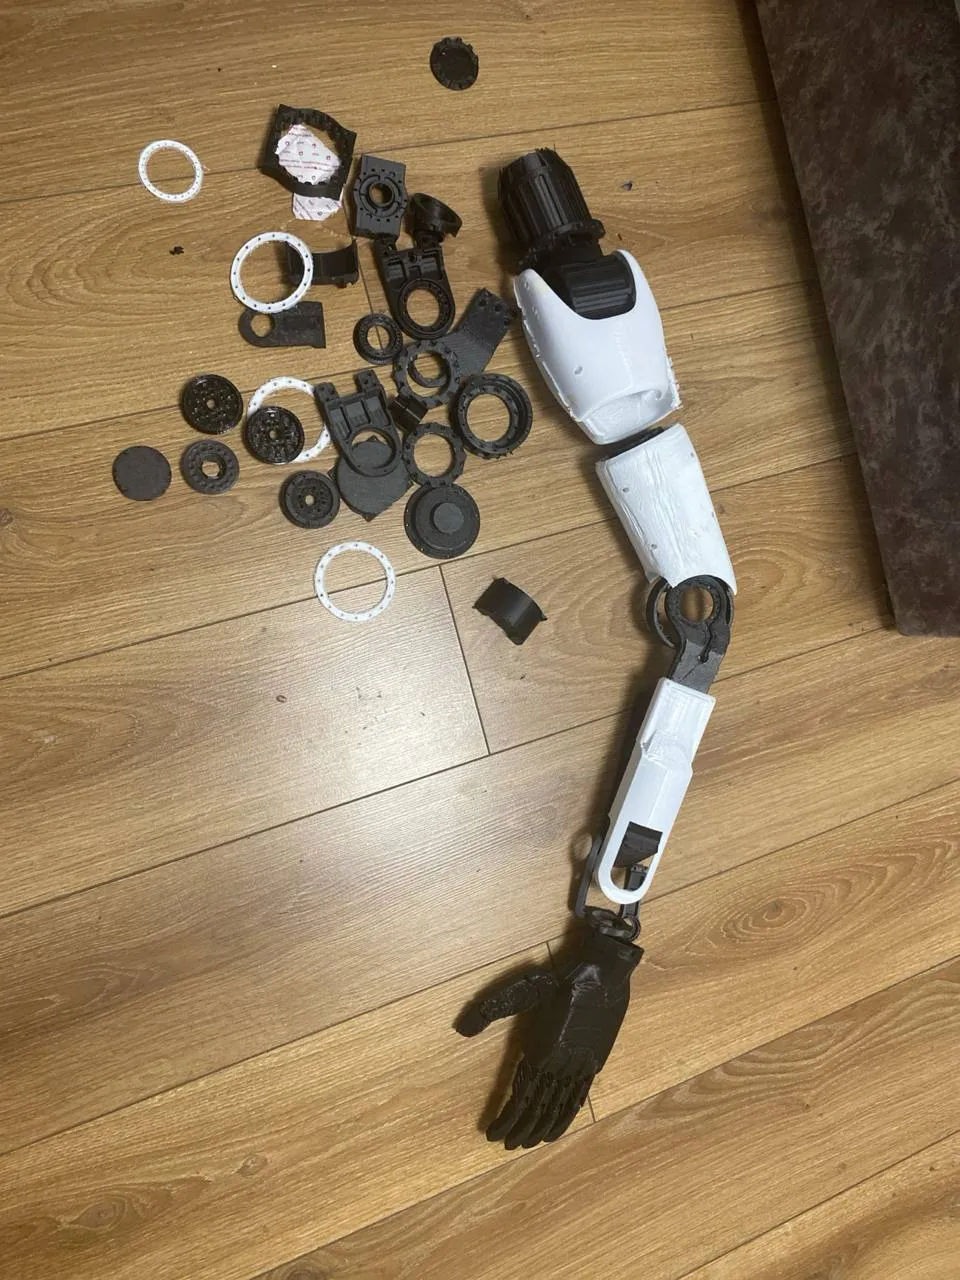
The limitations of 3D printing, plastic flexibility, and weight are felt especially acutely when working on arms.
You can print the desired shape. But if a component needs to function under load, you need to approach the problem from a completely different angle:
plastic strength;
layer direction;
bushings;
bearings;
clearances;
wear;
fasteners;
maintenance access;
how all this will move after assembly.
That is, "looks like a hand" and "works like a hand" are two different stages.
And the fact that I printed it, naively, does not mean at all that in reality it will work as it should.
In order to lift this arm weight, you need to have a) a powerful motor b) good heat dissipation so that the motor does not overheat. In my case, I think the arm will have to be redesigned.
Actuators and Motors: The Place Where Everything Gets Serious
The body, head, and hands look decent. But the real robot begins where actuators appear, and before that it's just a plastic trinket.
At this stage, I started to deal with BLDC motors, reducers, control schemes, motor control electronics, and best practices for drives.
And here it quickly becomes clear why humanoid robots are expensive.
Plastic can be printed at home.
Fasteners can be ordered.
Fusion 360 can be mastered.
But quality drives, reducers, position sensors, drivers, power supply, and control - this is already a serious part of the budget and complexity.
For now, this is not a ready-made industrial system. But I am interested in understanding the physics of the joints, not just buying an expensive ready-made actuator and bolting it on.
For me as a developer, this is similar to the difference between 'connecting a library' and 'understanding how it works inside'. Sometimes you can use a ready-made solution. But if you want to really understand the system, you have to go deeper.
On Electronics
Trying to do something with the 5010 360kv motor (but the motor is weak, it will do for practice)
As a controller, I took: ODrive3.6
Possibly, as I manage to deal with the electronics, I can make a normal reducer, I plan to use Nylon 6 as plastic.
What Has Already Been Achieved
At the current moment, I have:
a printed and assembled head;
a front panel with holes for cameras or sensors;
a part of the body;
a shoulder block;
neck elements;
the first details of the hands;
elbow mechanics;
understanding how to further move on to motors and control;
first practical skills in Fusion 360;
experience printing large parts and fitting them;
first steps in motor control electronics.
This is not yet a robot that walks around the room and brings tea. But it's no longer a fantasy at the level of "someday I'll build a robot", although time will tell... maybe it's just a hobby...
But overall, it's a physical construction that is gradually growing.
What turned out to be the most difficult
The most difficult thing is not some one detail.
The most difficult thing is that a humanoid robot forces you to keep many different disciplines in your head at the same time.
In ordinary backend development, you can be a strong Java developer and not touch the frontend, hardware, or mechanics for quite a while.
It doesn't work that way here.
You change the mount - it affects the assembly.
You change the motor - it affects the power supply.
You change the gearbox - it affects the geometry.
You change the body - it affects the wiring.
You add a camera - you need space, power, mounting, software, and data processing.
The robot quickly punishes local thinking.
And this is probably the most useful thing about such a pet project. It teaches you to look at the system as a whole.
Further plan
Next, I want to move in several directions:
Complete the body and neck mechanism.
Continue working on the arms.
Figure out the actuators and BLDC motors.
Assemble the basic control electronics.
Add cameras and microphones.
Integrate speech recognition.
Start experimenting with the AI layer.
Gradually move from a static figure to a robot that can receive commands and perform simple actions.
I don't think I can afford expensive AI video accelerators, I can just try connecting my Orange PI to the model https://deepmind.google/models/gemini-robotics/. The Google model can provide coordinates, see, hear – act as a full-fledged low-cost "brain"
Why I decided to write about this on Habr
First, I want to show a real engineering journey without the illusion that everything works out on the first try.
Second, I think such pet projects are also useful for professional development. Even though my main job is Java backend, the experience of building a robot forces you to think broader: about architecture, limitations, dependencies, fault tolerance, and the interaction of different system layers.
Third, this article may be useful for those who have long wanted to try robotics but think "this is only for laboratories". No, you can start much simpler. With one part. With a small assembly. With a head, an arm, a rotating platform, or a simple manipulator.
I wanted to highlight the great open source project OpenLoong from Chinese engineers who are happy to share their valuable developments with the world. If anyone can go further than I did, share your results, I will be glad to see your successes. Below I provide links to the robot's source code, maybe our engineers will create something great based on its developments.
Instead of a conclusion
I am still at the beginning of the journey. I don't have a finished humanoid robot that walks, talks, and helps around the house.
There are printed parts, a workbench, fasteners, Fusion 360, a 3D printer, electronics experiments, first steps in mechanics, and a huge desire to eventually bring this to a working system.
If you're interested in robotics, don't wait for the perfect moment. Take a small assembly, open CAD, print the first part, make mistakes, redo, and move forward.
Robots don't appear out of thin air.
Someone assembles them by hand.
Why not try too? Good luck to everyone!

Write comment