- DIY
- A
It's Getting Hot: We Explore the Peltier Element and Build a Refrigerator
Hot summer is approaching, so various methods for cooling food, appliances, and even indoor air are becoming highly relevant. Of course, you can use standard mains-powered compression refrigerators and air conditioners. But are there other ways to produce cold?
Let's leave aside cooling bottles in running water, wrapping them in a wet towel and placing them in the wind, as well as the misconception about cooling milk with frogs. What if you need to cool a can of drink right on your desk? Or, conversely, a microcomputer, a powerful transistor of the output stage of an amplifier? Conventional compression refrigerators can be used, but due to their size, they cannot be placed on a desktop.
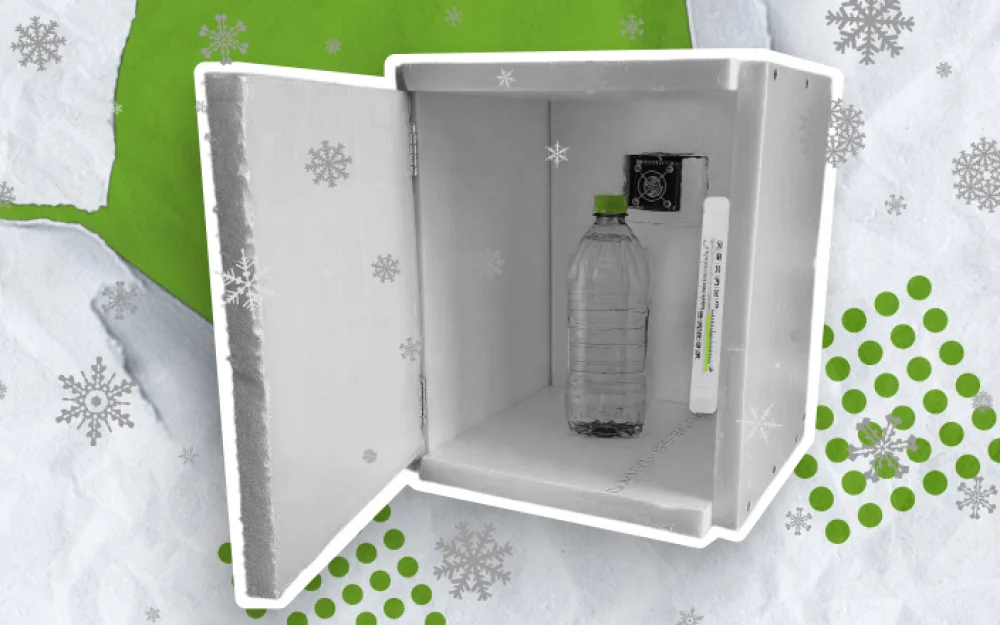
Armed with a Peltier element with radiators and fans, I made a desktop refrigerator from a thermal insulation plate purchased at a hardware store in half an hour. In about an hour or two, it was able to cool the contents down to 11 °C.
What are Peltier elements, and what can they be used for besides small refrigerators?
The invention of the Peltier element
In the distant 1834, French watchmaker Jean Charles Athanase Peltier discovered the thermoelectric effect, which was named after him - the Peltier effect. By passing an electric current through a circuit of copper wires and bismuth, Peltier found that one junction of metals heats up, while the other cools down, depending on the direction of the current.
This effect received theoretical justification in 1838 by Russian physicist Emilius Lenz. William Thomson (Lord Kelvin) in 1855 linked this effect to the Seebeck effect.
The Seebeck effect is the generation of an electromotive force (EMF) at the ends of a thermocouple - a series-connected heterogeneous conductors, the contacts between which are at different temperatures.
Thermocouple
If you are familiar with thermocouples, you know that temperature sensors are built on their basis. The junction of dissimilar conductors is placed in the measured medium
Temperature is determined by the magnitude of the resulting thermoelectric EMF. A thermocouple can be made based on alloys of chromel and alumel.
Chromel is an alloy of the following elements and impurities — chromium 8.7-10%, nickel 89-91%, silicon, copper, manganese and cobalt. Alumel consists of nickel (93-96%), aluminum (1.8-2.5%), manganese (1.8-2.2%), silicon (0.8-1.2%).
An example of a thermocouple is shown in Fig. 2.
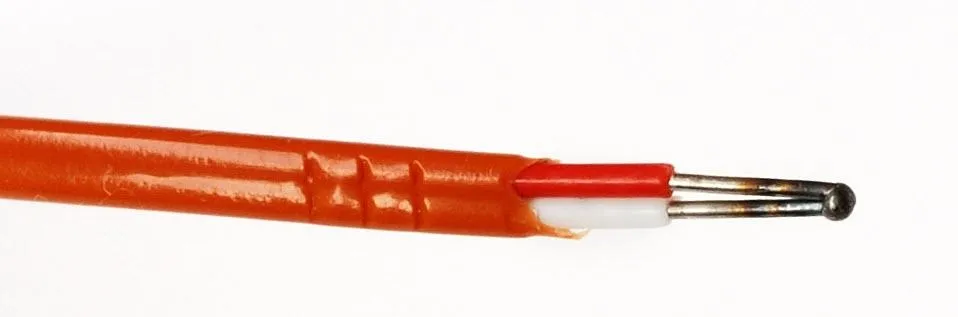
As a child, I made thermocouples myself, twisting and fusing the twist point of nichrome and copper wire. I took nichrome wire from a variable resistor, and copper wire from a disassembled transformer from an old TV. I fused it on a gas stove burner. To test such a thermocouple in operation, I connected it to a microammeter and heated the junction point with a lit match.
Today, you can buy a thermocouple on a marketplace.
The Peltier effect is the reverse effect: pass current through a circuit of two different materials, and one junction will start heating up while the other cools down.
Emergence of industrial Peltier elements
The Peltier effect works weakly on metals — this is insufficient for industry. However, at the turn of the 1920s–1930s, Soviet theoretical physicist Yakov Frenkel predicted the possibility of enhancing the effect in semiconductors. The idea was implemented by a group led by academician Abram Ioffe at the Leningrad Physico-Technical Institute (LPTI).
In 1942, the TG-1 thermoelectric generator, called the “Ioffe Partisan Kettle”, was created. It was the first example of industrial use of the Peltier effect. The kettle was capable of outputting 10 W of power when heated over a fire, which was enough to power an army radio station. This and other thermoelectric generators are described in the article “History of the Creation of the Thermoelectric Current Generator”. There you will find photos of thermoelectric generators operating from a kerosene lamp and a primus stove.
Today, Peltier elements are used in compact coolers. With their help, you can even cool radio components mounted on a circuit board — powerful processors, laser diodes and high-frequency components. Such coolers have no moving parts or refrigerant — but the hot side of the element must be cooled.
Design of the Peltier element
If you look at a Peltier element, it is a small plate to which two wires are connected — red and black (fig. 3).
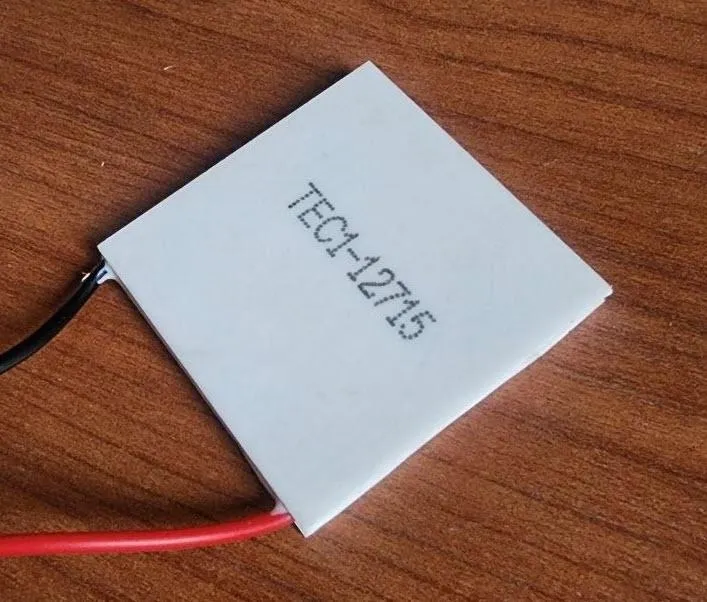
If you connect the red wire to the positive terminal of the power supply, and the black one to ground, a very interesting phenomenon will occur. One side of this plate will heat up, and the other will cool down. Heat will be “pumped” from one side of the plate to the other.
But don’t rush to turn on the power!
Power supply and cooling
Even if the element is rated for 12 V, it will burn out instantly if the hot side is not cooled. If it overheats, the solder that connects the internal conductors melts — and the module is done for.
To start, supply 2 V to the element from a laboratory power supply. A current of about 0.5 A will flow through the module — and in just a few seconds, if you pick up the element, you will feel the temperature difference between the two sides.
Ready-made assemblies are available for sale: a Peltier element plus two radiators with fans (fig. 4).
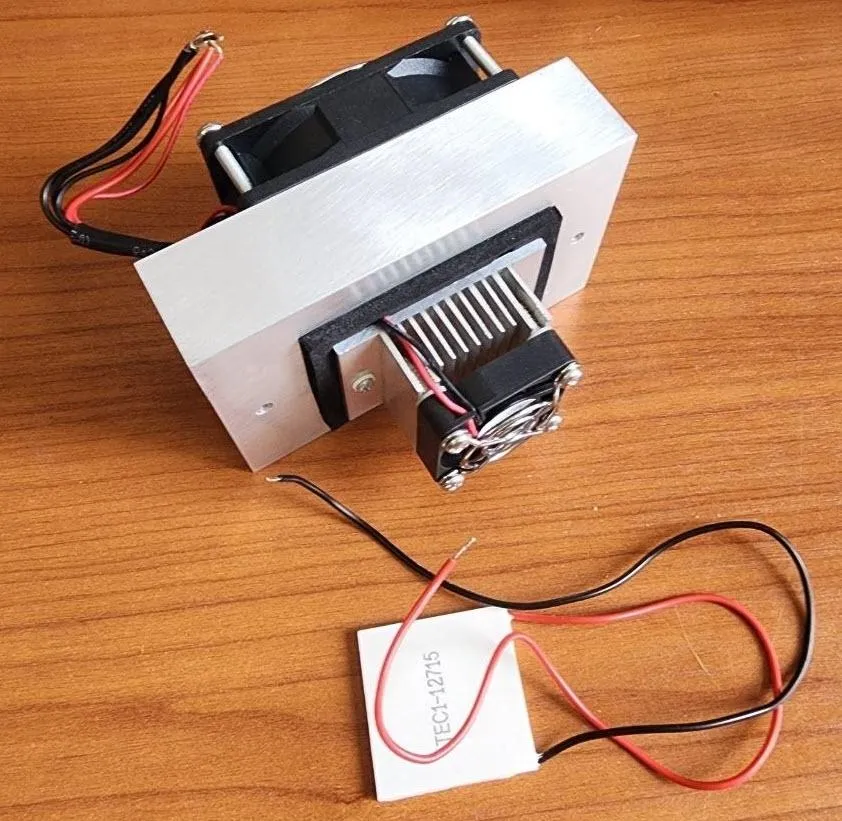
The Peltier element is tightly clamped between a large and a small radiator — and thermal paste is applied to the element plates for good thermal contact.
During operation, the large radiator heats up, and the large fan blows hot air off it. The small radiator cools down, and the small fan directs cold air into the cooled space.
This is exactly the type of unit I used — the refrigerator will be covered later. For now, I'll just say this: it consumes quite a lot of energy. At a supply voltage of 12 V, the current exceeds 4 A, and the power consumption is about 50 W.
If you need more intense cooling, buy dual and quad Peltier modules. In this case, you will need a fairly powerful power supply unit capable of providing 12 V at 100 W and 200 W power, respectively.
And yes, the fans are quite loud, but they are absolutely necessary.
Semiconductor cubes
If you look at the internal structure of the Peltier element tile, you can see a cellular structure (Fig. 5).
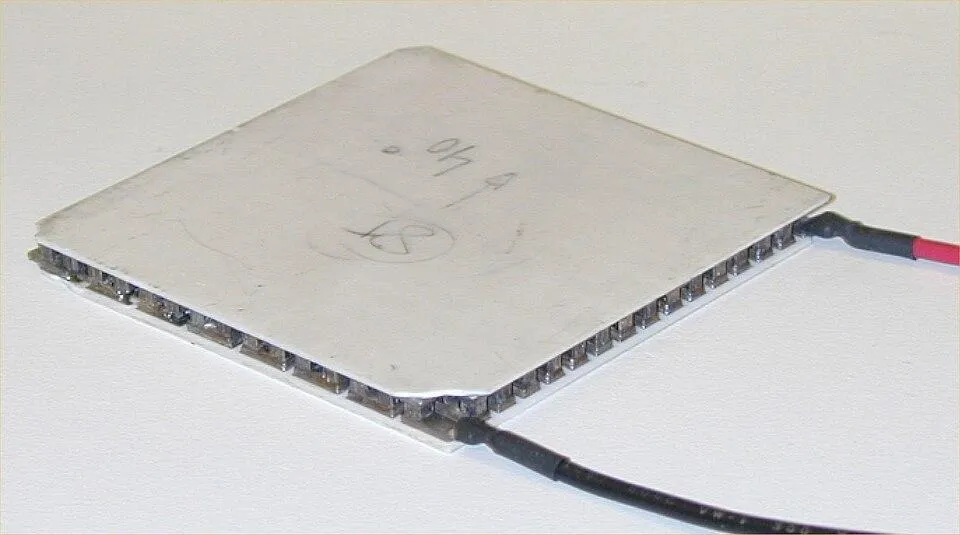
This structure is shown in close-up in Fig. 6.
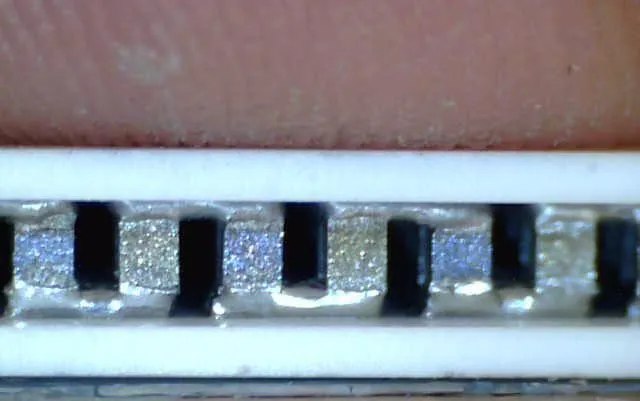
Inside the module are p-type and n-type semiconductor columns. They are connected in pairs with metal bridges and clamped between two ceramic plates
The ceramic substrates hold the entire structure and insulate the pairs from each other.
Bismuth telluride Bi2Te3 and solid solution of silicon-germanium mixture SiGe are used for semiconductor pairs. The material for a Peltier element must conduct electric current well while conducting heat poorly. This is achieved through the composition of materials and additives.
Modules with dozens and hundreds of pairs are available on the market — ranging from tiles smaller than a square centimeter to large industrial assemblies.
The ends of the columns are metallized and soldered to copper jumpers on ceramic substrates made of aluminum oxide. The ceramic substrates form uniform cold and hot sides of the Peltier element.
Typical household module: 12 V power supply, 5–6 A current, up to 50–60 W power.
How Peltier elements work
The operation of a Peltier element is based on the fact that electrons in different materials are at different energy levels. When charge carriers cross the interface between two dissimilar semiconductors, they find themselves in an environment with a different distribution of energy levels.
To reach equilibrium, carriers either take energy from the lattice or give it to the lattice. In the first case, the contact area cools down, in the second case it heats up. At the same time, the direction of the current determines which side will be cold. If you reverse the polarity, the cooler will become a heater.
A potential difference arises at the interface between p- and n-type semiconductors: it either helps the carriers cross or hinders them. Whether the interface heats up or cools down depends on this.
Domestic industrial Peltier elements
Domestic manufacturers have a huge range — categories for every taste and every application.
You will find cooling micromodules, as well as cooling devices and assemblies.
For example, one domestic manufacturer produces thousands of thermoelectric coolers, both standard and made to custom requirements. These can be miniature single-stage or large multi-stage modules for such application areas:
semiconductor lasers and superluminescent diodes;
X-ray and IR sensors;
photodetectors and photomultipliers;
avalanche photodiodes;
photoreceiving arrays;
charge-coupled devices
Cooling devices and assemblies are also manufactured, in which a thermoelectric cooler is installed in a standard or custom housing. These can be standard packages such as TO-46, TO-39, TO-8, Butterfly, DIL, and others.
You will find ready-made modules with heat sinks and fans, similar to the one shown in Fig. 4.
As you can see, Peltier elements are available, intended not only for home creativity and DIY projects but also for serious industrial solutions.
Marking of Peltier elements
The module's body has a marking — something like TEC1-12715. You can learn a lot from it.
The abbreviation TEC stands for Thermoelectric Cooler. You may also come across the domestic abbreviation TEM (thermoelectric module) or others, depending on the manufacturer.
The symbols TE indicate that it is a thermoelement. Following TE is a symbol indicating the size of the housing:
S — small housing;
C — standard size housing
The digit after the size symbol indicates the number of cascades or layers inside the module.
The next three digits are the number of thermocouples, and the last two are the maximum current in amperes.
Thus, the TEC1-12715 element is a single-stage module of standard size. It has 127 thermocouples, and the maximum current can reach 15 A.
As for the module's supply voltage, it is determined by the number of thermocouples. For 127 thermocouples, it is 16 V, however, manufacturers recommend supplying only 12 V for optimal efficiency.
The higher the current, the more powerful the cooling, and the more seriously you need to dissipate heat from the hot side, otherwise the module will desolder.
Find the exact specifications of the Peltier module in the manufacturer's datasheet corresponding to the device's marking. For example, the datasheet for the TEC1-12715 element can be found on this page.
Pay attention to the maximum operating temperature, maximum supply voltage and maximum current. Exceeding these parameter values may damage the module.
The tolerance for parallelism of ceramic plates is important for the quality of thermal contact. As for the specification of connecting wires, this parameter ensures that the connecting wires will not become a bottleneck when the module operates at full power.
In Russia, there is production of domestic Peltier elements and assemblies based on them with quite high power. The designations of these elements depend on the manufacturer. elements
Building a desktop refrigerator
The heat outside made me think it would be nice to quickly assemble a compact desktop refrigerator based on a Peltier element. It could be used to store water, juice, or anything else in a cooled state.
I chose the unit with a Peltier element, two radiators and fans that I already wrote about earlier (fig. 5).
Buying materials
To make the refrigerator, I bought a 20 mm thick Penoplex insulation board at a hardware store and cut it into pieces measuring 34 cm x 25 cm (three pieces for the side walls) and 25 cm x 26 cm (two pieces for the bottom and top). As for the door, one 30 cm x 30 cm piece is needed here.
I also took two door hinges, a box of 45 mm self-tapping screws and a segmental construction knife (fig. 10).

Assembling the refrigerator casing
You need to cut the board along a guide — a steel ruler or a thin square
To get a straight cut, extend the blade longer than the thickness of the board — and cut in several passes, without trying to cut through in one go.
Next, you need to cut an opening in the back wall to secure the Peltier module with fans. I fastened this module using screws (fig. 11).
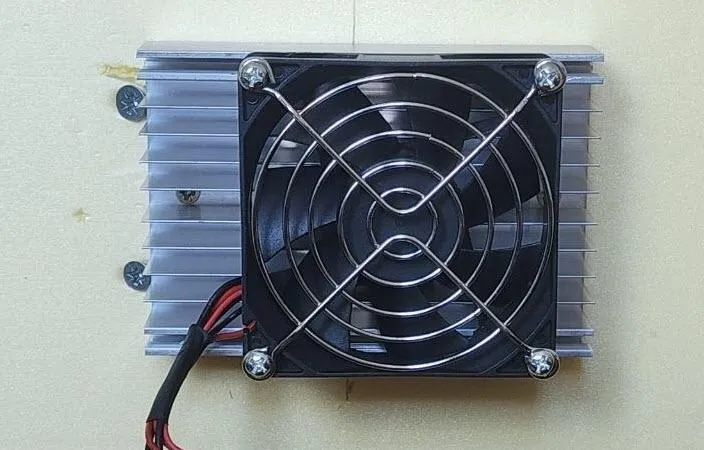
I put a regular outdoor thermometer inside to monitor the temperature.
Figure 12 shows the thermometer mounting. You can also see the radiator and a small fan on the "cold" side of the Peltier module.
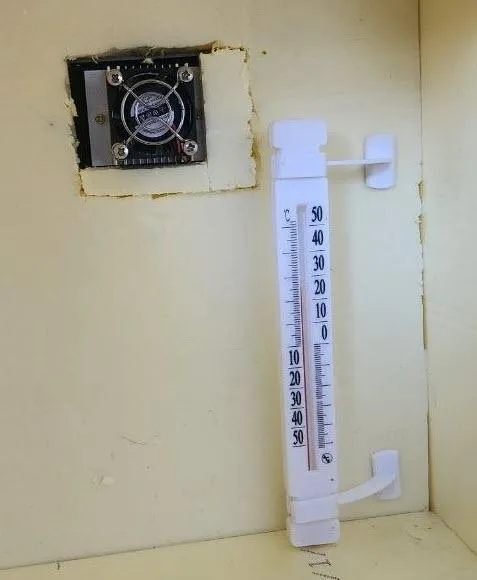
Before turning it on, the thermometer showed +25 °C.
Powering on the mini fridge
I connected the module and fans to a laboratory power supply and gradually increased the voltage to 12 V (fig. 13).
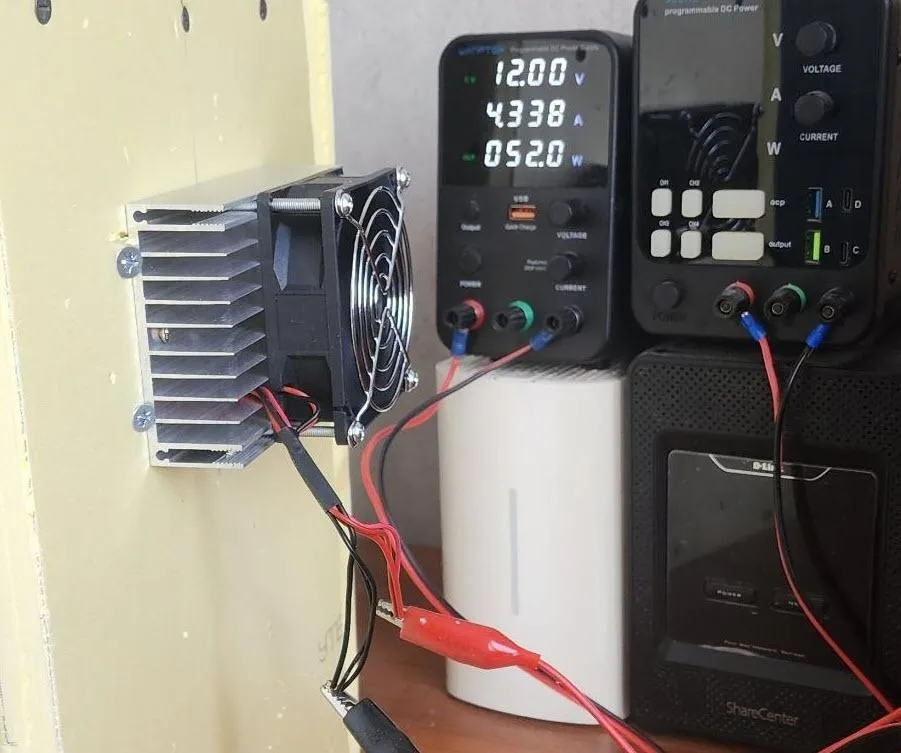
At 12 V, the mini fridge consumed 52 W. After about an hour, the temperature inside the fridge casing dropped from +25 °C to +11 °C.
For a box assembled in half an hour, that's pretty good. If you can overlook the buzzing of the fans, this desktop mini fridge is usable. And you'll have chilled drinks right at hand.
Improving the mini fridge
To improve thermal insulation, you can cover the casing with aluminum tape on both the outside and inside. I've also seen insulation boards for sale that already have one side covered with aluminum foil.
If the fridge needs to run 24/7 and maintain a set temperature, a simple power supply won't be enough anymore — you'll need a controller. Temperature sensors will also be required: one inside the fridge, one on each radiator, and one on the cold side of the Peltier module.
And another tip: to make the module last longer, don't power it with a power supply with high ripple, and don't frequently cut its power. A simple power supply based on a transformer, rectifier diode bridge, and ripple-smoothing capacitor may not be suitable for this power consumption level due to its ripple level.
The article “DIY Wine Refrigerator. Refrigerator based on a Peltier element” discusses a serious approach to creating a continuously operating DIY wine refrigerator built around a Peltier element. This refrigerator maintains the constant temperature required for proper wine storage. You can use ideas from this article to improve your own refrigerator.
You may also find the article “Peltier element” useful, which describes controlling a Peltier element using an Arduino microcontroller and a high-power field-effect transistor.
Thermoelectric generators
We connect a multimeter set to voltage measurement mode to the Peltier element and pour hot water on one of its sides (fig. 14). Voltage appears at the terminals — thanks to the Seebeck effect.
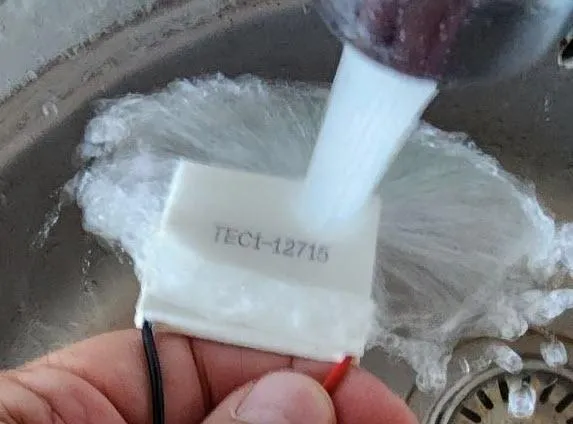
I got around 0.4 V — then I had to stop to avoid burning my hand.
Is it possible to generate electricity using a Peltier element and an ice cube?
It turns out it is possible. In fig. 15, I connected a multimeter to the Peltier element, then placed an ice cube from the refrigerator on top of it.
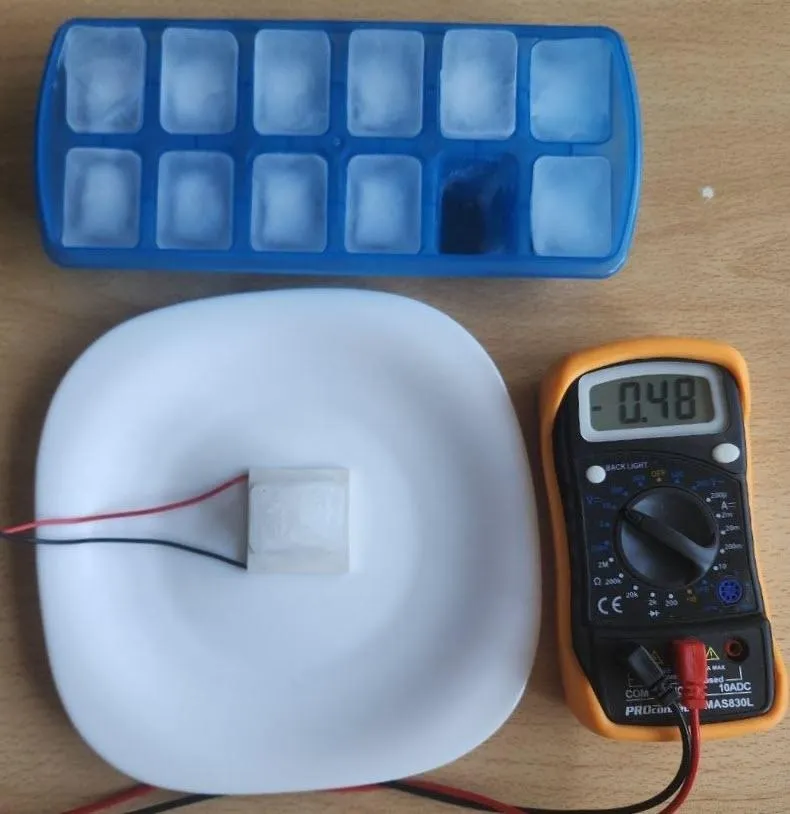
At room temperature, the voltage at the lower terminal was −0.48 V (the minus sign is because the polarity reversed compared to the previous experiment). As the temperature difference decreased, the voltage also dropped.
The operation of compact and quiet thermoelectric generators (TEG) is based on the principles underlying Peltier elements. Such generators provide autonomous power supply far from civilization. Earlier I already mentioned the TG-1 thermoelectric generator, the "Ioffe partisan kettle". Reindeer herders will find the "chumogenerator" useful, which generates electricity using steam from boiling water.
Today, thermoelectric generators are manufactured in a wide variety of types. They can utilize heat from fuel combustion, pyrotechnic flares, radioactive isotope decay, heat from nuclear reactors and solar collectors, as well as geothermal and aquatic heat. Heat generated at industrial facilities and in transport can also be used.
Such generators can be used both on Earth and in space, for example as onboard power sources for spacecraft designed to explore regions of the Solar System located far from the Sun.
Among the advantages of thermoelectric generators based on Peltier elements are their simple design, lack of moving parts, and silent operation. Their efficiency is relatively low, but they prove invaluable in scenarios where simplicity and silence are more important than megawatts of power output.
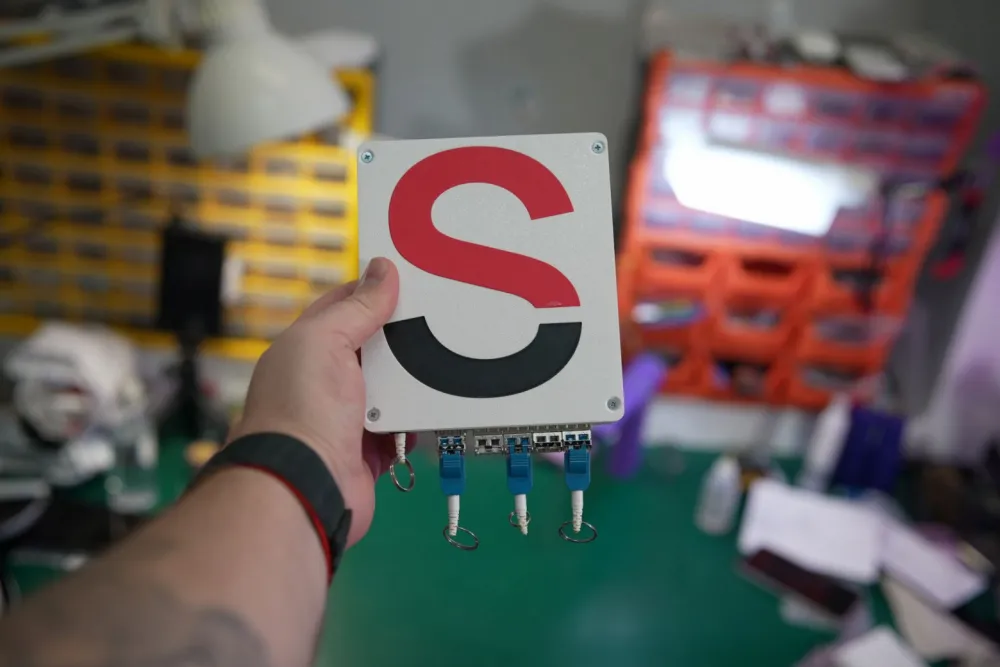
Figure 16 shows a printed circuit board with an integrated NanoTritium nuclear battery.
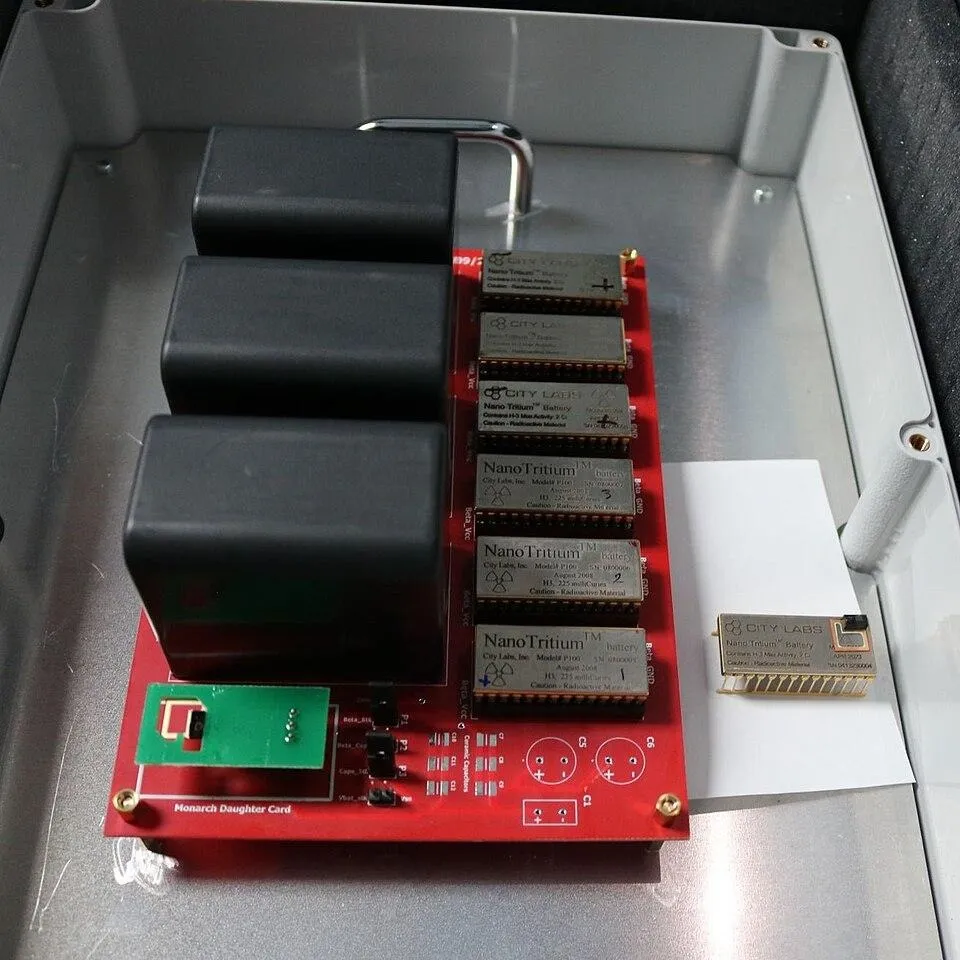
It was showcased at the SpaceCom 2024 exhibition and highlighted the potential applications of such power sources for small satellites and lunar missions. In these devices, electronics must operate in extreme cold and darkness.
At the National Research Nuclear University MEPhI, a prototype nuclear battery using plutonium isotopes has been developed, operating on the principle of converting heat and light. It can operate without recharging for several decades.
Also, at the national research center "Kurchatov Institute", an atomic battery has been created, which produces 1 MW of electricity and 14 MW of heat, and is capable of operating for 40 years.
The same domestic manufacturers also produce thermoelectric generators and devices for monitoring heat flux.
Summary
I hope the experiments with the Peltier element were enjoyable for you. Now you know how to quickly assemble a small desktop refrigerator using such an element equipped with radiators and fans.
Perhaps, using Peltier elements, you will design a cooling system for a computer processor, for output transistors of high-power radio frequency or audio amplifiers, or other electronic components that heat up significantly during operation. Or you might build a thermoelectric generator for camping use, or simply conduct a series of physics experiments, or apply Peltier elements in industrial installations. Here, everything is limited only by your imagination!



Write comment