- Network
- A
How to set up DLNA on different devices: step-by-step plan
Hello, tekkix, my name is Alexey Onosov, I am an author at vAITI media. In this article, I will talk about setting up DLNA on servers, TV and mobile players, and hardware receivers. At first, this may seem like a daunting task, but in practice, it is not. The main thing is to choose the right equipment and software that meets your needs.
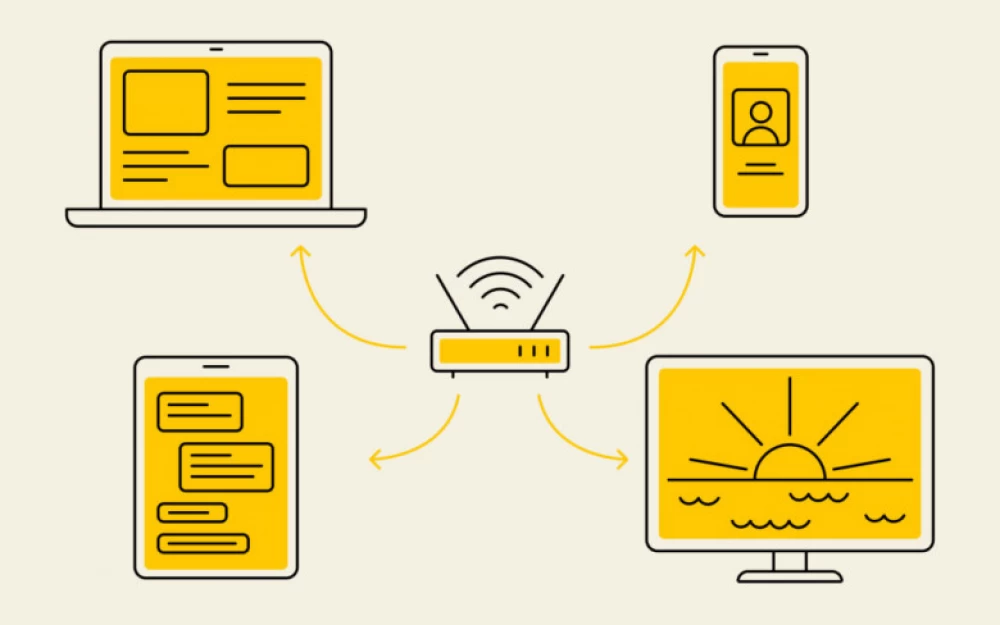
DLNA is an abbreviation for Digital Living Network Alliance. The technology allows different devices, such as PCs, TVs, and smartphones, to easily share any media files: photos, videos, audio tracks. This happens without extra wires and complex settings. For example, you can watch movies stored on your computer on the big screen of your TV without transferring them to a flash drive. Or listen to music from your phone through your home audio system.
To use DLNA, you need to have devices that support this technology. I used the following devices: Synology servers, QNAP, ASUS RT-AX88U, Plex Media Server, Kodi, Universal Media Server, Serviio, Windows Media Player; TV players: Samsung Smart TV, LG Smart TV, Sony Android TV; Android mobile players: BubbleUPnP, LocalCast, VLC for Android; iOS mobile players: VLC for Mobile, ArkMC; hardware receivers: Sonos Play:5, Denon HEOS Link HS2, Yamaha WXA-50.
Choosing a Media Server
The first step in setting up DLNA is choosing the right media server. I prefer solutions from Synology and QNAP. These devices are not only reliable but also have a wide range of features, which is extremely important for business.
Synology DiskStation:
Log in to DSM (DiskStation Manager).
Open Package Center.
Find and install Media Server.
After installation, open the application and enable DLNA.
Go to the "Settings" tab and select the folders you want to make available via DLNA.
Click "Apply".
The advantage of Synology is that it allows you to easily manage access rights to media files, which is especially important in a corporate environment.
QNAP:
Log in to QTS (QNAP operating system).
Go to App Center.
Find and install Multimedia Console.
Open the application and go to the "Media Management" tab.
Enable the DLNA server.
Select folders for indexing.
Click "Apply".
QNAP excels at on-the-fly transcoding, allowing us to watch videos on almost any device, even if it does not support the original file format.
Alternative Solutions
In addition to specialized NAS devices, many vendors offer DLNA functionality in their products. For example, some routers from ASUS or D-Link have built-in DLNA support. We tested the ASUS RT-AX88U, and here is how to set up DLNA on it:
Log in to the router's web interface.
Go to the "USB Application" section.
Enable "Media Server".
Select folders for sharing.
Click "Apply".
This can be a convenient solution for small offices or home use, especially if you already have a compatible router.
Setting up a DLNA server on a PC
This is especially convenient — no need to buy anything. Here are some software solutions we recommend:
Plex Media Server:
Download and install Plex Media Server from the official website.
Run the program and create an account or log in to an existing one.
Click "Add Library" and select the type of media files.
Specify the folders with media files.
Enable DLNA in the server settings.
The advantage of Plex is that it allows not only to stream media over the local network but also to access files over the internet.
Kodi:
Install Kodi.
Go to "Settings" → "Services".
Enable "Allow remote control via HTTP".
Enable "Allow control via UPnP".
Add media files to the Kodi library.
Kodi is great for creating a media center, especially if you use diverse content.
Universal Media Server:
Download and install UMS.
Select the folders with media files at the first launch.
Make sure DLNA is enabled in the program settings.
Configure transcoding if necessary.
UMS works well with most formats and devices, making it a great choice for a heterogeneous environment.
Serviio:
Install Serviio.
Open the Serviio console.
Go to the "Library" tab and add media files.
Configure the transcoding settings for your devices in the "Transcoding" tab.
Make sure the DLNA server is enabled in the settings.
Serviio does an excellent job with transcoding, allowing us to use it even on less powerful devices.
Windows Media Player:
Open Windows Media Player.
Go to "Stream" → "Turn on media streaming".
Select "Turn on media streaming".
Configure access settings for devices on the network.
This solution is suitable for quick DLNA setup in a Windows environment.
Choosing DLNA Receivers
For maximum efficiency in using DLNA, it is important to choose the right receiver devices. In my experience, DLNA-enabled TVs have proven to be the best.
Samsung Smart TV:
Press the Home button on the remote.
Go to "Source".
Select "Network".
Find your DLNA server in the list of devices.
LG Smart TV:
Press the Home button on the remote.
Select "Smart Share".
Press "Device".
Select your DLNA server from the list.
Sony Android TV:
Press the Home button on the remote.
Go to "Apps".
Find and launch "Media Server".
Select your DLNA server.
These TVs do an excellent job of playing content via DLNA, providing high-quality picture and sound.
Optimizing Network Connection
An important point that is often overlooked is the quality of the network connection. For stable DLNA operation, especially when streaming high-definition video, I recommend using a wired connection.
When I conducted testing, it turned out that when using Wi-Fi, data transfer speeds can drop by up to 50% compared to wired connections, especially in offices with a large number of devices and interference. Here are some recommendations for optimizing the network:
Use Cat6 cable or higher for Gigabit Ethernet.
If Wi-Fi is inevitable, use the 5 GHz band.
Place the router in the center of the room for better coverage.
Use network switches with QoS support to prioritize DLNA traffic.
Regularly update the firmware of the router and network devices.
In one of our projects, we encountered the problem of video streaming interruptions when using Wi-Fi. After switching to a wired connection, the problem was completely resolved, and the playback quality improved significantly.
Mobile applications for DLNA
For convenient use of DLNA on mobile devices, you can use specialized applications.
For Android
BubbleUPnP. This is my favorite for Android devices. Here's how we set it up:
Install the app from Google Play.
Open the app and go to "Settings".
In the "Local Renderer" section, enable "Local Playback".
In the "Servers" section, select your DLNA server.
Now you can browse and play media files.
LocalCast. An excellent solution for streaming to Chromecast and DLNA devices:
Install the app.
On the first launch, select the device type (DLNA).
Select your DLNA server from the list.
Start playing files.
VLC for Android. Universal media player with DLNA support:
Install VLC.
In the main menu, select "Local Network".
Find your DLNA server.
Select files to play.
For iOS
VLC for Mobile. iOS version of the popular player. Setup is similar to the Android version.
8 Player. Convenient DLNA client with support for many formats:
Install the app.
Click on the "+" icon to add a server.
Select your DLNA server from the list.
Browse and play files.
ArkMC. Multifunctional application for working with DLNA:
Install ArkMC.
At the first launch, the application will automatically find DLNA servers on the network.
Select the desired server and start viewing files.
DLNA Audio Receivers
For lovers of high-quality sound, we recommend using specialized DLNA audio receivers. The following solutions have performed excellently in our office.
Sonos Play:5. High-quality wireless speaker with DLNA support. Setup:
Install the Sonos app on your smartphone.
Connect the speaker to the Wi-Fi network.
In the app, select "Settings" → "Services & Voice".
Enable "Show UPnP".
Now you can play music from the DLNA server.
Denon HEOS Link HS2. Network preamplifier with DLNA support and many additional features. Setup:
Connect the device to the network.
Install the HEOS app.
In the app, select "Music" → "Servers".
Select your DLNA server.
Start playing music.
Yamaha WXA-50. Compact and powerful amplifier with network technology support. Setup:
Connect the amplifier to the network.
Install the MusicCast app.
Add the device to the app.
In the main menu, select "Servers".
Find your DLNA server and start playback.
These devices can be used not only for listening to music but also for organizing background music in the office and conducting presentations.
Troubleshooting
During the setup and use of DLNA, you may encounter some common issues. Here are some tips for resolving them.
Device does not see the DLNA server:
o Check that all devices are on the same network.
o Make sure the firewall is not blocking DLNA traffic.
o Restart the router and devices.
Intermittent playback:
o Check the network speed.
o Try using a wired connection.
o Reduce the playback quality.
Files do not play:
o Make sure the device supports the file format.
o Check the transcoding settings on the server.
o Try another DLNA client.
Authorization issues:
o Check the access settings on the server.
o Make sure the credentials are entered correctly.
o Try resetting the settings and configuring again.
Security when using DLNA
Here are some safety recommendations. Use strong passwords to access the DLNA server. This is a unique combination of lowercase and uppercase letters, numbers, and special characters, usually at least 12 characters long. Strong passwords do not contain personal information and common words, so they are difficult to guess or crack.
Regularly update the software on all devices. It is recommended to update the software at least once a quarter, as well as immediately when critical security updates are released, and it is advisable to enable the automatic update function if available.
vAYTI is a DIY media for IT professionals. Share personal stories about solving various IT tasks and get rewarded.
Other articles on the topic
Corporate VPN setup practice in one checklist
Wrote a checklist for setting up corporate VPNs based on my practice.
Through thorns to a secure VPN perimeter
Who needs a secure VPN perimeter and can you do without it at all?
How we set up a remote infrastructure for a retailer via VPN
Told about cases of creating remote workspaces and uniting offices through a secure network.



Write comment