- Software
- A
Ruling perch with SeteZor
Good afternoon, dear tekkix readers. In this article, dedicated to the Setezor product, a description of the integration with the Acunetix web resource vulnerability scanner will be provided.
Good afternoon, dear readers of tekkix. We are already familiar with you from articles article1 and article2. In this article, dedicated to the Setezor product, a description of the integration with the Acunetix web resource vulnerability scanner (commonly known as perch) will be provided.
For those who do not know what a web resource vulnerability scanner is. A scanner is specialized software that allows for a comprehensive analysis of a site to identify existing problems in configuration, access rights differentiation, and functional implementation errors.
Why is it so important to regularly scan your web resources?
In our opinion, this approach allows you to timely identify possible "holes" in the site's security and fix them in time, preventing an attacker from exploiting them. This is critically important in the context of information security, as any vulnerabilities can lead to financial losses, reputational consequences for the business, and in the case of critical infrastructure, to federal-scale security threats.
Currently, there are several software offerings on the market, for example:
-
RedCheck
-
Acunetix
-
Nessus
As the tool with which the integration was carried out, Acunetix was chosen, but why?
-
First, the tool receives timely updates, ensuring the relevance of the threat database that can be identified.
-
Second, Acunetix is a leading tool in the market. For example, American Express is a company that analyzes its resources using Acunetix.
-
Third, the presence of a well-documented API allows integration with your software solution.
Read also: -
Fourth, Acunetix offers a rich selection of scanning profiles and allows you to record entire scanning scenarios, including authorization in a form via iframe.
-
Fifth, there is a
crackedtrial version
Why did we integrate?
Since SeteZor is a Network Intelligence Solution type software product, we need to collect as much information about the network as possible, including software products and their vulnerabilities. This facilitates penetration testing and provides a broader picture of network operation. Also, our integration option is more "lightweight", like "set it and forget it".
What are the advantages of using Acunetix through the SeteZor interface?
-
First of all, convenience in aggregating and analyzing information (everything is collected in one place).
-
Convenience when creating a report for a specific scan.
-
The ability to launch scanning for a whole group, which may contain many targets, at a certain interval (allows reducing the load on the server where Acunetix is running).
-
Visual display and management of targets on the map. Convenient when working with a large volume both when analyzing the external perimeter and the internal one.
-
All vulnerabilities identified during the scan are automatically recorded in the project database. This is implemented at the background task level.
-
The functionality of downloading scan reports in html and pdf format has been implemented.
In the future, it is planned to manage a whole school of perch, i.e., SeteZor will have the functionality of a command center. This approach will give greater flexibility and massiveness ;) when scanning resources. As well as displaying the found vulnerabilities on a specific node.
How to interact with Acunetix in SeteZor?
Creating a connection between SeteZor and Acunetix
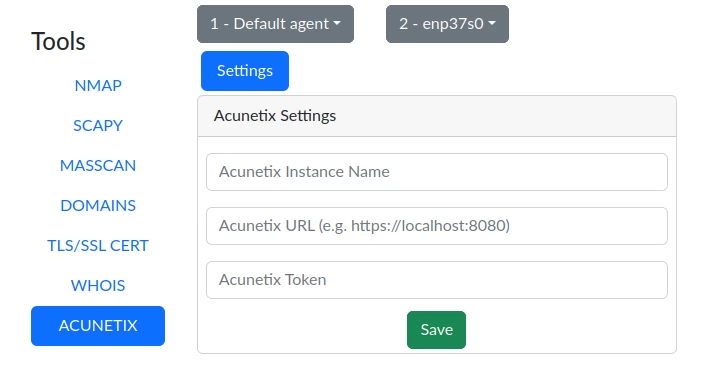
First, you need to go to the Tools tab, which is available in the navigation panel. Then we get to the page where all the tools are displayed. Among them, you need to select Acunetix. And go to the settings.
To successfully link, you need to fill in all the fields:
-
Name for the Acunetix entity
Read also: -
Resource address where Acunetix is deployed
-
API KEY. The key is generated in Acunetix and is located in the administrator's profile at "{url}/app/profile".
After clicking the "Save" button, the data will be written to the project's configuration file and all targets located in Acunetix will be imported into the project's database.
Interaction with Groups
On the Groups tab, the user is greeted with a table displaying all the groups registered in Acunetix.
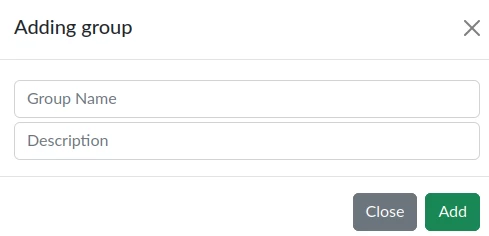
To add a new group, click the Add Group button. A modal window with a form will then be displayed, containing fields for creating a group.
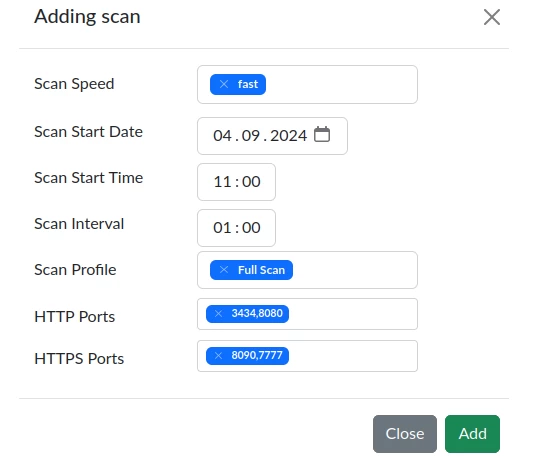
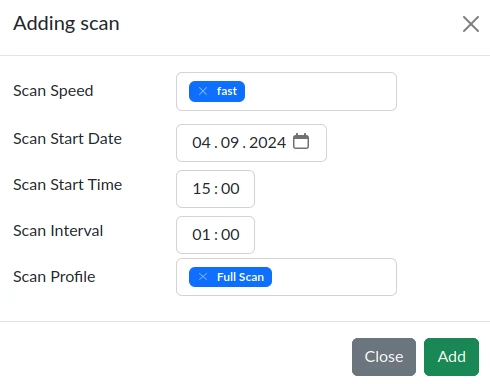
To start scanning all targets in the group, click the Scan button. A modal window will then be displayed, where scanning parameters are set.
Scan Speed implies 4 target scanning speed options:
-
Sequential (the slowest option, 1 concurrent request every 120ms)
-
Slow (2 concurrent requests every 50ms)
-
Moderate (5 concurrent requests every 20ms)
-
Fast (10 concurrent requests without delay)
The Scan Start Date parameter defines the start date of the scan.
The Scan Start Time parameter defines the exact time the first target scan starts.
The Scan Interval parameter sets the time interval between scans of targets in the group.
Scan Profile sets the scan profile:
-
Full Scan
-
Critical / High Risk
-
Critical / High / Medium Risk
-
Cross-site Scripting
-
SQL Injection
-
Weak Passwords
-
Crawl Only
-
OWASP Top 10
-
PCI checks
-
Sans Top 25
-
Malware Scan
Also implemented is the functionality of setting target membership in the group.
When you click the "Edit membership" button, a modal window opens. The left area displays the targets of the selected group, and the right area displays the remaining targets.
To add targets to groups, you need to check the checkboxes next to the targets you want to add in the right area and click the "Add" button. Conversely, to remove targets, you need to check the targets in the left area and click the "Remove" button.
To save, you need to click the "Save" button.
Interaction with targets
The Targets tab displays the interface for interacting with targets.
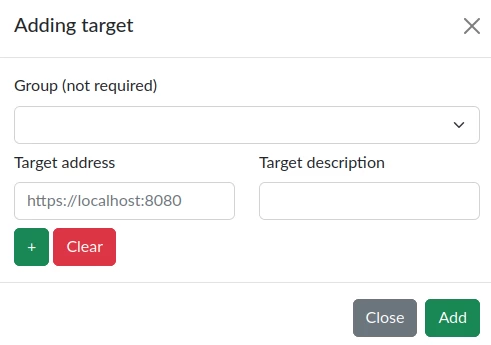
To add a new target, you need to click "Add Target". After that, a modal window will appear.
In the displayed form, you can select which group to add the targets to. In addition, by clicking on the "+", fields for new targets will be added to the form. To complete the addition, you need to click the "Add" button.
Also, the interface has functionality for setting up proxies, custom cookies, and custom headers for individual targets.
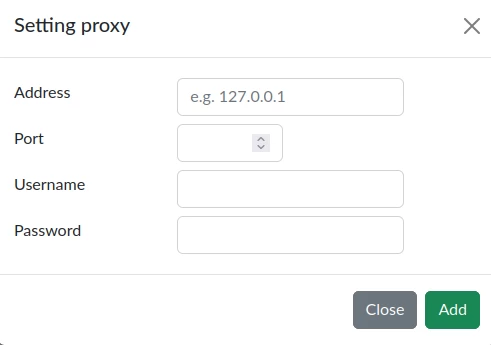
To set the proxy target, you need to click the Set button in the Proxy cell. After that, a modal window will appear.
In the form that appears, you need to fill in the fields:
-
Address. In this field, you need to specify the IP address of the server through which the proxying will be performed.
-
Port. In this field, the port value is specified.
-
Username and Password. These fields are optional if authorization is required for the proxy.
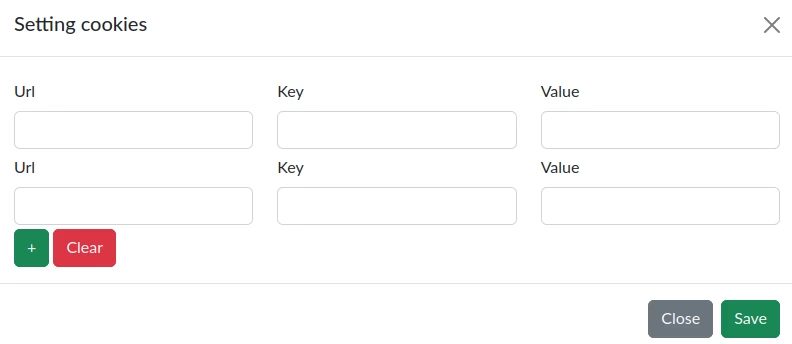
To set custom cookies, you need to click "Set" in the "URL | Cookie" cell. After that, a modal window will appear.
In the "URL" field, you need to enter the address for which the cookie will be set. In the "Key" field, enter the name of the cookie, and in the "Value" field, enter the value. The functionality of adding multiple cookies for a separate target is also implemented. To save the set values, you need to click the "Save" button.
To set custom headers, you need to click the Set button in the Headers cell.
After that, a modal window will appear, in which you can set headers in the key-value format, similar to cookies.
Import targets from a CSV file
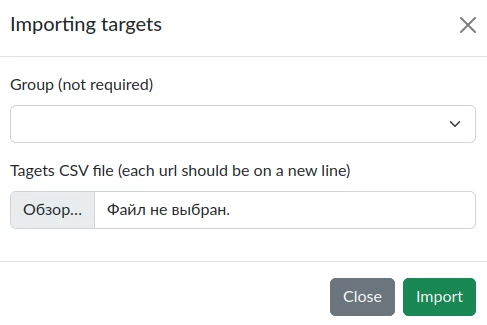
To import targets, you need to click the "Import targets" button.
In the modal window that appears, you can select the group to which the targets from the CSV file will be added and the field itself, by clicking on which a file manager will open with the ability to select a file.
Interaction with scans
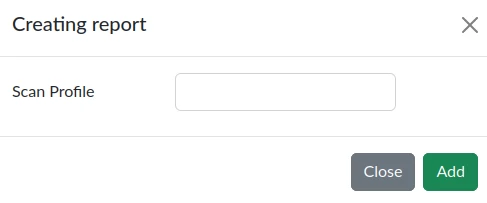
The page with scans has a functionality for generating a report for a specific scan. When you click the "Create report" button, a modal window will appear.
There are many profiles for which the report will be generated:
-
PCI DSS 4.0
-
Sarbanes Oxley
-
Developer
-
Comprehensive (new)
-
Quick
-
Executive Summary
-
HIPAA
-
Affected Items
-
Scan Comparison
-
CWE Top 25
-
ISO 27001
-
NIST SP 800-53
-
OWASP Top 10 2013
-
OWASP Top 10 2017
-
OWASP Top 10 2021
-
PCI DSS 3.2
-
DISA STIG
-
WASC Threat Classification
After selecting a profile, you need to click the "Add" button.
Interaction with reports
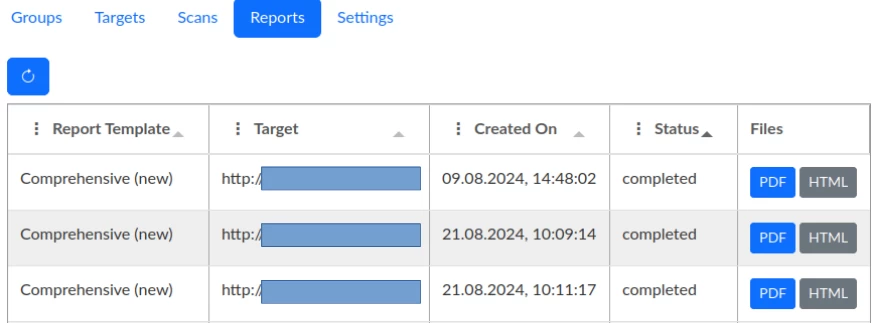
The Reports tab displays the interface with the created reports.
On this page, there is an option to download the generated reports in PDF and HTML formats, which occurs when you click the corresponding button next to the report.
Afterword
Thank you for your attention. We hope that our tool will help you in your work and beyond. You can read all the news of SeteZor on our channel. Send all comments and suggestions to the chat. You can download SeteZor for free and without subscriptions from our Git repository.











Write comment