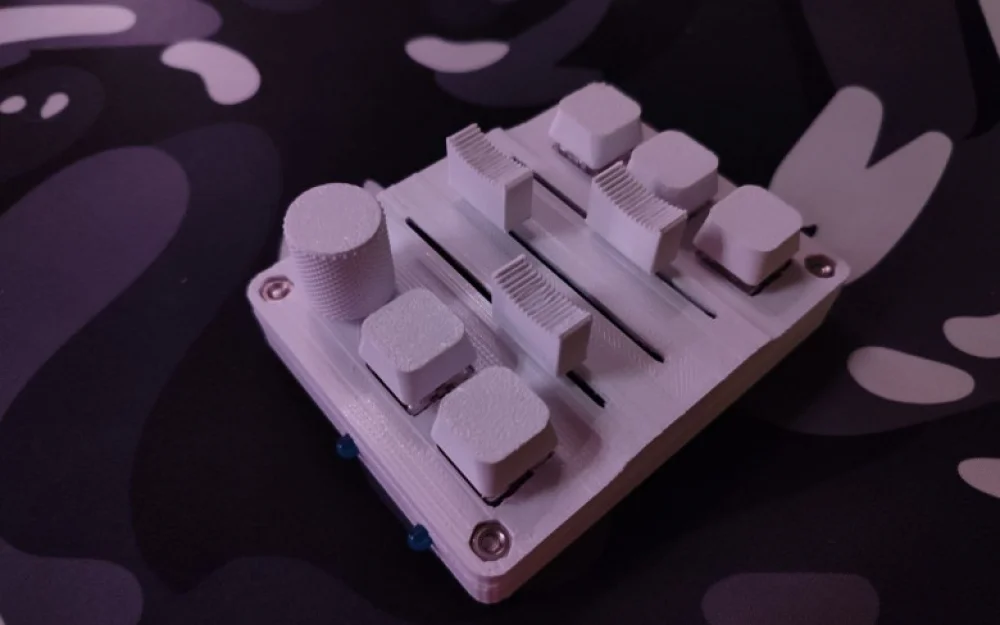
- DIY
- A
How I make a DIY controller for PC: volume, applications, MIDI, OBS
In 2024, I knew nothing about Arduino and Python. But within a week, I assembled a working prototype on a breadboard for music control, using AI and the internet. I didn't stop there and decided to gain valuable development experience by making a real controller!
It All Started with an Idea
It all began in 2024, somewhere in mid-autumn. At that time, I didn't have much experience with Arduino and Python yet, but I got the idea to make a simple mini keyboard for switching tracks so I wouldn't get distracted while gaming. In about a week, I had already assembled on a breadboard a circuit with switches from a keyboard that controlled the system volume and scrolled through tracks. I was thrilled: something I threw together on my knee, stupidly with AI, works! Yes, back then I relied entirely on DeepSeek or ChatGPT.
Then the Excitement Set In
Next, I wanted to make at least some working version and decided to learn how to use Kompas-3D. I made my first model, printed it—not on the first try, of course, haha. And I finished it right around the new year of 2025.
Wanted Something New
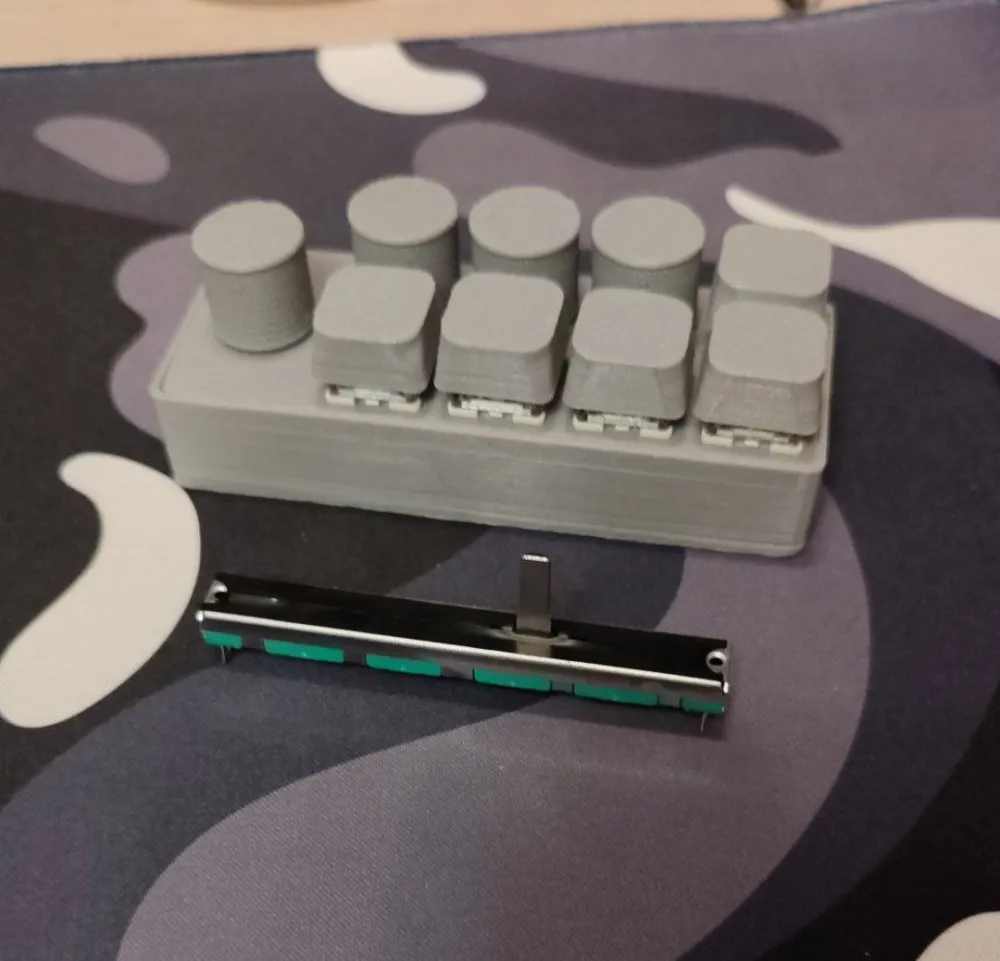
I used my creation for a short time, about a month, that is, until February 2025. I decided to do a redesign, quite a global one, by making sliding resistors like in the top photo, which seemed very convenient and beautiful to me. I was right; it turned out really cool! I used this version for about half a year.
But Satisfaction Didn't Last Long
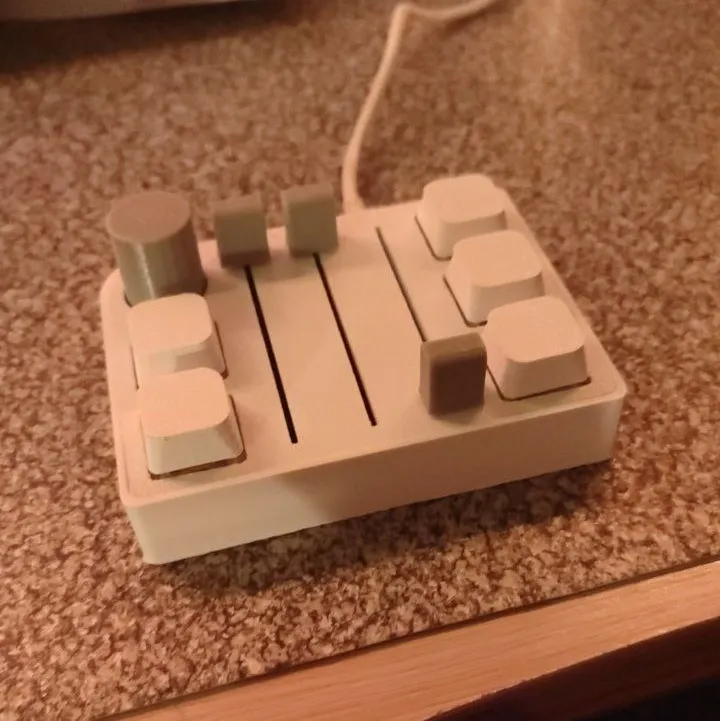
By around summer, I managed to rewrite the code in Python a couple of times, adding some features or just optimizing it. By autumn 2025, I decided to redesign the controller again, adding a board instead of surface-mount: it wasn't really convenient every time to solder about 20 thin wires that break off and so on. Unfortunately, it turned out to be absolutely not what I expected, partly because I was in a hurry and even forgot to add some functionality for which I was making the update in the first place. It was some huge thing, a couple of times bigger than the previous one, and overall I didn't like it :-(
Diligent attempts bore fruit
But I didn't give up! After another huge break, I made a new version, but it's not as interesting as the current version, into which I added everything I wanted: both the board and the LEDs and finally... I wrote the Python code myself, which I continue to improve to this day. I made it, by the way, also for the new year, but already 2026)
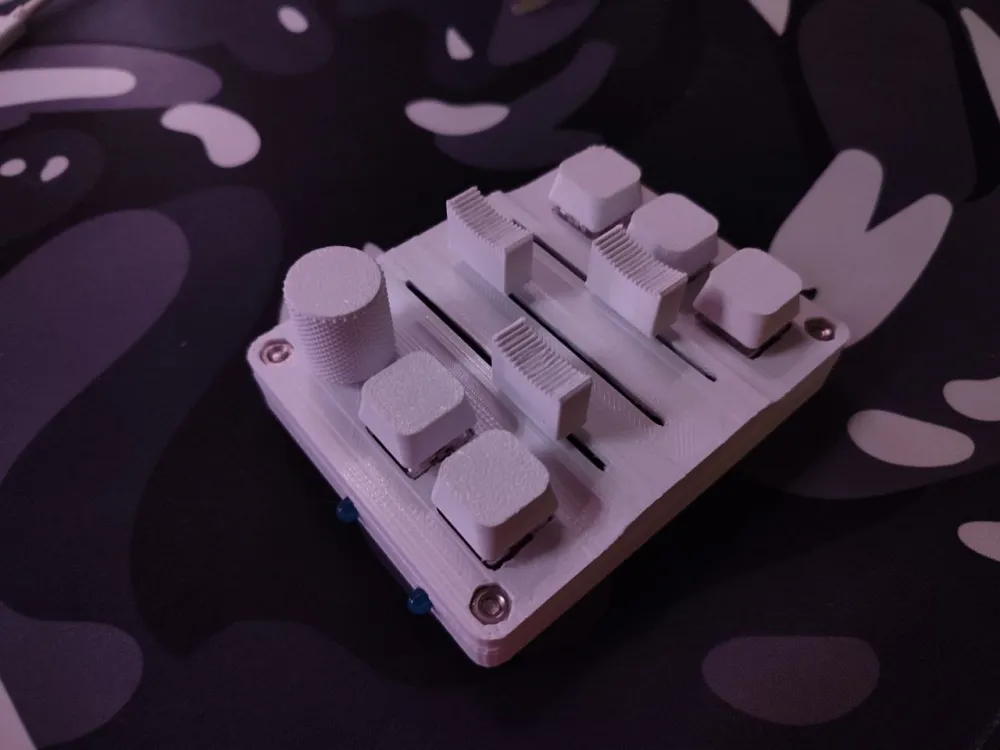
What path will the samurai choose next?
Even realizing that my project is not so unique, I continue to improve it and already had the first tester! In fact, I now want to bring the project to the conditional V‑Beta1.5.0 and take a little breath, look at people's reactions, listen to their opinions. I started slowly making posts on Pikabu, Vombat, and Telegram. I want to shoot a video on YouTube too, but it's not working out yet.
What changes have been made recently?
So. Right now I am working on finalizing the project to a checkpoint, namely:
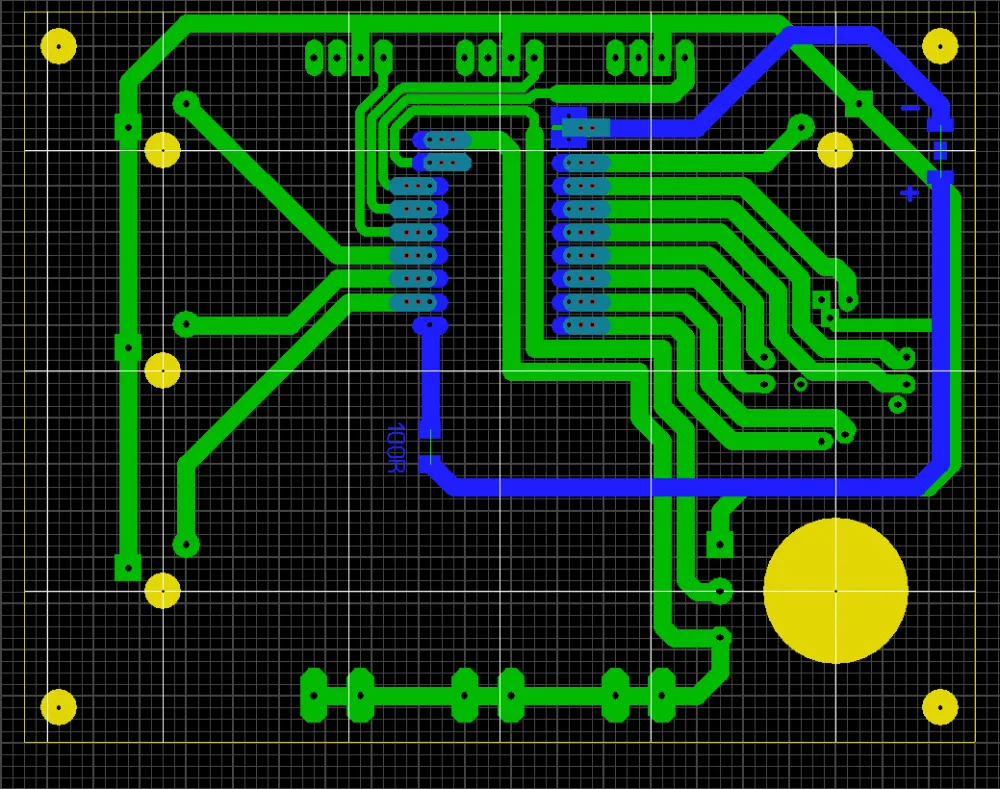
I'm making a board for the new component configuration (adding an encoder with buttons)
I'm polishing the Python code and the firmware for the Arduino Pro Micro
After all this, I model the case and assemble everything into a single unit
More about the code and firmware. For the Arduino, I'm adding a profile to make the controller work as a MIDI device. In Python, I'm currently creating a GUI for proper communication with the user, specifically for bind settings, notifications, and so on.
More about the project architecture
Previously, I wrote the script all in one file, which contained a set of functions and an infinite loop. The system wasn't very elegant, but it worked. However, after learning about such a thing as a class in Python, I was able to advance in development, and now the architecture looks like this.
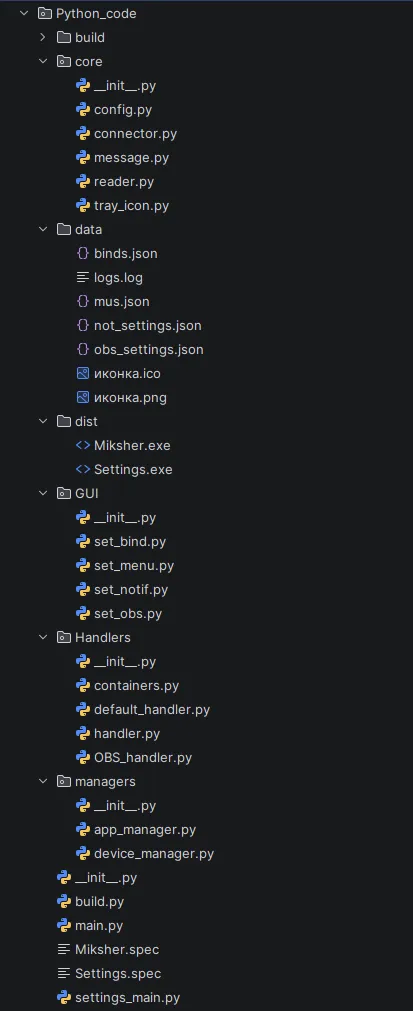
Overall, the distribution is done by the functionality of each class, i.e., in a modular way. In each file, there is a class responsible for a specific function, a specific logic.
🧱 core
main classes used either almost everywhere:
message — sending messages
config — universal logger configuration
or once, for the operation of some program functions:
connector — connection to Arduino
reader — reading data from the COM port
tray_icon — icon in the system tray
📁 data
All additional files needed for the program to work, like settings, icons, etc.
# binds
{
    "left_1": "Previous track",
    "left_2": "Play / Pause",
    "left_3": "Next track",
    "left_4": "Mute sound",
    "left_A": "System volume",
    "left_B": "Application volume",
    "left_C": "Application volume",
    "left_D": "Application volume",
    "right_Энкодер": null,
    "right_↑": null,
    "right_↓": null,
    "right_←": null,
    "right_→": null,
    "right_●": null
}
# notifications
{
"connection_not": false,
"disconnection_not": false,
"change_audio_not": false,
"bind_not": true,
"sound_not": true
}# obs connection settings
{
"port": "4455",
"password": "password",
"A": "123",
"B": "Desktop audio",
"C": "Mic/aux",
"D": ""
}🖥️ GUI
Well, I think it's clear that the GUI has settings for notifications, binds (not finished yet), and connection to OBS.
Yeah, not great, but I'm not yet capable of making something much better. And I even resorted to AI help, especially for this picture; spawning so many objects is exhausting.
🎮 Handlers
Handler classes:
default_handler — all methods for switching music, sound, and the like
OBS_handler — methods for working with the OBS API: connection, channel volume
handler — the main handler, where dictionaries with command keys are collected into one and processed depending on the incoming port keys and values
# dictionary of default_handler methods
self.keys = {
            'A': self.master_volume,
            'B': self.app_volume,
            'C': self.app_volume,
            'D': self.app_volume,
            'M': self.microphone_state,
            'V': self.volume_state,
            'K': self.bind,
            'P': self.music,
            'S': self.music,
            "N": self.music
        }

# dictionary of OBS_handler methods
self.keys = {
            'A': self.set_channel_volume,
            'B': self.set_channel_volume,
            'C': self.set_channel_volume,
            'D': self.set_channel_volume,
            'M': None,
            'V': None,
            'K': None,
            'P': self.mute_channel_volume,
            'S': self.mute_channel_volume,
            'N': self.mute_channel_volume
        }
And the handler class itself is:
import logging
import time


from threading import Thread

from Python_code.managers.app_manager import AppManager
from Python_code.managers.device_manager import DeviceManager
from Python_code.core.reader import Reader
from Python_code.core.connector import Connector
from Python_code.core.tray_icon import TrayIcon
from Python_code.core.message import Message
from Python_code.core.config import setup_logger

from Python_code.Handlers.default_handler import Default
from Python_code.Handlers.OBS_handler import OBS
from Python_code.Handlers.containers import Services, Events


setup_logger()


class Handler:
    def __init__(self):
        self.logger = logging.getLogger(self.__class__.__name__)
        self.tray = TrayIcon()
        self.msg = Message()
        self.connector = Connector(self.msg, self.tray.shutdown_event)
        self.disconnect_event = self.connector.disconnect_event
        self.app_manager = AppManager(self.disconnect_event, self.msg)
        self.device_manager = DeviceManager(self.disconnect_event)
        self.audio_disconnect_event = self.device_manager.audio_disconnect_event
        self.mic_disconnect_event = self.device_manager.mic_disconnect_event
        self.reader = Reader(self.connector, self.disconnect_event)

        self.services = Services(
            connector=self.connector,
            reader=self.reader,
            app_manager=self.app_manager,
            device_manager=self.device_manager,
            msg=self.msg
        )

        self.events = Events(
            audio_disconnect_event=self.device_manager.audio_disconnect_event,
            mic_disconnect_event=self.device_manager.mic_disconnect_event,
            disconnect_event=self.disconnect_event
        )

        self.default = Default(self.services, self.events)
        self.obs = OBS(self.services, self.events)

        self.keys = {
            'A': None,
            'B': None,
            'C': None,
            'D': None,
            'M': None,
            'V': None,
            'K': None,
            'P': None,
            'S': None,
            'N': None
        }
        self.path = 'binds.json'
        self.load_binds()

        thread = Thread(target=self.process, daemon=True)
        thread.start() # processing thread for incoming data

    def process(self):
        while True:
            if not self.disconnect_event.is_set():
                key, val = self.reader.wait_for_key(3)
                if key or val:
                    try:
                        self.keys[key](key, val)
                        self.reader.line = None
                        self.reader.key = None
                        self.reader.val = None
                    except:
                        self.logger.debug(f'No command assigned to button {key}')
                    time.sleep(0.001)
            else:
                time.sleep(3)

    # not implemented yet(
    def load_binds(self):
        pass
🕵️ managers
Managers constantly monitoring something:
app_manager — updates the dictionary with audio applications if new processes appear, plus rewrites the binds of these applications in data/mus.json
{
    "B": "яндекс музыка.exe",
    "C": "discord.exe",
    "D": "hl.exe"
}
device_manager — monitors audio devices, their connection, disconnection, etc.
Overall, that's it about the architecture. I want to explain a little bit, just a tiny bit, about the system of how it all works.
⚙️ Logic
Connector establishes a connection with Arduino.
Managers start updating their dictionaries and lists from
data/, scanning the system (audio devices and applications).An icon appears in the tray, and notifications about the launch arrive. The work has begun.
Messages come from Arduino in the form:
A0.23,N,B0.69, etc.In the handler, values are processed depending on the key and value, calling the necessary methods.
What's next?
The project is not finished, but now it has a solid foundation. Next — the case, video, and V‑Beta 1.5.0 as a consolidation of progress.
Thank you for reading. I'll be glad to hear your opinion and ideas — write to me!
Subscribe to my telegram-channel, where I share more details about the changes.
app_manager — updates the dictionary with audio applications when new processes appear and rewrites the bindings of these applications in data/mus.json.
{
    "B": "yandex music.exe",
    "C": "discord.exe",
    "D": "hl.exe"
}
device_manager — monitors audio devices, their connection, and disconnection.
That's a general overview of the architecture. I'd like to briefly explain how the system works.
⚙️ Logic
The Connector establishes a connection with Arduino.
Managers update their dictionaries and lists from
data/by scanning the system for audio devices and applications.An icon appears in the system tray, and launch notifications are sent. The application is now running.
Arduino sends messages in the following format:
A0.23,N,B0.69, etc.The handler processes these values based on their keys and values, invoking the necessary methods.
What's next?
The project is not yet complete, but it now has a solid foundation. The next steps include working on the case, video, and releasing V-Beta 1.5.0 to consolidate the progress made so far.
Thank you for reading. I welcome your feedback and ideas; please feel free to share them.
Write comment