
- Hardware
- A
Unboxing a Coil of VVGng Cable
The article about how to blink an LED using Arduino was quite well received by the Tekkix audience. At the end of that article, there was a poll with a long list of topics for the next publication. The clear winner was “Unboxing a coil of VVGng cable.” Well, readers’ wishes are the law for the author.
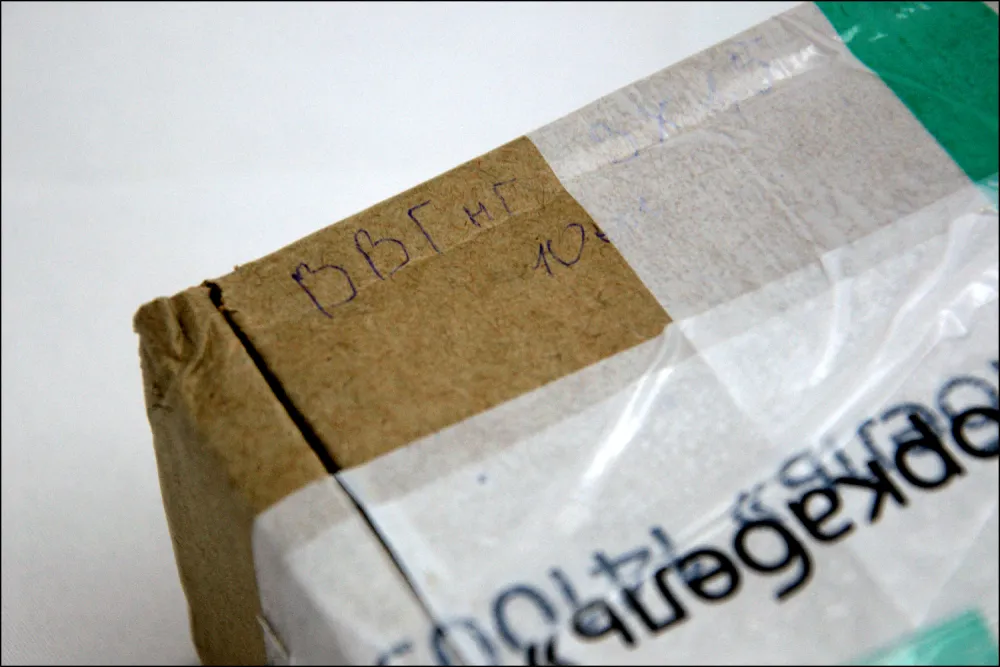
So, a box with VVGng(A)-LS 3×1.5 mm cable with a nominal length of 10 meters arrived at my place.
The box is made from not-too-expensive light brown cardboard, generously wrapped with branded tape.
The packaging looks sturdy enough and raises no complaints. In the corner, there’s a note in blue pen indicating the type of cable and the ordered length.
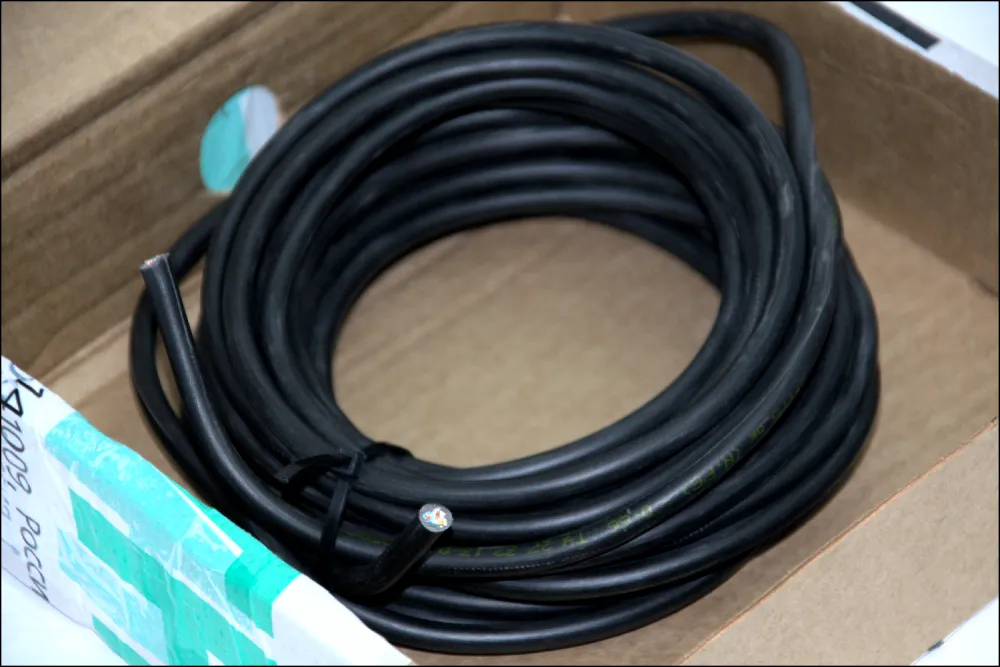
Inside is a neatly coiled cable, which is securely fastened with a black plastic tie. The cable is a uniform black color with clearly legible bright green marking. The ends of the cable look as if they were snipped off with side cutters.
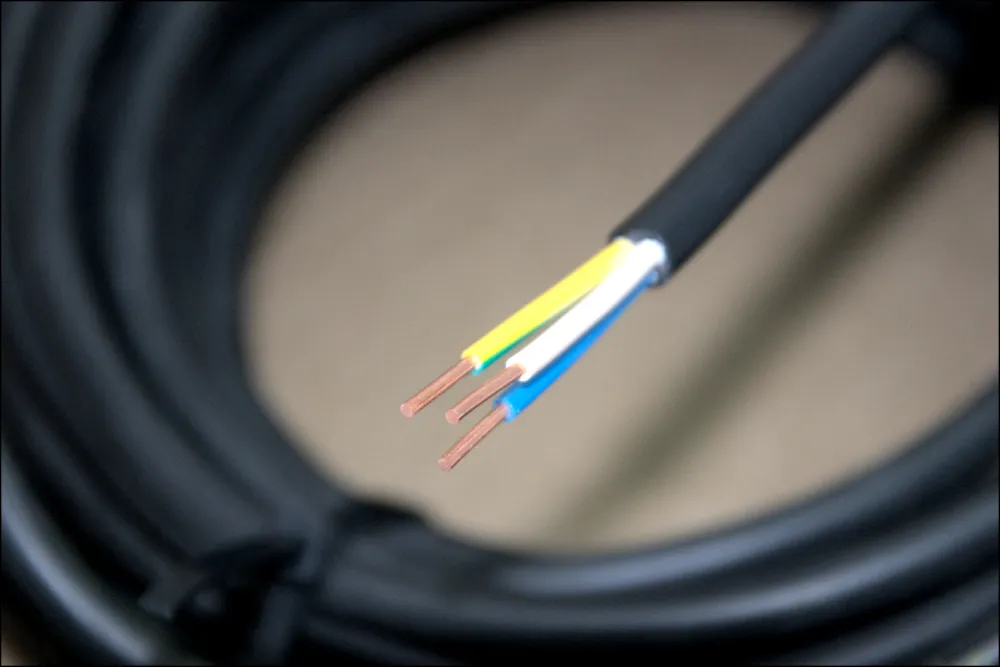
Inside the cable there are three wires: phase, neutral, and ground. The insulation of each wire is bright enough, and the wires themselves are generously powdered with talc. There is also talc on the cable surface, which makes it look a bit messy. However, this is easily removed with isopropyl alcohol or water.
All three wires in the cable are single-core. This makes the cable stiff — it doesn’t sag under its own weight, and you can clamp the wires in terminal blocks without ferrules, just by stripping them.

The geometric dimensions of the cable are roughly in line with the nominal ones. For example, the strand diameter, with a nominal value of 1.5 mm, actually turned out to be 1.45 mm. And the total cable length was 9.6 m instead of the stated 10 m.
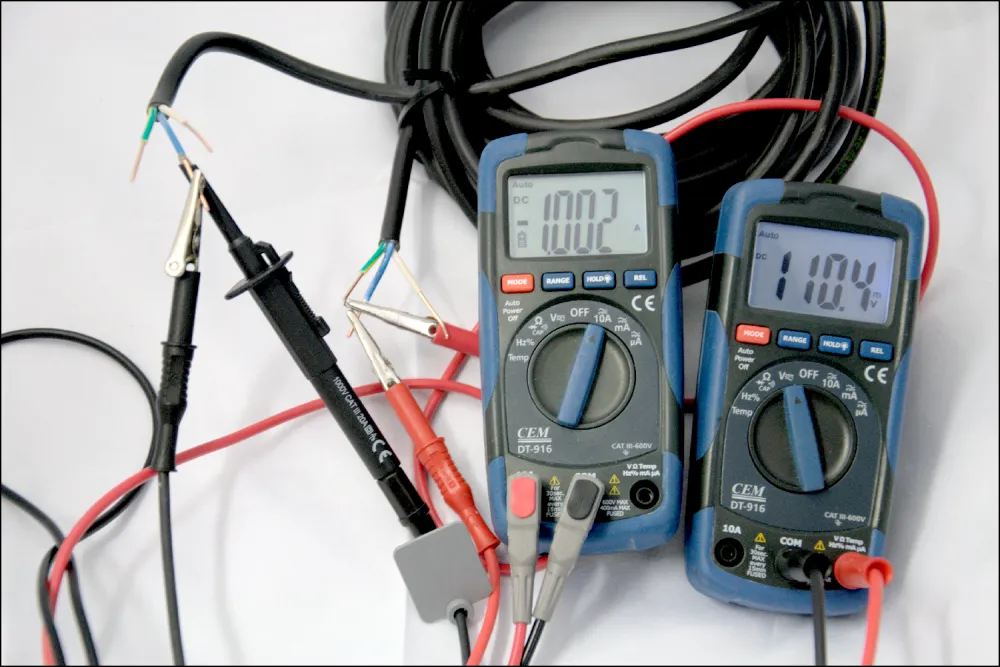
One of the key characteristics of a wire is its resistance. There are various schemes for determining the resistance of highly conductive materials such as wire. However, in this article, the resistance is measured using the four-point probe method. A fixed current, measured by an ammeter, is passed through the cable, while at the same time a voltmeter measures the voltage drop across the cable.
Recalculated per kilometer of length, the resistance amounted to 11.5 Ohms.
The abbreviation VVGng stands for "vinyl-vinyl bare, non-flammable." Therefore, besides electrical and mechanical characteristics, it makes sense to look at flame resistance. For this, the wire is burned with a gas burner. According to regulations, the burning process lasts for several tens of minutes, but in the scope of this article, the wire was burned for several seconds.

During the burning, the wire ignites, but after the burner is turned off, it extinguishes quite quickly. Although the cable sheath became charred and swollen after burning, each conductor still carried electric current and did not contact the neighboring conductors.
Overall, it can be said that the cable in question may not exceed the stated nominal parameters, but it does fully meet the requirements set for it.
Just like in the article about blinking an LED on Arduino, I want to finish with thanks.
Thank you very much for reading this article. If you enjoyed it, leave comments, share it with your friends. Make sure to leave likes — I’ve entered this article in the Tekhnotext-7 contest and hope to win the audience favorite prize. Also, subscribe here on tekkix, or to my Telegram — there are already 6 of us, let’s get it to 10.


![From Virtual Hands to AI for Survivalists: Curious Open Agent OSes [and One Hardware Project]](https://cdn.tekkix.com/imgs/2026/05/habrcom/big/ce0b1057616faed51cd8b9f3b2b9.webp)

Write comment