
- Hardware
- A
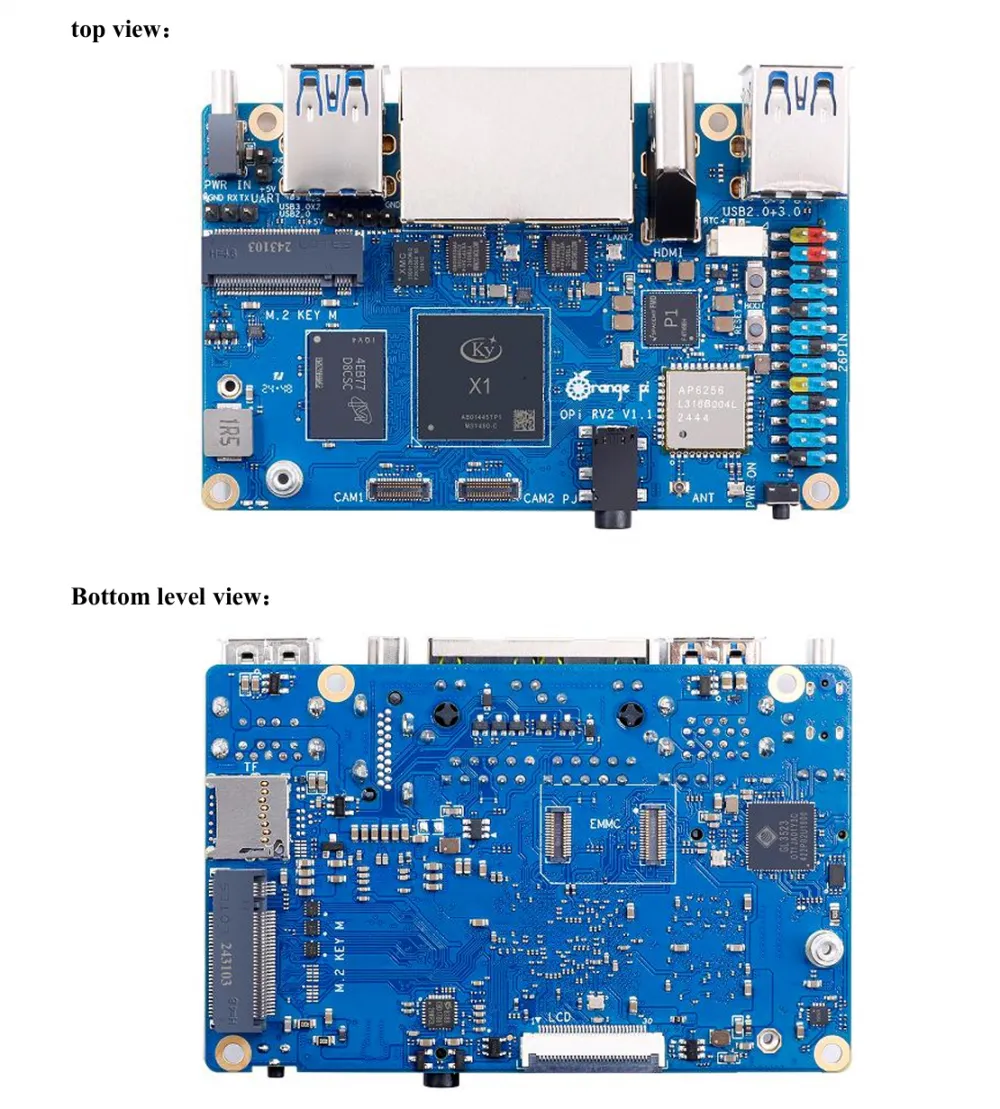
Making a media server from Orange Pi RV2
Hello everyone! I want to share my experience setting up a media server based on the Orange Pi RV2. In another author’s article, the setup was described using the Orange Pi Zero 3 board, but I decided to take a slightly different approach based on the following requirements:
I wanted native NVMe drive support from the board
The most compact solution possible (just the board and the drive, no external devices/adapters via USB)
Relatively low cost
Board selection
After studying the official orange pi website, I identified the following boards that met item 1:
Orange Pi 5
Orange Pi 5 Plus
Orange Pi 5 Pro
Orange Pi 3B
Orange Pi 4A
Orange Pi RV2
Then, after checking prices and specs, I decided that version 5 was rather expensive and probably too powerful for my needs. In the end, I chose the RV2 because:
It has two drive slots (2230 and 2280 M.2), so upgrades and expansion are possible
It is quite budget-friendly (if not the most affordable of them all – I ordered my 4 GB RAM unit on Ali for 4392 R)
8-core RISC-V processor (not that it made a huge difference when setting up linux later, but I wanted to try it out).
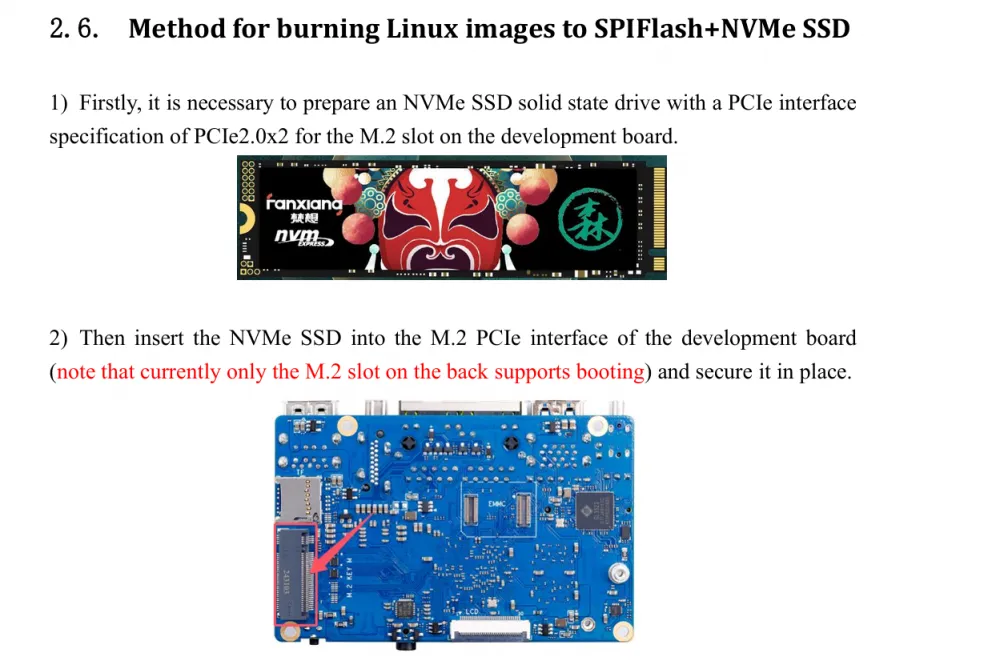
I planned to install the system on an NVMe drive, and chose the Kingston SSD SNV3S1TB.
Note! Boot support is available only from the rear M2 slot, as clearly specified in the documentation.
Case assembly
There are ready-made acrylic cases for RV2 on Ali, for example:

But I decided to make a custom one for 3D printing in orange (it's Orange Pi after all!). The plan is to attach a 3010 fan for cooling the processor and other board components from above. The result is in the photo:

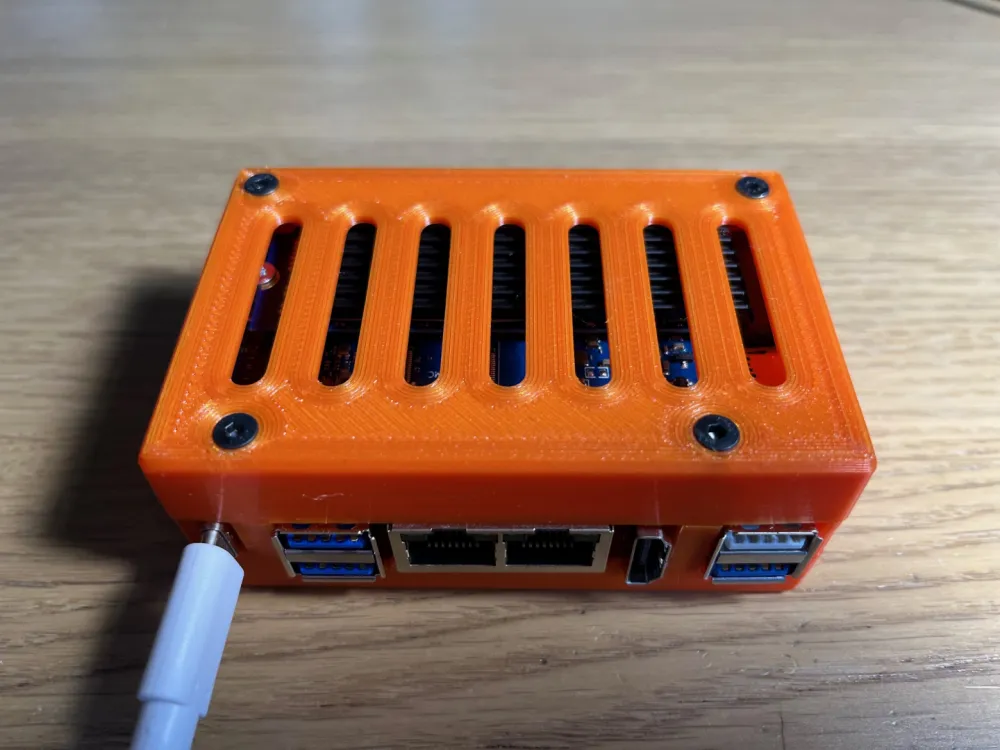

The model can be found at: https://www.thingiverse.com/thing:7054834
System installation
For the initial setup, you’ll need an HDMI monitor and a USB keyboard.
The installation process is described in detail in the board’s user manual, and includes the following steps:
Download the system image from the official website. I chose Orangepirv2_1.0.0_ubuntu_noble_server_linux6.6.63.zip, unzip it, and get the .img file
Use balenaEtcher to write the image to a TF card. Note! The documentation clearly states requirements: at least 16 GB, class 10 or higher. Although the image is around 2 GB, my board didn’t boot from an 8 GB card. With a 16 GB card everything worked fine.
Install the SSD in the lower slot. Insert the TF card into the board, connect to the monitor via HDMI and attach the USB keyboard, then plug in the power (5V/5A)
The board should load, then we perform minimal settings to transfer the image to SPIFlash and NVMe SSD. This process is also described in detail with screenshots in the documentation, consisting of command calls.
SSD preparation:
sudo parted /dev/nvme0n1 mklabel gpt
sudo parted /dev/nvme0n1 mkpart primary ext4 8192s 100%
Launching the installer:
sudo nand-sata-install
After installation and reboot, you can further configure the Wi-Fi connection using a command that opens a graphical interface to set up the Wi-Fi network connection:
sudo nmtui
If you plan to use an Ethernet connection, you don't need to configure Wi-Fi, but I decided to connect the board via Wi-Fi. After connecting, I fixed the server's IP address in the router to prevent it from changing.
After this step, you can disconnect the board from the keyboard and monitor, and continue the setup through SSH.
Installing and configuring Transmission and Samba
Further configurations assume that the server is within a home network, so I didn't change the default login/password orangepi/orangepi and didn't configure authentication for transmission and samba to simplify access to resources.
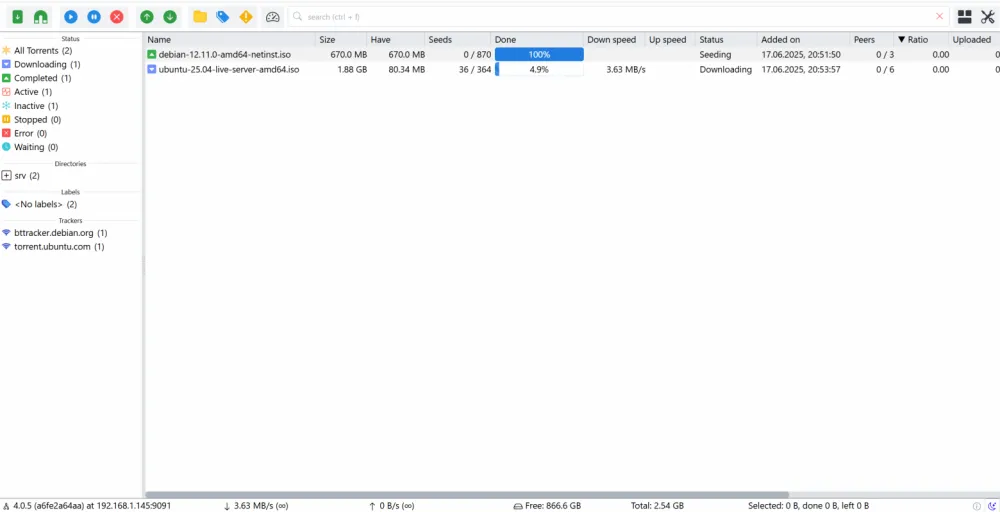
The scenario for downloading .torrent files and starting downloads was set up through the watch-dir configuration in transmission and the directory on the server.
Connect via Putty or any other client using the IP address I checked in the router, then execute a series of commands.
Create directories and set permissions:
mkdir /srv/media
chmod 777 /srv/media
mkdir /srv/watch
chmod 777 /srv/watch
Next, install transmission:
sudo apt install transmission-daemon
After installation, stop the service sudo service transmission-daemon stop
and configure the config sudo nano /etc/transmission-daemon/settings.json
For example, my configuration
settings.json
{
"alt-speed-down": 50,
"alt-speed-time-begin": 540,
"alt-speed-time-day": 127,
"alt-speed-time-enabled": false,
"alt-speed-time-end": 1020,
"alt-speed-up": 50,
"announce-ip": "",
"announce-ip-enabled": false,
"anti-brute-force-enabled": false,
"anti-brute-force-threshold": 100,
"bind-address-ipv4": "0.0.0.0",
"bind-address-ipv6": "::",
"blocklist-enabled": false,
"blocklist-url": "http://www.example.com/blocklist",
"cache-size-mb": 256,
"default-trackers": "",
"dht-enabled": true,
"download-dir": "/srv/media",
"download-limit": 100,
"download-limit-enabled": 0,
"download-queue-enabled": true,
"download-queue-size": 5,
"encryption": 1,
"idle-seeding-limit": 30,
"idle-seeding-limit-enabled": false,
"incomplete-dir": "/var/lib/transmission-daemon/Downloads",
"incomplete-dir-enabled": false,
"lpd-enabled": true,
"max-peers-global": 200,
"message-level": 2,
"peer-congestion-algorithm": "",
"peer-limit-global": 200,
"peer-limit-per-torrent": 50,
"peer-port": 51415,
"peer-port-random-high": 65535,
"peer-port-random-low": 49152,
"peer-port-random-on-start": false,
"peer-socket-tos": "le",
"pex-enabled": true,
"port-forwarding-enabled": false,
"preallocation": 1,
"prefetch-enabled": true,
"queue-stalled-enabled": true,
"queue-stalled-minutes": 30,
"ratio-limit": 2,
"ratio-limit-enabled": false,
"rename-partial-files": false,
"rpc-authentication-required": false,
"rpc-bind-address": "0.0.0.0",
"rpc-enabled": true,
"rpc-host-whitelist": "",
"rpc-host-whitelist-enabled": false,
"rpc-password": "{a7d7118cc5c00f53aef172ff2ae09bf3e5ae379fMBw1QaKi",
"rpc-port": 9091,
"rpc-socket-mode": "0750",
"rpc-url": "/transmission/",
"rpc-username": "transmission",
"rpc-whitelist": "127.0.0.1",
"rpc-whitelist-enabled": false,
"scrape-paused-torrents-enabled": true,
"script-torrent-added-enabled": false,
"script-torrent-added-filename": "",
"script-torrent-done-enabled": false,
"script-torrent-done-filename": "",
"script-torrent-done-seeding-enabled": false,
"script-torrent-done-seeding-filename": "",
"seed-queue-enabled": false,
"seed-queue-size": 10,
"speed-limit-down": 100,
"speed-limit-down-enabled": false,
"speed-limit-up": 100,
"speed-limit-up-enabled": false,
"start-added-torrents": true,
"tcp-enabled": true,
"torrent-added-verify-mode": "fast",
"trash-original-torrent-files": true,
"umask": "022",
"upload-limit": 100,
"upload-limit-enabled": 0,
"upload-slots-per-torrent": 8,
"utp-enabled": true,
"watch-dir": "/srv/watch",
"watch-dir-enabled": true
}
The setting "watch-dir" and "watch-dir-enabled" allow automatic start of download when a file is placed into this directory. Authentication is not required when accessing the web interface at http://{serviceIp}:9091
Here's how I use this scenario:
On the client where the .torrent files are searched and downloaded, I create a folder (e.g., on the desktop, a folder named opi) where I place all the files that need to be downloaded
Then, I use a script to move them to the watch directory on the server. On Windows, it's a simple bat file with the following content:
move C:\Users\Username\Desktop\opi\*.torrent \192.168.1.100\watch
To make this work, you also need to install Samba and configure the directories.
Install it using sudo apt install samba -y and configure using sudo nano /etc/samba/smb.conf
Here’s my configuration for the watch and media directories:
smb.conf
[media]
comment = media
path = /srv/media
browsable = yes
guest ok = yes
read only = no
unix extensions = no
directory mask = 0777
[watch]
comment = watch
path = /srv/watch
browsable = yes
writable = yes
guest ok = yes
read only = no
create mask = 0777
directory mask = 0777
Restart Samba with sudo systemctl restart smbd, then move the file to \{serviceIp}\watch and check that the download starts.
I don’t like the standard web interface of Transmission, so I decided to search for and install an alternative. I found TrguiNG , which I found to be the most appealing. Below is the script to install it:
Navigate to tmp, download, and extract the distribution (as of the writing of this article, the latest release was 1.4.0)
cd /tmp
 mkdir webui
 cd webui
 sudo wget
https://github.com/openscopeproject/TrguiNG/releases/download/v1.4.0/trguing-web-v1.4.0.zip sudo unziptrguing-web-v1.4.0.zip
Stopping the service sudo service transmission-daemon stop
Backing up the default interface. In the latest versions of transmission it’s located in the public_html folder.
sudo tar -cvf /usr/share/transmission/public_html/backup.tar /usr/share/transmission/public_html/
Copy the new files and set the permissions
sudo cp -vr * /usr/share/transmission/public_html/
 sudo chmod 755 -Rc /usr/share/transmission/public_html/
Start the service and check if it’s running
sudo service transmission-daemon start
 sudo service transmission-daemon status
The new interface will be available at the same URL: http://{serviceIp}:9091
There are other interface options, but TrguiNG suits me just fine.
That’s it, hope this info will be helpful!


![From Virtual Hands to AI for Survivalists: Curious Open Agent OSes [and One Hardware Project]](https://cdn.tekkix.com/imgs/2026/05/habrcom/big/ce0b1057616faed51cd8b9f3b2b9.webp)


Write comment