- AI
- A
Keywording stock images using OpenAI's Batch API
Image attribution is a mandatory step in preparing them for sale on stock photo sites. Each work must have a title, description, keywords, and all of this in English.
Keywording stock images using OpenAI's Batch API
Image attribution is a mandatory step in preparing them for sale on photo stocks. Each work (photo or illustration) must have a title, description, keywords, and all of this in English.
ChatGPT handles keywording quite well. But sending it pictures one by one and then copying the attributes manually takes too long. Let's automate this process.
Tools
We will need:
PyCharm or another Python IDE.
OpenAI API key and a couple of dollars in the balance.
A couple of gigabytes on some hosting.
Optional:
Access to the OpenAI developer platform web interface.
VPS outside of Russia.
Task setting
I will attribute my photo archive, taken on vacations in different years. In stock language - travel photos. Files are distributed by countries and cities, as well as divided into commercial and so-called editorial (with people or recognizable landmarks). The folder structure is as follows:
photo
├── Russia
│ └── Ruskeala
│ ├── editorial
│ └── commercial
└── Turkey
└── Istanbul
├── editorial
└── commercial
For each file in the final editorial/commercial folders that is an image, you need to select and write in EXIF its title in English no longer than 200 characters, as well as 50 keywords. At the same time, for files from the editorial folders, the title has the format
City, Country - Month Day Year: Description
There are no such requirements for commercial photos, but it is advisable to use the name of the city and country in the list of keywords.
Here is the plan to solve this problem:
Generating a batch of tasks for the OpenAI platform.
Sending the batch and receiving the results.
Processing the results and filling in the metadata for the images.
Generating a batch of tasks
We will not send each photo to the neural network separately. Instead, we use the Batch API. Requests will not be executed immediately, but within a day, but we will get a 50% discount on the dialogue with ChatGPT.
Let's turn to the gpt-4o-mini version, as it has quite democratic limits compared to gpt-4o. Here, for example, are the values for first-level accounts (less than $50 spent over the lifetime of the account).
Model | Requests per minute | Requests per day | Tokens per minute | Batch queue limit |
gpt-4o | 500 | - | 30,000 | 90,000 |
gpt-4o-mini | 500 | 10,000 | 200,000 | 2,000,000 |
As we can see, with the gpt-4o-mini version, we can send batches of up to 200,000 tokens.
Let's prepare the parameters of our script as global variables:
valid_extensions = ('.jpg', '.jpeg')

api_key = 'YOUR_KEY'

your_site = 'http://YOUR_SITE/'
photo_dir = 'C:\PATH\TO\PHOTOS'
tasks_path = "batch_tasks.jsonl"
results_path = "batch_tasks_output.jsonl"
job_id_path = "batch_job_id.txt"

description_length = 200
keywords_count = 50
prompt = f"Please create a description no more than {description_length} characters long for this image in stock style "          f"and a list of {keywords_count} popular single-word keywords, separated with commas. "          f"Tailor the description to a specific niche and target audience. "         f"Your keywords are to enhance searchability within that niche."          f"If there are architectural decoration elements in the image, be sure to include them. "          f"If there are inscriptions in a language other than English in the photo, include their translation in the description. "          f"Be sure to separate the description from the list of keywords with a newline character. "          f"Don't write anything except a description and a list of keywords. "          f"If there are any plants in the picture, identify their names and weave them into the description and the keywords list. "          f"Ensure no word is repeated. Be sure to include in both the description and in the keywords list the next words: "

batch_output_map = {}
The purpose of each parameter is clear from its name. I will focus in more detail only on the prompt – the heart of our system. It suggests focusing on a specific niche, that is, stock theme, which will improve the SEO characteristics of the stock portfolio. We expect the result in the form of two paragraphs of text – a description and a list of keywords. We will have to add keywords to the prompt, so it ends with the corresponding phrase and a colon.
Now let's generate a batch of tasks:
from urllib.parse import quote

def generate_tasks():
    with open(tasks_path, 'w') as file:
        task_index = 0
        for root, dirs, files in os.walk(photo_dir):
            path_parts = root.split(os.sep)
            # If we have three levels of directories and we are in the last one
            if len(path_parts) >= 3 and path_parts[-1] in {'editorial', 'commercial'}:
                for filename in files:
                    if not filename.lower().endswith(valid_extensions):
                        continue
                    file_path = os.path.relpath(os.path.join(root, filename), photo_dir).replace('\', '/')
                    image_url = f"{your_site}photo/{file_path}"
                    image_url = quote(image_url, safe=':/')

                    path_parts = re.split(r'[\/]', file_path)
                    country, city = path_parts[0], path_parts[1] if len(path_parts) > 1 else (None, None)

                    new_prompt = f"{prompt} {country}, {city}" if country and city else prompt

                    task = {
                        "custom_id": f"task-{task_index}",
                        "method": "POST",
                        "url": "/v1/chat/completions",
                        "body": {
                            "model": "gpt-4o-mini",
                            "messages": [
                                {
                                    "role": "system",
                                    "content": new_prompt
                                },
                                {
                                    "role": "user",
                                    "content": [
                                        {
                                            "type": "image_url",
                                            "image_url": {
                                                "url": image_url
                                            }
                                        },
                                    ],
                                }
                            ]
                        }
                    }

                    file.write(json.dumps(task) + '\n')
                    print(f"Added task: {image_url}")
                    task_index += 1
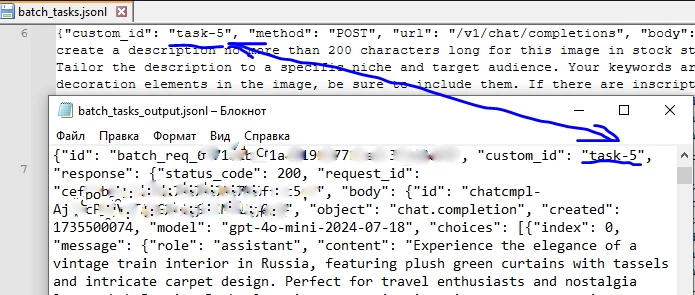
Here we traverse the folder tree starting from photo_dir, and for each file …/editorial/*.jp(e)g or …/commercial/*.jp(e)g we extract the country and city name from its path, add these parameters to the prompt, and generate a task in the form of a JSON object. Each task has a unique custom_id within the package, which we will later use to determine the file name. The task body consists of two messages – the prompt and the image URL on the hosting.
It is assumed that the files are located on your hosting in the photo folder. We pass the URL through the quote() function in case the file name contains reserved characters. Percent encoding will replace them with a percent sign and a number. For example, a space will turn into %20.
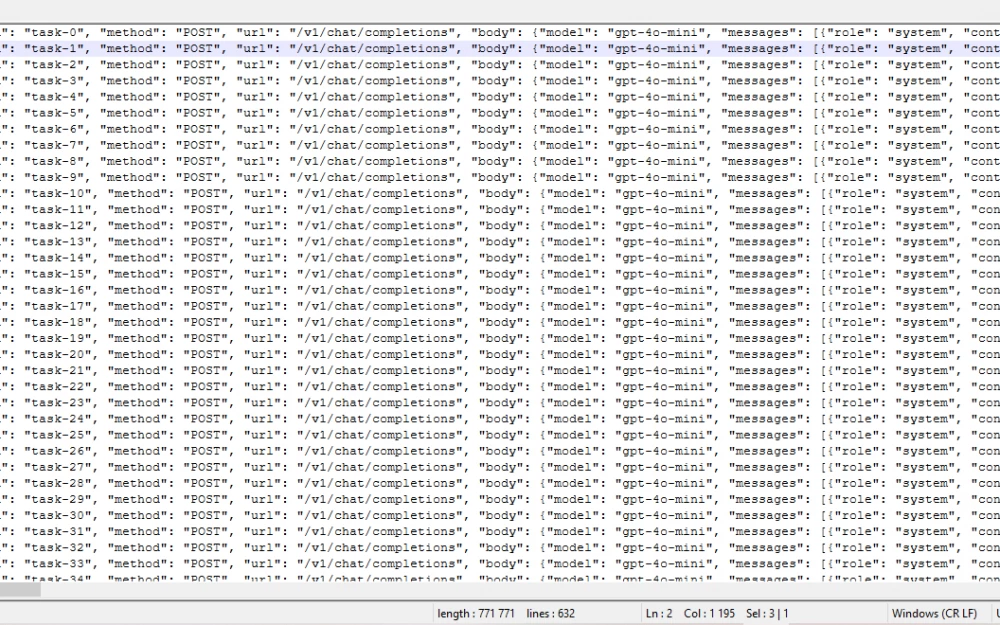
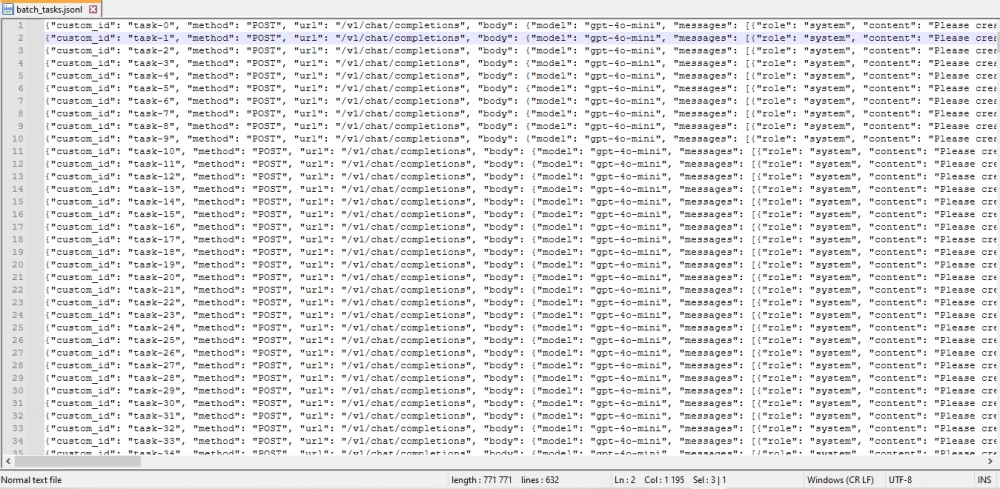
Each task is recorded in the tasks_path file on a separate line. Therefore, the file has the .jsonl (JSON Lines) extension.
It is necessary to monitor the volume of the resulting file, as there is a risk of exceeding the number of tokens in one package. As mentioned earlier, for first-level accounts and the gpt-4o-mini version, the package should not exceed 200 thousand tokens. To monitor the limit, you can use a tokenizer. From experience, with a prompt of this length, up to 800 lines=JSON objects fit within the limit.
Sending the package and uploading results
Let's send the resulting file for processing.
from openai import OpenAI

def send_batch():
    client = OpenAI(
        api_key=api_key
    )

    batch_file = client.files.create(
        file=open(tasks_path, "rb"),
        purpose="batch"
    )
    batch_job = client.batches.create(
        input_file_id=batch_file.id,
        endpoint="/v1/chat/completions",
        completion_window="24h"
    )
    print(f"Created batch job with ID {batch_job.id}")

    with open(job_id_path, 'w') as f:
        f.write(batch_job.id)

    return batch_job.id
Here we upload the task file to our storage on the server, specifying the purpose="batch" parameter. The file is assigned a unique ID, which we then obtain and pass to the batch job creation function. The job will also receive its own ID, which we will save in a separate file just in case, and also return as the function's output parameter.
Let's try to get the result:
def try_get_results():
    client = OpenAI(
        api_key=api_key
    )

    with open(job_id_path, 'r') as f:
        batch_job_id = f.read().strip()

    batch_job = client.batches.retrieve(batch_job_id)
    print(f"Batch job status: {batch_job.status}")
    if batch_job.status == 'completed':
        result = client.files.content(batch_job.output_file_id).content
        with open(results_path, 'wb') as file:
            file.write(result)
        print(f"Results saved to file {results_path}")
    else:
        print(batch_job)
By restoring the job ID, we get its status using the retrieve() function. In case of success, we save the result to the results_path file.
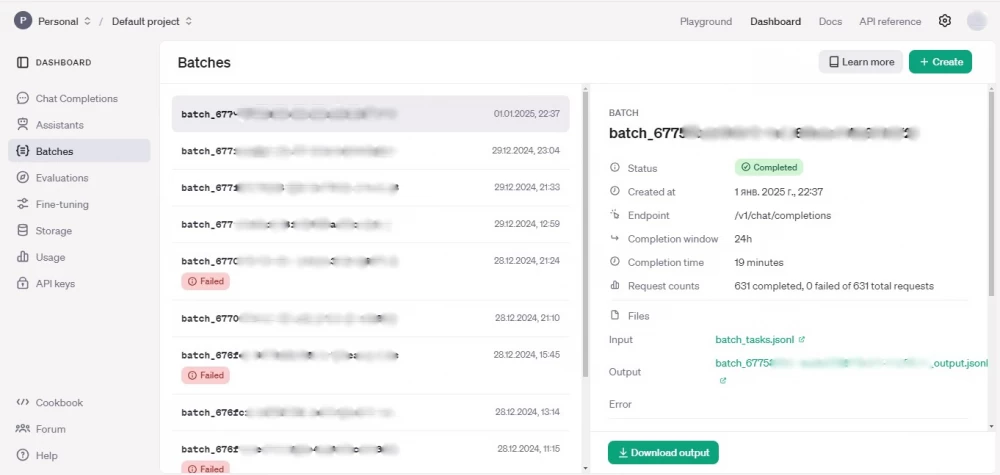
The same can be done using the web interface, where it is convenient to track issues with batches.
Processing the received results
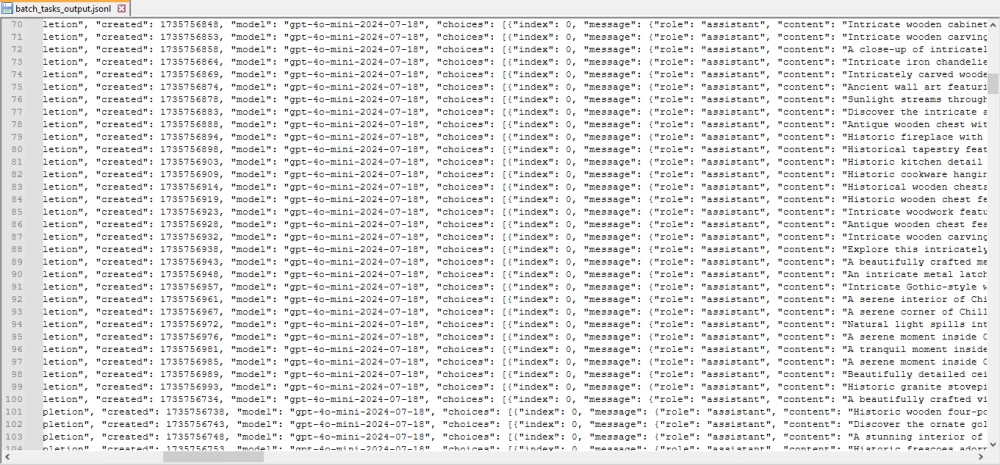
The result we got in the same JSON Lines format.
The answer to each task is recorded as a JSON object:
{
  "id": "batch_req_6771…",
  "custom_id": "task-0",
  "response": {
    "status_code": 200,
    "request_id": "b247…",
    "body": {
      "id": "chatcmpl-Ajt…",
      "object": "chat.completion",
      "created": 1735500227,
      "model": "gpt-4o-mini-2024-07-18",
      "choices": [
        {
          "index": 0,
          "message": {
            "role": "assistant",
            "content": "Elegant interior showcasing intricate metalwork and lush green drapery. Ideal for modern design enthusiasts. Explore the charm of Ruskeala, Russia through this stylish setting.\n\nRussia, Ruskeala, interior, design, elegance, green, drapery, metalwork, decoration, style, modern, seating, artistic, ambiance, wood, vintage, upholstery, tranquility, cozy, decor, booth, pattern, texture, illumination, hospitality, creativity, aesthetic, luxurious, charming, refinement, sophistication, boutique, comfort, travel, cultural, picturesque, artisan, heritage, classic, unique, rustic, classy, inviting, traditional, fashionable, ornate.",
            "refusal": null
          },
          "logprobs": null,
          "finish_reason": "stop"
        }
      ],
      "usage": {
        "prompt_tokens": 1331,
        "completion_tokens": 131,
        "total_tokens": 1462,
        "prompt_tokens_details": {
          "cached_tokens": 0,
          "audio_tokens": 0
        },
        "completion_tokens_details": {
          "reasoning_tokens": 0,
          "audio_tokens": 0,
          "accepted_prediction_tokens": 0,
          "rejected prediction tokens": 0
        }
      },
      "system_fingerprint": "fp_d…"
    }
  },
  "error": null
}
As we can see, for the task task-0 and the given keywords "Russia, Ruskeala" the neural network generated a description of 177 characters and exactly 50 keywords, including the given ones. Now all this needs to be entered into the metadata.
Let's create a function to read a JSON Lines file into a list:
def load_jsonl(filepath):
    with open(filepath, 'r', encoding='utf-8') as file:
        return [json.loads(line) for line in file]
Let's read two files at once - tasks and results:
def load_batch_output(tasks_file, outputs_file):
    global batch_output_map

    tasks_data = load_jsonl(tasks_file)
    outputs_data = load_jsonl(outputs_file)

    batch_output_map = {}

    tasks_index = {task['custom_id']: task for task in tasks_data}

    for output in outputs_data:
        custom_id = output.get('custom_id')
        if custom_id in tasks_index:
            task = tasks_index[custom_id]
            try:
                image_url = task['body']['messages'][1]['content'][0]['image_url']['url']
                image_url = image_url.replace(your_site, '', 1)
                content = output['response']['body']['choices'][0]['message']['content']
                batch_output_map[image_url] = content
            except (IndexError, KeyError, TypeError) as e:
                print(f'Ошибка обработки задачи {custom_id}: {e}')
Since the response to the batch task does not specify the URLs of the photos to which these responses relate, we had to read two files at once - the original and the one received from the API. By linking them by custom_id, we created a hash table batch_output_map, in which the neural network response is stored for each URL.
In my case, the script works locally, so the domain needs to be excluded from the URL.
The function for writing results to metadata is similar to the function for generating tasks. In the same way, we go through the photos folder using os.walk().
def process_directory(root_path):
    global batch_output_map

    if not batch_output_map:
        print("First, load the batch processing results!")
        return

    for root, dirs, files in os.walk(root_path):
        path_parts = root.split(os.sep)
        # If we have three directory levels and we are in the last one
        if len(path_parts) >= 3 and (path_parts[-1] == 'editorial' or path_parts[-1] == 'commercial'):
            country = path_parts[-3]  # third from the end element in the list
            city = path_parts[-2]  # penultimate element in the list
            category = path_parts[-1]  # last element in the list

            print(f"Analyzing folder {root}")
            for file in files:
                if file.lower().endswith(valid_extensions):
                    relative_file_path = os.path.join(os.path.relpath(root, root_path), file)
                    relative_file_path = relative_file_path.replace(os.sep, '/')
                    relative_file_path = f"photo/{relative_file_path}"
                    relative_file_path = quote(relative_file_path)

                    if not relative_file_path in batch_output_map:
                        print(f"No metadata found for {relative_file_path}!!!")
                        continue

                    file_path = os.path.join(root, file)
                    year, month, day = extract_date_taken(file_path)

                    response = batch_output_map[relative_file_path].split("\n\n")
                    if len(response) < 2:
                        print("Less than 2 sections in the response!")
                    else:
                        default_title, tags = response[:2] # sometimes the neural network puts extra line breaks after the keyword list
                        add_metadata(file_path, default_title, category, make_tag_list(tags), month, day, year, country,
                                 city)
        else:
            print(f"{root} is neither commercial nor editorial, skipping it :-(")
For each image file, we look for the corresponding entry in the global variable batch_output_map, extract two paragraphs of text from it, split them using the split() function, and pass them to add_metadata() as the title and tag list.
The tags are comma-separated, as we requested. Usually, their list ends with a period, which we don't need, as well as spaces:
def make_tag_list(tags):
    if tags.endswith('.'):
        tags = tags[:-1]
    tags_list = tags.split(',')
    tags_list = [tag.strip() for tag in tags_list]
    return tags_list
Working with image metadata
There are three main metadata formats used in digital photography:
EXIF (Exchangeable Image File) – information embedded in the image by the camera: time and place of shooting, camera and lens model, shooting parameters (focal length, exposure, ISO),
as well as camera mileage, an indispensable metadata field for those who like to buy used photo equipment;IPTC (International Press Telecommunications Council) – information added to the file by specialized software. This format is designed for use by the media and includes information necessary for publishing a photo - title, description, location, photographer and copyright information, list of keywords;
XMP (Extensible Metadata Platform) – information about changes made to the image during post-processing, for example, in Lightroom.
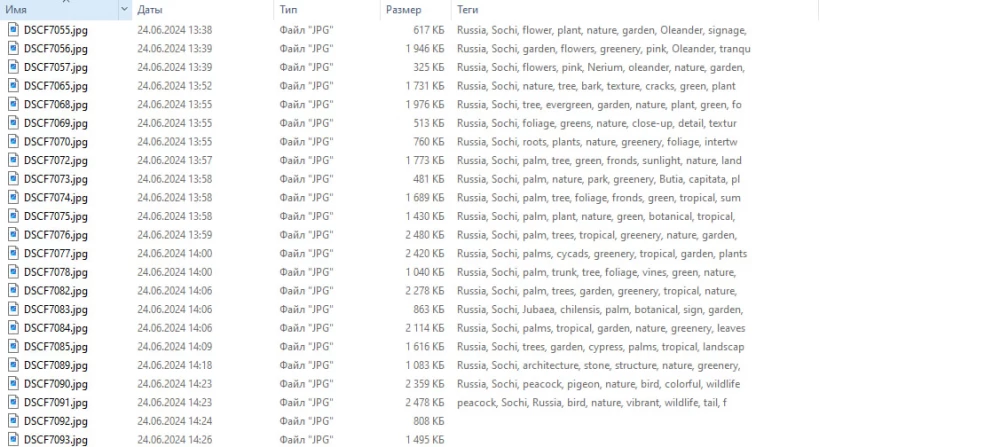
For editorial photos, we need shooting parameters – place and time. It would be necessary to read GPS coordinates from EXIF, but for now I will be content with reading the name of the country/city from the folder in which the file is located. As for the time, it is easy to get it from EXIF. Let's use the piexif library for this:
import piexif

def extract_date_taken(image_path):
    exif_dict = piexif.load(image_path)
    date_taken_str = exif_dict['Exif'].get(piexif.ExifIFD.DateTimeOriginal)

    if date_taken_str:
        try:
            # string parse time
            date_taken = datetime.strptime(date_taken_str.decode('utf-8'), '%Y:%m:%d %H:%M:%S')
            return date_taken.year, date_taken.month, date_taken.day
        except ValueError:
            return None, None, None
    return None, None, None
To add metadata, I first tried using the same piexif library.
exif_dict["0th"][piexif.ImageIFD.ImageDescription] = title
exif_dict["0th"][piexif.ImageIFD.XPKeywords] = (','.join(combined_tags)).encode('utf-16')
exif_bytes = piexif.dump(exif_dict)
piexif.insert(exif_bytes, image_path)
However, it turned out that Shutterstock does not see the text written in exif_dict["0th"][piexif.ImageIFD.ImageDescription]. Replacing it with exif_dict["0th"][piexif.ImageIFD.XPSubject] did not help. At the same time, the tags written in piexif.ImageIFD.XPKeywords were displayed perfectly.
Then the heavy artillery came into play – the IPTC standard, for which you can use ExifTool.
Let's install ExifTool using the OS tools and run it from our script using the subprocess library:
def add_metadata(image_path: str, title, category, tags, month, day, year, country, city):
    if category == "editorial" and country and city and day and month and year:
        title = f"{city}, {country} - {month}.{day}.{year}: " + title

    try:
        commands = [
            'C:\Program Files\exiftool\exiftool.exe',
            '-overwrite_original',
            f'-Headline={title}',
            f'-Keywords={",".join(tags)}'
            image_path
        ]

        subprocess.run(commands, check=True)

    except subprocess.CalledProcessError as e:
        print(f"Error executing ExifTool for file {image_path}: {e}")
    except Exception as e:
        print(f"Unexpected error processing file {image_path}: {e}")
If we are dealing with an editorial file, we immediately bring its title in line with the format adopted on Shutterstock. Then we prepare the command to overwrite the image title. Through trial and error, I found that the -Headline parameter is suitable for stocks. The existing ExifTool parameters -Title and -ImageDescription are not recognized by stocks.
But, as often happens, when you fix one thing, another breaks. Tags that were perfectly recorded using piexif did not pass the ExifTool test:
I had to add tags one by one:
       commands = [
            'C:\Program Files\exiftool\exiftool.exe',
            '-overwrite_original'
            f'-Headline={title}'
        ]
        if tags:
            for tag in tags:
                commands.append(f'-Keywords={tag}')

        commands.append(image_path)
Now it remains to run the script and enjoy the process of adding metadata.
Adding command line arguments
Our script has several functions, but you always need to run only one of them. Of course, you can comment out the call of the unnecessary ones before each call, but this is too long. Let's add command line arguments, which is especially convenient if the script runs on a VPS.
import argparse

if __name__ == '__main__':
    choices = {
        'generate_tasks': generate_tasks,
        'send_batch': send_batch,
        'try_get_results': try_get_results,
        'process_output': process_output
    }
    parser = argparse.ArgumentParser(description="Step processing.")
    parser.add_argument('-s', '--step', choices=choices.keys(),
                        required=True, help="Select a step for processing")

    args = parser.parse_args()

    step_function = choices.get(args.step)
    if step_function:
        step_function()
    else:
        print(f"Unknown step. Enter one of the values {', '.join(choices.keys())}")
Here we created a command line parameter -s (--step) with values named after our functions. However, two functions are responsible for output processing, so we will create a wrapper for them:
def process_output():
    load_batch_output(tasks_path, results_path)
    process_directory(photo_dir)
Now you can run the script using intuitively understandable values of the -s argument:
main.py -s generate_tasks
main.py -s process_output
…
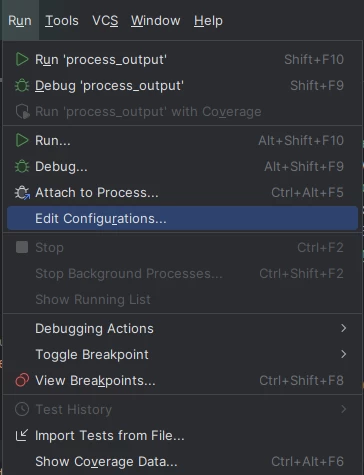
What if we are working locally from an IDE? In PyCharm, the configuration settings will help us.
Go to the menu Run -> Edit Configurations…, click on the “+” sign, specify the path to the main.py script and parameters: -s generate_tasks. Repeat for the other values from the choices list.
Now you can run any configuration with a mouse click.
Further work
This script was enough for me to process my photo archive of several thousand photos, which gradually began to move to stocks. During the work on the article, the first sale of an image for the traditional Shutterstock 10 cents has already even dropped 😊
The full script code is on GitHub.
What should be improved in the script?
Tokenizer and splitting large task packages into smaller ones to fit within the limit.
Reading GPS from EXIF and automatically determining the locality where the photo was taken.
Classifying photos into commercial and editorial using neural networks.
Automatic photo resizing and uploading reduced copies to hosting.






Write comment