- Hardware
- A
Restoring a Damaged Linux via chroot
Have you ever had to open up a Linux machine that wouldn't boot, even after ensuring the BIOS settings were correct and confirming there were no serious hardware errors in the system?
If so, you absolutely need to learn about chroot. It’ll become your real lifesaver.
For instance, a couple of weeks ago I managed to restore a Nanopore GridION device using this method, after the official reinstall method via an .iso image didn’t help me at all. So, I decided to document the steps I took.
I only figured out this method after Linux had been my workhorse for over ten years (thanks, Matt!). That’s why I’m pretty sure this method is really handy and definitely worth your attention. Hopefully, this post will help out anyone who’s been missing this kind of guide.
TLDR
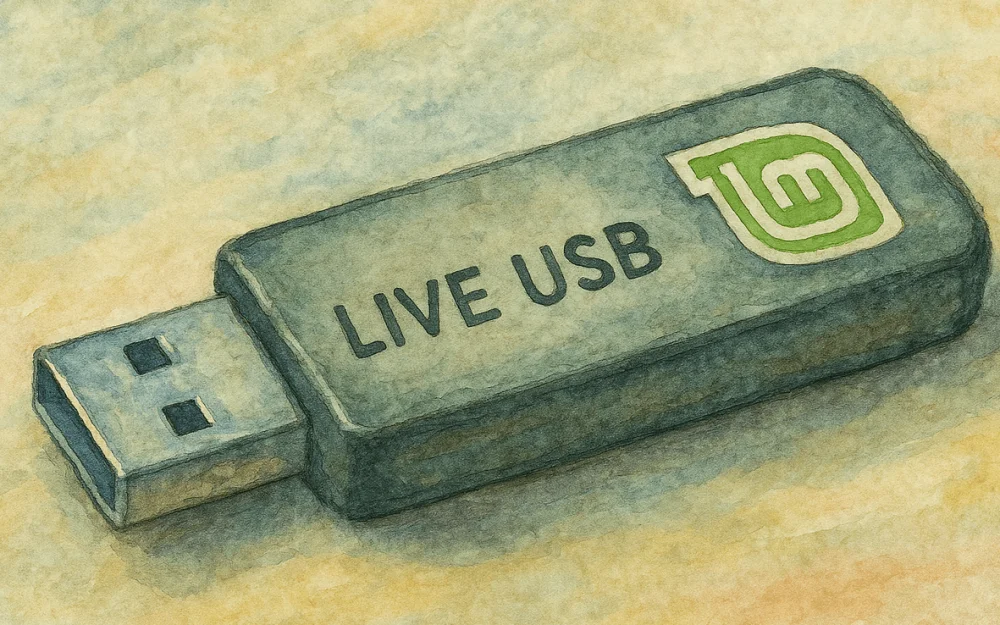
In short: if you can access the hard drive of a faulty Linux machine that’s either broken or won’t boot (for example, by using a live USB or connecting the failed disk to another working Linux machine), you’ll need to mount this disk in a special way. The goal is to trick Linux during the current session and make the machine believe that this is a hard drive with a fully working OS—even though that’s not actually the case.
To pull this off, you need to create a directory tree that’s based on:
A segment of the faulty hard disk, mounted on the host OS as the / directory.
A set of special system directories from the currently running, temporary OS (like your live USB or other Linux box). These aren’t regular directories from the disk; they only hold system info needed for the present Linux session. They include
/sys,/procand a few others, which we’ll discuss in detail below.
Here’s what comes next: apply the chroot command to this newly assembled directory structure. This allows you to substitute the current Linux file system in your session with a set of directories mainly from your old, non-working drive.
It’s like hooking a dead car up to an external power supply just so you can at least turn on the dashboard, check the mileage, pull up error codes, and run some diagnostics.
Either way, using this approach lets you run various commands that (if you’re lucky) can help fix or diagnose your system. These might include apt upgrade, dpkg-reconfigure for repairing broken packages on Debian-based distros, or other tools, depending on your setup.
Procedure
It would be good to set up the entire workflow in one place, allowing you to organize the directory structure you’ve created and perform chroot — so that everything can be easily found when needed. Ideally, even print a small cheat sheet with all these commands or save them in a text file on your "rescue USB stick" or something like that.
Below is a step-by-step breakdown of the entire process:
Load the operating system you selected as a replacement (for this, we’ll need a bootable USB stick or another computer to which we’ve connected the faulty hard drive as an external drive).
Determine which partition of the hard drive with the damaged system contains the root file system and which contains the /boot directory.
For this, I usually use
gparted. This tool is available on most bootable disks based on Ubuntu/Linux Mint.You can also use command-line tools, for example,
sudo fdisk -lI usually try to mount each of the damaged system's partitions in the file navigator (they are usually displayed in Thunar on Linux Mint XFCE as ready-to-mount drives) to be sure that I’ve selected the correct partition.
If that doesn’t work, you’ll have to guess a bit based on the size and file system type — to find out if these partitions are already available in
/etc/fstab, etc.In this example, we’ll assume that the root directory is in the partition
/dev/nvme0n1p5… and that the boot partition /boot is in:
/dev/nvme0n1p3(That’s how everything was arranged on the Nanopore GridION device, which I recently managed to repair in this way).
3. Somewhere in the file system of the working distribution you currently have, create a directory that will serve as the root, and within it, a /boot directory:
sudo mkdir /rescue
sudo mkdir /rescue/boot
4. Mount the main and boot partitions of the damaged system to these directories, for example:
sudo mount /dev/nvme0n1p5 /rescue
sudo mount /dev/nvme0n1p3 /rescue/boot
5. Then, mount the necessary special directories from the system that is currently working to the appropriate points of the new file structure (the mount command looks like mount -t )
sudo mount -t proc proc /rescue/proc
sudo mount -t sysfs sys /rescue/sys
sudo mount -o bind /dev /rescue/dev
sudo mount -t devpts pts /rescue/dev/pts
6. Now we are ready to perform chroot, i.e., "change the root directory", transferring it to this newly created directory structure:
chroot /rescue /bin/bash -i7. That’s it!
Now you can explore the file system and try to figure out why the damaged device wasn’t working. You can use any file management commands that you think will help fix the failed system.
In my case, with the broken GridION device, I was able to find non-working symbolic links and empty initrd.img-* files in the /boot directory. It looked like the Linux kernel update had suddenly been interrupted by an overlapping process — for example, due to the update of some package or something like that.
In this case, the problem was fixed by running sudo apt update && sudo apt upgrade. The system complained about corrupted packages and suggested trying sudo dpkg-reconfigure, after which everything was finally resolved.

![From Virtual Hands to AI for Survivalists: Curious Open Agent OSes [and One Hardware Project]](https://cdn.tekkix.com/imgs/2026/05/habrcom/big/ce0b1057616faed51cd8b9f3b2b9.webp)

Write comment