
- AI
- A
Here is the English translation with the requested formatting: Flutter + Cursor: setting up background agent
If you prefer to use Jules, please check out this article.
Brief history — recently, Cursor added the ability to launch AI Agents, which allow you to work on tasks in the background, in exactly the same environment as on your own computer.
Since the agent runs in an Ubuntu container, it's best to set it up in advance.
Let's start:
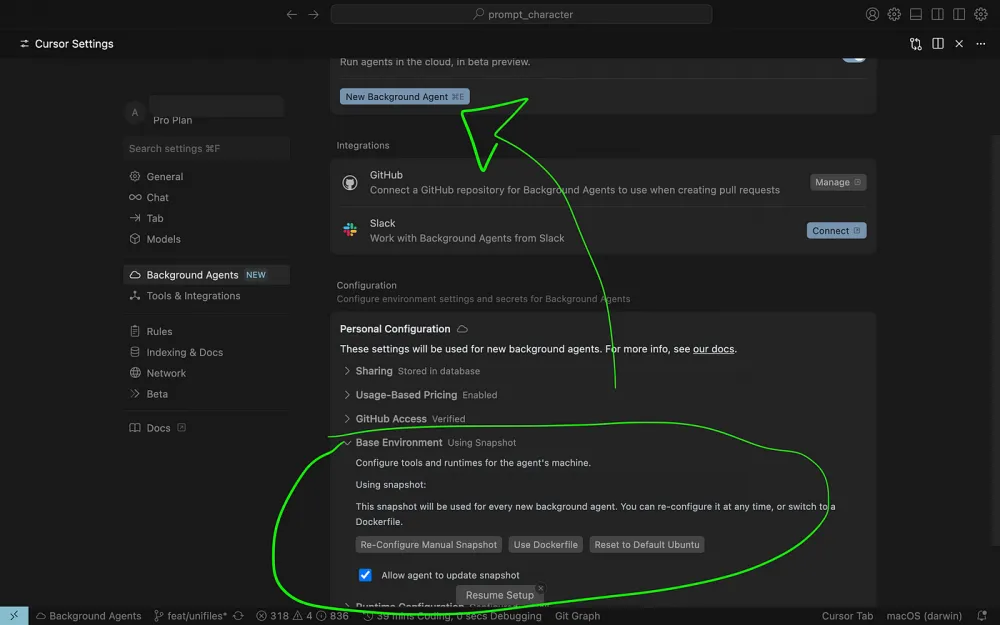
Open Cursor Settings (the panel might be in different places, depending on how the interface is configured, so you can use Command+Shift+P to open the command panel and type “cursor settings”).
2. Open the Background Agents panel on the left
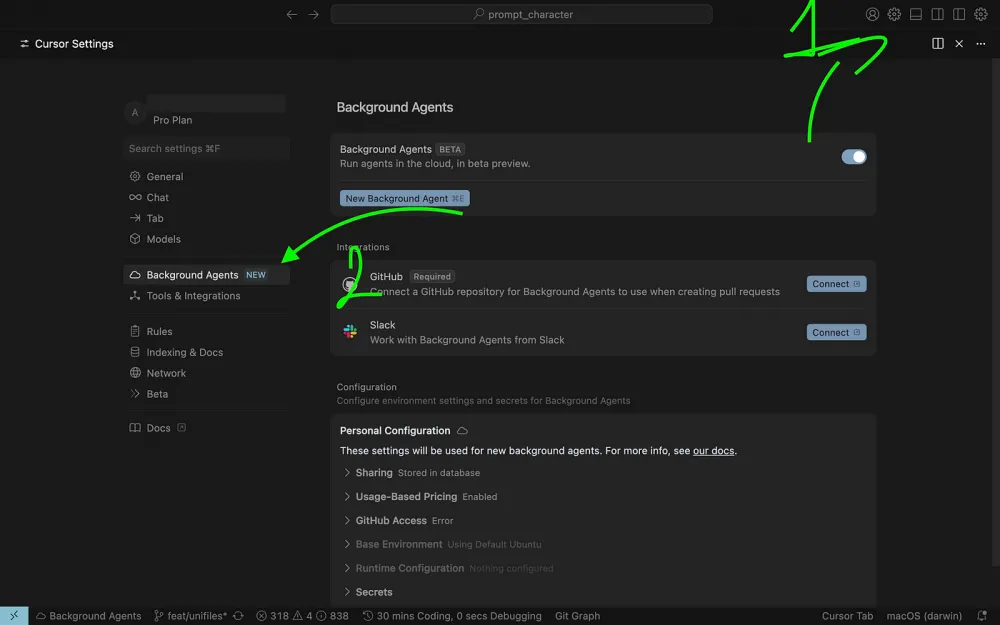
3. The next step is to grant Cursor access to GitHub for a specific repository. Click Go To GitHub to allow access.

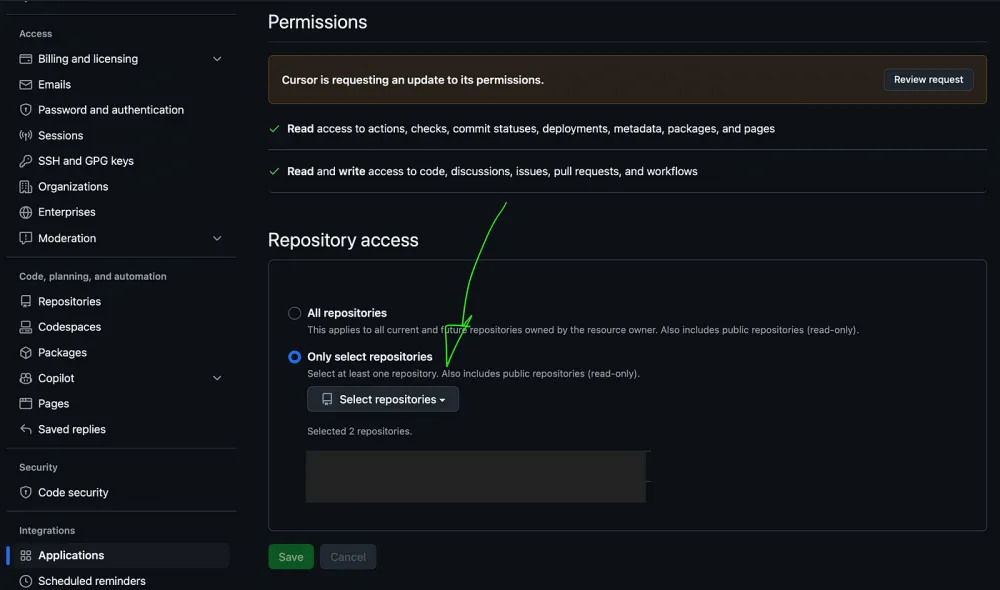
4. Select the repository you want to grant access to. Note (!): for public organizational repositories, you’ll need to fork the repo before selecting it.
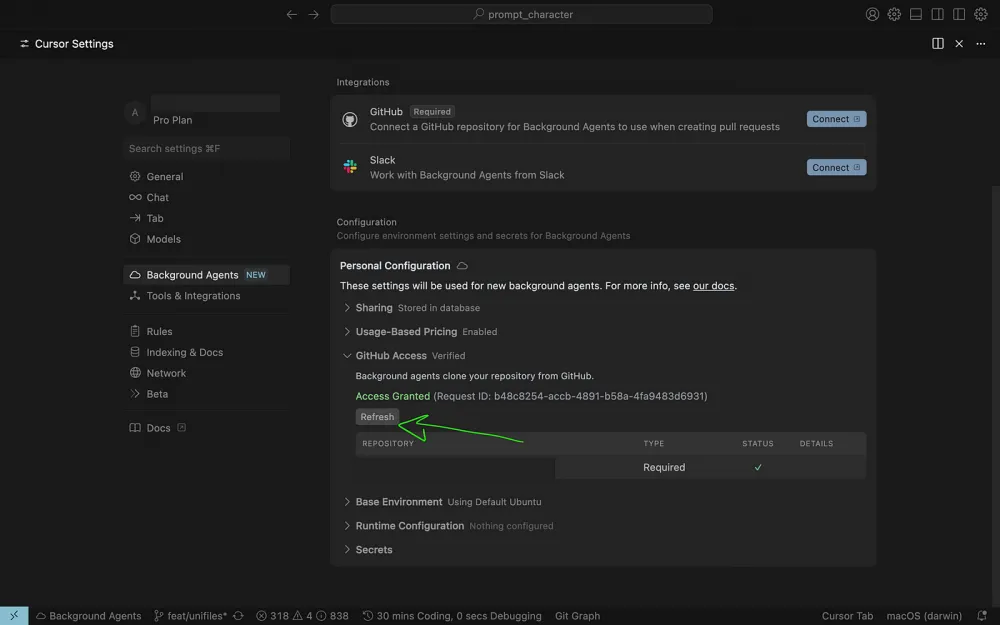
5. After granting access, click refresh and make sure you see Access Granted.
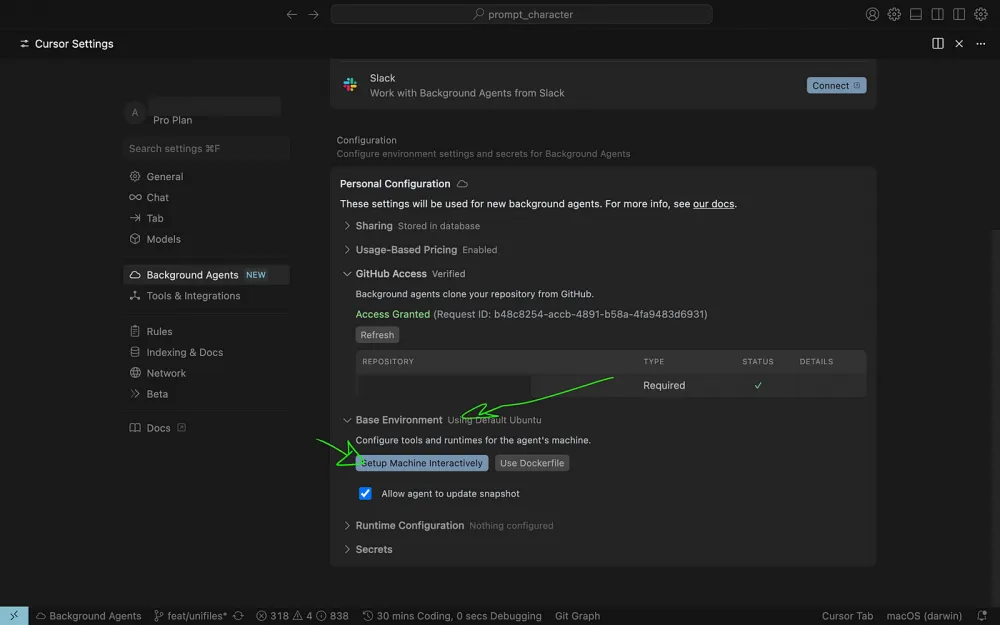
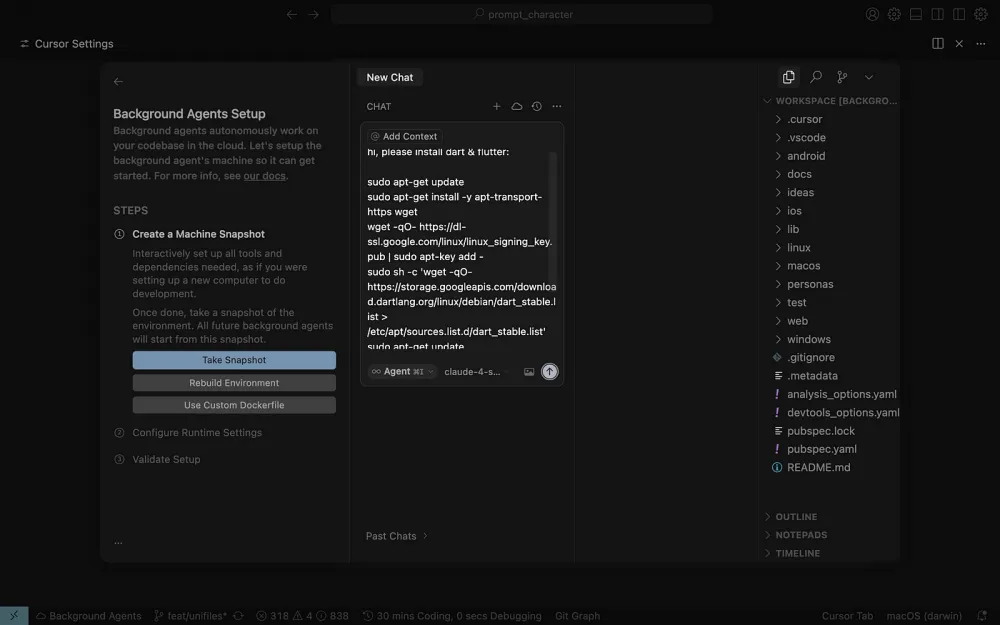
6. Click Base Environment and then Setup machine interactively.
7. Wait until you see the chat interface

8. Give the Agent commands to install dependencies.
Make sure to use Agent mode, so the Agent can independently fix dependencies and problems.
You can use a prompt like this:
Hi. Please install Flutter & Dart.

Use the command below:

# Install Dart SDK (using apt, official Google repo)
sudo apt-get update
sudo apt-get install -y apt-transport-https wget
wget -qO- https://dl-ssl.google.com/linux/linux_signing_key.pub | sudo gpg --dearmor -o /etc/apt/keyrings/dart.gpg
echo "deb [signed-by=/etc/apt/keyrings/dart.gpg] https://storage.googleapis.com/download.dartlang.org/linux/debian stable main" | sudo tee /etc/apt/sources.list.d/dart_stable.list
sudo apt-get update
sudo apt-get install -y dart
# Add Dart to PATH
export PATH="$PATH:/usr/lib/dart/bin"
# Clone Flutter
cd /opt && sudo git clone https://github.com/flutter/flutter.git -b stable
sudo chown -R $USER:$USER /opt/flutter
export PATH="$PATH:/opt/flutter/bin" && cd /workspace
flutter pub get
9. After the Agent finishes, click Take Snapshot
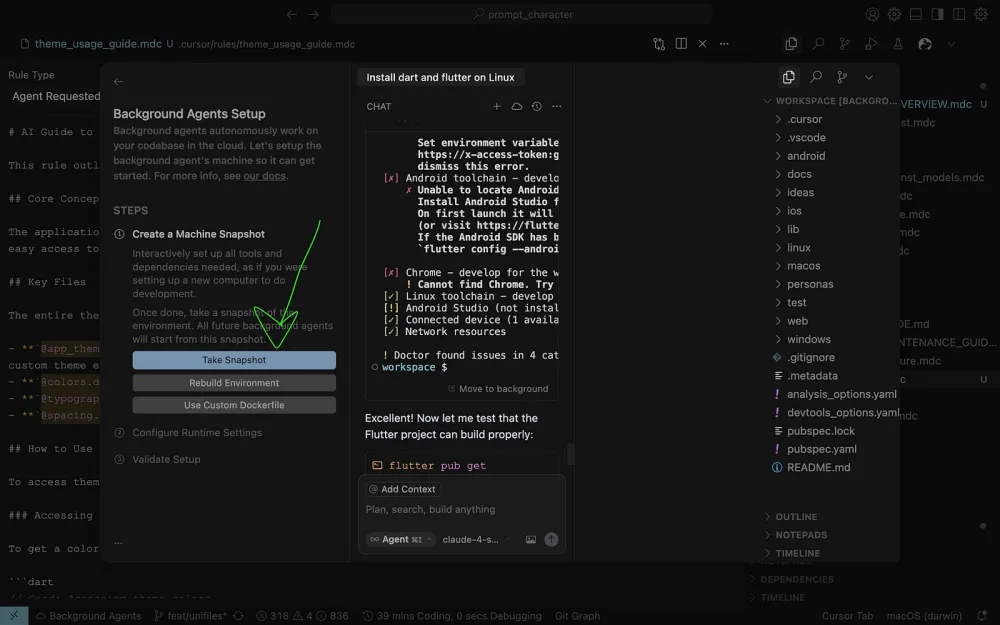
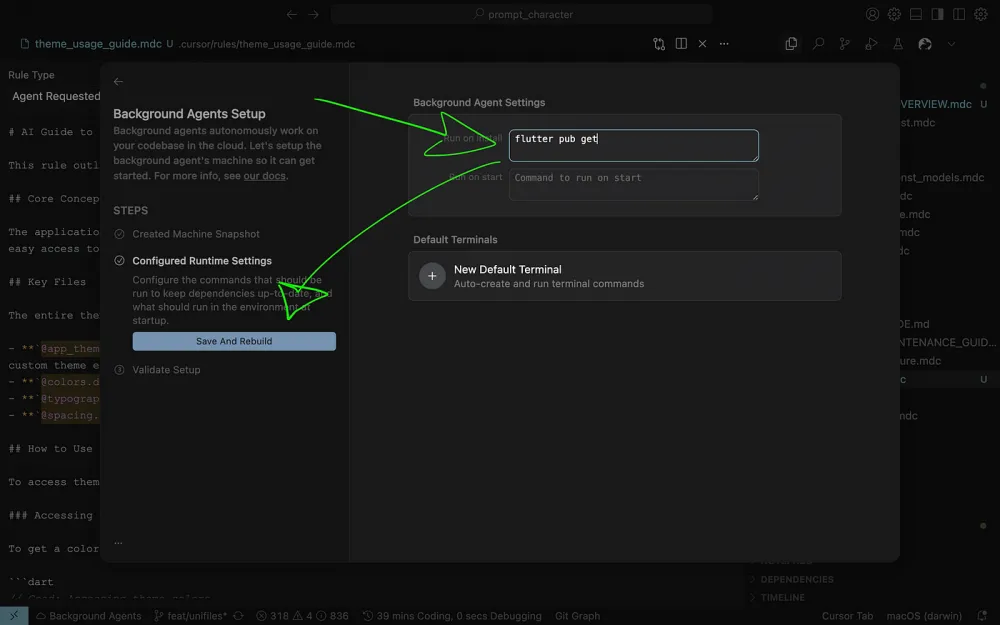
10. Add the flutter pub get command, or any other that initializes the project and fetches all dependencies.
11. After that, check if setup is needed, and click everything works
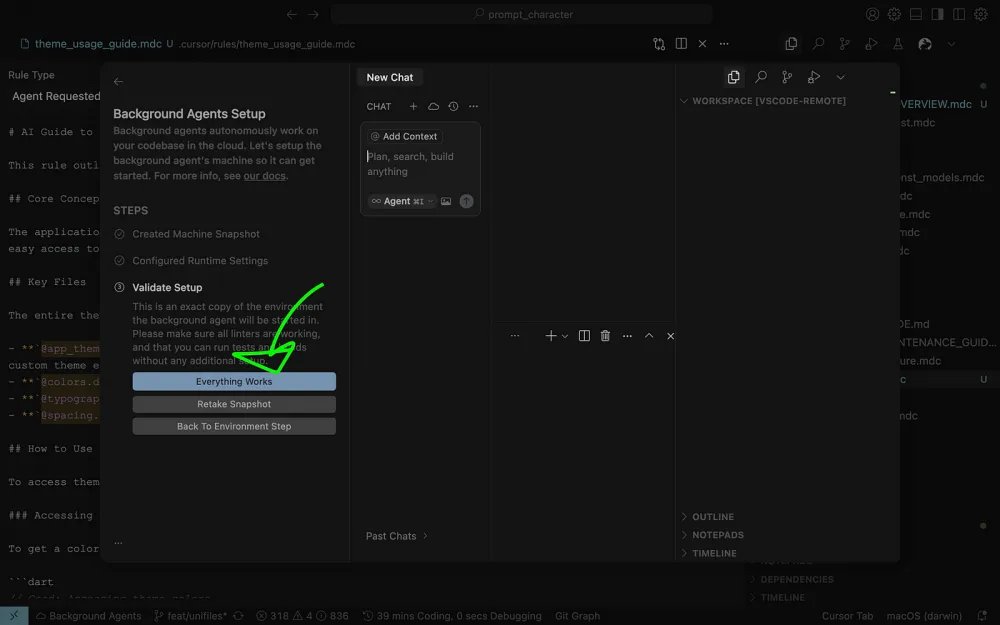
12. That's it! Now you can use the background agent from any part of the UI interface (settings, tabs, the cursor website, PWA app, etc.).
Hope this concept proves useful :-)
Please share your thoughts in the comments :-) it will help make this article visible to others and will be great support and motivation :-)
Thank you for your time and have a great day!


Write comment