- AI
- A
How to implement CTRL + Z at the project level?
As the use of AI agents and vibe coding expands, the question arises more frequently: how to add new functionality without breaking what already works?
The answer to this question was devised long before the emergence of AI agents because humans can sometimes mess things up worse than any AI agent.
To be able to roll back, one must understand where to roll back to, to what state of the code. Ideally, there should be a convenient state control system or a version control system for the code.
From the most basic "save → roll back," we have gradually evolved to advanced version control tools. Globally, version control systems can be divided into three types:
Local version control system. The simplest and most basic level. We automatically save file versions and keep the history locally.
Centralized version control system. There is a single point of truth - a server where all changes are sent. Developers have a working copy stored locally, while the entire history of changes resides on the server. Without connecting to the server, full interaction with the history is impossible.
Distributed version control system. The main principle is decentralization. Each developer has all the data; the entire history, all versions are stored everywhere and at once. There is no single point of failure. Local manipulations can be conducted, and one can roll back to the desired state at any moment in time.
Currently, the distribution of usage is approximately 0 / 5 / 95 %, where almost no one uses local systems, centralized ones exist only partially due to enterprise needs, and distributed version control systems occupy the majority, with Git being the most popular system.
This article will focus solely on it.
So, Git. Where to start? First, you need to install Git locally on your OS. Then, navigate to your project folder and create an empty repository. This is done using the command git init.
A repository is a storage for history, changes, and a list of files and directories.
After initializing an empty repository, we need to create a file in the root of the project called .gitignore and fill it with the data and patterns that we do not want to see in the repository. The most typical examples are passwords and secrets stored in .env files, as well as all immutable objects, such as external libraries and dependencies; additionally, you can include your local configs and environment settings in the ignore list.
The simplest way to understand what should be added to .gitignore is to imagine that you have a colleague who is working with you on the project. What data does he not need access to?
After filling out the .gitignore, you need to add all existing files to the git index.
The index in git is a staging area where files that need to be tracked for changes are stored, and only for files in the index should the state be saved.
You can add all files in the project using the command git add --all. Thus, all files that were not in .gitignore will be added to the index.
After that, we can commit the state of the files. The state is recorded using a commit. A commit can be thought of as a checkpoint to which you can always revert if something goes wrong. You can commit all changes in the index at once or only for selected files if you are not ready to commit the state for some of them.
Before the first commit after installing git, you need to enter your contact information. Since each commit is a change made by a specific author. The data is recorded using:
git config --global user.email "[email protected]" git config --global user.name "Your Name"
Now we can make our first commit! git commit -m "My first commit"
After the -m flag, you provide a message describing what exactly was done in the current change in relation to the previous state.
After the commit, several very useful features become immediately available. For example, at any moment, you can see which files have changed, which files have been deleted or added since the last commit. This can be done with the command git status. Additionally, you can now revert to previous states and even compare them with each other.
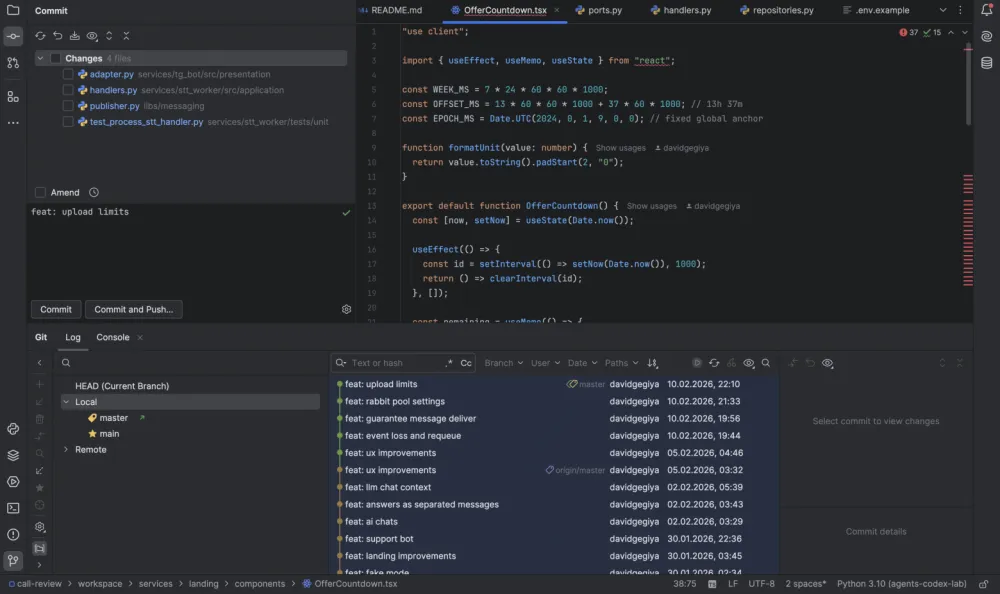
Each commit has a unique hash – a sequence of characters. To find out the hash of the commit you need, you can view the history – git log, which will display a list of commits along with the date and time they were added, as well as the message you wrote during the commit after the -m flag.
To revert to the previous commit, you can use either git checkout or git reset . In place of COMMIT_HASH, you can insert the hash of the desired commit. You just need to be extremely careful when running these commands, as under certain parameters, they can forcibly reset the state of your project, removing files that were not present at the time of the last state.
It is best to refer to the official documentation for git. There you can learn more about branching, remote repositories, merge procedures, etc.
For remote history storage, services like Github, Gitlab, or similar are usually used. But this is a topic for a separate article.
If you feel that constant manual management of indexing and commits will take too much time, you can breathe easy.
Firstly, all modern IDEs typically used for development have built-in UI for working with git. Thanks to this, remembering complex commands turns into a simple sequence of actions that need to be performed with each state save.
Secondly, you can always delegate state management in git to an AI agent by giving it the appropriate instruction – to save the state in git after every significant change. However, I still recommend reviewing changes manually before each commit, as well as ensuring that nothing from the old functionality is broken.
In response to the question from the beginning of the article – the best thing you can do to avoid breaking your working project with another prompt is to master version control systems. By spending half an hour now, you can save dozens of hours in the future.


Write comment